


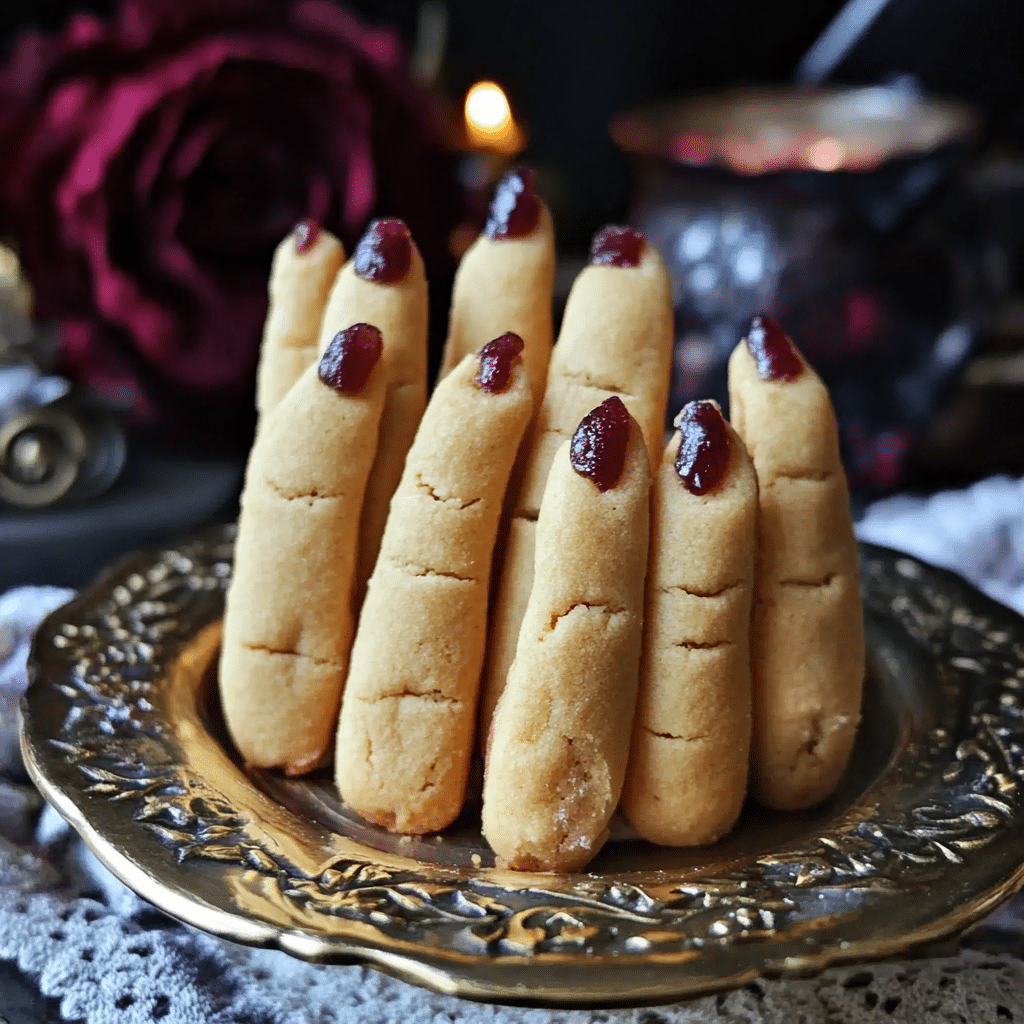
A Ghastly Delight for Halloween! 🧙♀️ Prepare to spook your guests with these devilishly delightful Spooky Witch Finger Cookies! With their eerie shape and buttery taste, they are the ultimate Halloween treat. These creepy yet delicious cookies are sure to enchant everyone at your Halloween gathering. Whether you’re hosting a spooky party or just want to indulge in some festive fun, these cookies are guaranteed to impress. Want more haunting recipes like this? Subscribe to get them delivered straight to your inbox!
Why You’ll Love This Recipe
These Spooky Witch Finger Cookies are the perfect mix of spooky and tasty, making them an absolute must-have for your Halloween celebration. The eerie finger-like shapes create a delightfully creepy effect, while the buttery, crunchy texture is sure to satisfy every sweet tooth. They’re incredibly easy to make and provide an opportunity for some family fun in the kitchen—your little ghouls will love helping to shape and decorate these “fingers”!
Ingredients
- 1 cup unsalted butter, softened
- 1 cup powdered sugar
- 1 large egg
- 1 teaspoon vanilla extract
- 1 teaspoon almond extract
- 2 2/3 cups all-purpose flour
- 1 teaspoon baking powder
- 1 teaspoon salt
- 1/2 cup whole blanched almonds (for the “nails”)
- Red food coloring (for the “blood”)
- Green food coloring (optional, for green witch fingers)
Necessary Tools
- Mixing bowls
- Electric mixer
- Whisk
- Parchment-lined baking sheet
- Wire rack
- Small brush (for applying food coloring)
Ingredient Swaps and Additions
- Almond extract: If you’re not a fan of almond, you can swap this for cinnamon for a warm, cozy twist.
- Chocolate chips: Use chocolate chips instead of almonds to create a different type of “nail.”
- Spiced up: Add a pinch of nutmeg or cinnamon to the dough for an extra layer of flavor.
- Pumpkin seeds: For those with nut allergies, use pumpkin seeds or simply omit the nails for safety.
Step-by-Step Instructions
- Preheat your oven to 325°F (163°C). Line your baking sheet with parchment paper to prevent sticking.
- Cream the butter and sugar: In a large mixing bowl, cream together the softened butter and powdered sugar until smooth. Add the egg, vanilla extract, and almond extract, and mix well until fully incorporated.
- Mix the dry ingredients: In a separate bowl, whisk together the flour, baking powder, and salt.
- Combine and color: Gradually add the dry ingredients to the butter mixture, mixing until a dough forms. If you want green witch fingers, divide the dough and knead green food coloring into one half until the color is evenly spread.
- Shape the fingers: Take about a tablespoon of dough and roll it into a 4-inch long finger shape. Press a blanched almond at one end to create the “nail,” and use a knife or your fingers to create knuckle lines along the length of the dough.
- Add the “blood”: Use a small brush to apply red food coloring around the almond, giving the effect of blood oozing from the nails.
- Bake: Place the fingers on the baking sheet and bake for 20-25 minutes, or until the edges are lightly golden.
- Cool and serve: Once baked, allow the cookies to cool on a wire rack before serving. This helps the cookies hold their eerie shape!
Serving Suggestions
Pair these Spooky Witch Finger Cookies with a glass of milk for a simple snack or serve alongside hot apple cider for a true autumnal treat. They also make a fantastic addition to any Halloween dessert table—try presenting them with some ghost-shaped cookies or candy apples for a complete spooky spread!
Pro Tips for Success
- Soft butter is key: Ensure your butter is properly softened to make the mixing process smoother and your dough easier to handle.
- Knead with flour: If the dough becomes sticky while shaping, dust your hands and surface with a little flour.
- Cool completely: Let the cookies cool fully before moving or serving to prevent them from losing their eerie shape.
Storing and Reheating
- Store leftovers: Keep any remaining cookies in an airtight container at room temperature for up to a week.
- Reheating: While these cookies are best fresh, you can reheat them in a low oven to restore their crunchy texture. Place them in a 300°F (150°C) oven for 5-10 minutes for a crispy revival!
FAQ Section
Can I make the dough ahead of time?
Yes! You can prepare the dough up to two days in advance. Store it in the refrigerator, wrapped in plastic wrap. Let it come to room temperature before shaping and baking.
What if I’m allergic to almonds?
No worries! Simply omit the almonds or replace them with pumpkin seeds or even small pieces of chocolate for a safe and delicious alternative.
Conclusion
These Spooky Witch Finger Cookies are sure to cast a sweet spell on your Halloween festivities! Not only are they fun to make and decorate, but they’re also a guaranteed hit with guests of all ages. The combination of spooky visuals and delicious flavor will have everyone coming back for more. Don’t forget to share your creepy creations with us—tag us on Instagram or Pinterest to show off your haunted Halloween treats!
Nutritional Information (per cookie)
- Calories: 120
- Total Fat: 7g
- Sugar: 5g
- Protein: 1g
Happy haunting, and enjoy your spooky baking! 🧙♀️🎃
Leave a Reply