


No-Bake Homemade Crunch Bars are the kind of treat that checks every box. They are fast to make, deeply satisfying, and require absolutely no oven time. With layers of chocolate, peanut butter, oats, and crispy rice cereal, these bars deliver the perfect mix of chewy, crunchy, sweet, and slightly salty in every bite. When you need a dependable dessert or snack that comes together quickly, No-Bake Homemade Crunch Bars never disappoint.
What makes No-Bake Homemade Crunch Bars especially appealing is their simplicity. You do not need special tools, advanced skills, or hours of prep. Everything comes together on the stovetop and in one bowl, making cleanup easy and stress-free. Whether you are making a last-minute dessert, a lunchbox treat, or a shareable snack for gatherings, these bars fit the moment perfectly.
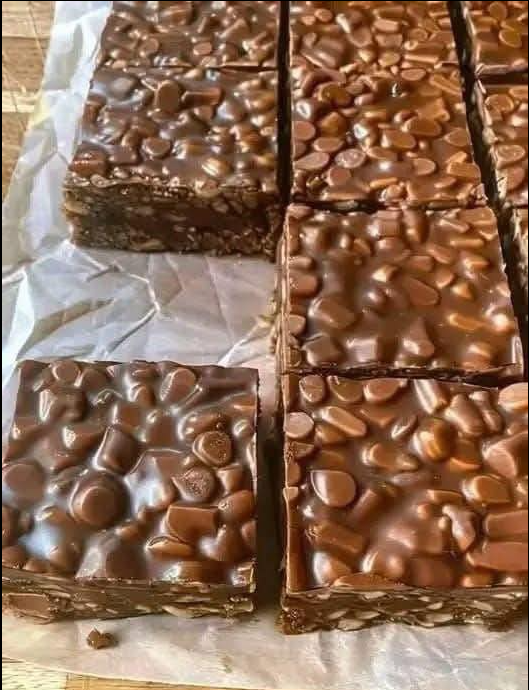
I first made No-Bake Homemade Crunch Bars during a busy week when turning on the oven felt like too much work. I wanted something sweet but homemade, and these bars came together in minutes. After chilling, they sliced beautifully into glossy, chocolate-topped squares with a satisfying crunch. They disappeared quickly, and since then, they have become a regular treat that everyone asks for again.
Why No-Bake Homemade Crunch Bars Always Work
No Oven, No Stress
No-Bake Homemade Crunch Bars eliminate the need for baking entirely. This makes them ideal for warm days, busy schedules, or anyone who prefers simple recipes.
Because there is no baking involved, the texture stays chewy and rich instead of dry or crumbly.
Balanced Texture in Every Bite
These bars combine soft and crunchy elements seamlessly. The peanut butter and honey create a smooth base, while the cereal and nuts add crunch.
Chocolate on top brings everything together with a rich finish that sets firmly once chilled.
Ingredients That Make No-Bake Homemade Crunch Bars So Good
Peanut Butter and Honey as the Base
Peanut butter provides richness, structure, and flavor. It binds the dry ingredients together while keeping the bars soft.
Honey or maple syrup adds sweetness and helps the bars firm up when chilled, giving No-Bake Homemade Crunch Bars their sliceable texture.
Crispy Rice Cereal and Oats
Crispy rice cereal brings light crunch without heaviness. Rolled oats add chewiness and make the bars more filling.
Together, they create the signature texture that makes No-Bake Homemade Crunch Bars so addictive.
Chocolate Chips and Optional Nuts
Chocolate chips melt slightly into the mixture and firm up beautifully when chilled.
Chopped nuts are optional but add extra crunch and depth of flavor.
How to Prepare No-Bake Homemade Crunch Bars
Lining the Pan Properly
Line an 8×8-inch pan with parchment paper, leaving overhang on the sides. This makes removal clean and effortless.
This step ensures your No-Bake Homemade Crunch Bars come out in one solid slab.
Making the Binding Mixture
Gently warm peanut butter and honey over low heat, stirring constantly. The goal is a smooth, pourable mixture, not boiling.
Once combined, remove from heat and stir in vanilla and salt to balance the sweetness.
Mixing Everything Together
Pour the warm mixture over the cereal, oats, chocolate chips, and nuts. Stir thoroughly so every piece is coated.
This step ensures consistent texture and flavor throughout the bars.
Pressing and Chilling for Perfect Bars
Pressing Firmly Matters
Transfer the mixture to the prepared pan and press it down firmly. Use a spatula or clean hands.
Firm pressing helps the bars hold together when sliced.
Chilling for Structure
Refrigerate the pan for at least one to two hours. This allows the bars to fully set.
Once chilled, No-Bake Homemade Crunch Bars slice cleanly and hold their shape.
Ingredients
Equipment
Method
- Line an 8×8-inch pan with parchment paper.
- Warm peanut butter and honey over low heat until smooth.
- Stir in vanilla and salt, then remove from heat.
- Mix cereal, oats, chocolate chips, and nuts in a bowl.
- Pour warm mixture over dry ingredients and stir well.
- Press mixture firmly into pan and refrigerate until set.
Nutrition
Notes
Tried this recipe?
Let us know how it was!Easy Variations for No-Bake Homemade Crunch Bars
Chocolate Lover Version
Use dark chocolate chips or add a melted chocolate layer on top for extra richness.
This creates a glossy, candy-bar-style finish.
Nut-Free Option
Replace peanut butter with sunflower seed butter and skip the nuts.
This makes No-Bake Homemade Crunch Bars school-friendly.
Extra Chewy Version
Increase the oats slightly and reduce cereal for a denser texture.
This variation feels more like an energy bar.
Serving No-Bake Homemade Crunch Bars
Perfect for Snacking
These bars are ideal for quick snacks, lunchboxes, or afternoon treats.
They travel well and stay firm when chilled.
Great for Sharing
Slice into squares or rectangles and serve on a platter.
No-Bake Homemade Crunch Bars look impressive despite minimal effort.
Storage Tips
Refrigeration
Store bars in an airtight container in the refrigerator for up to one week.
Chilling keeps them firm and fresh.
Freezing
Freeze individually wrapped bars for longer storage. Thaw slightly before eating.
Frequently Asked Questions
Do these bars need to stay refrigerated?
They hold best when chilled but can sit out briefly.
Can I use maple syrup instead of honey?
Yes, both work well.
Why are my bars crumbly?
They may not have been pressed firmly enough.
Can I add dried fruit?
Yes, chopped dried fruit works well.
Do these melt easily?
They stay firm when cool but soften at warm temperatures.
Conclusion
No-Bake Homemade Crunch Bars are proof that simple ingredients and minimal effort can produce an incredibly satisfying treat. With their chewy centers, crunchy texture, and rich chocolate flavor, they are the kind of recipe you will come back to again and again. Whether for snacking, sharing, or satisfying a sweet craving fast, No-Bake Homemade Crunch Bars always deliver.
Leave a Reply