
Introduction
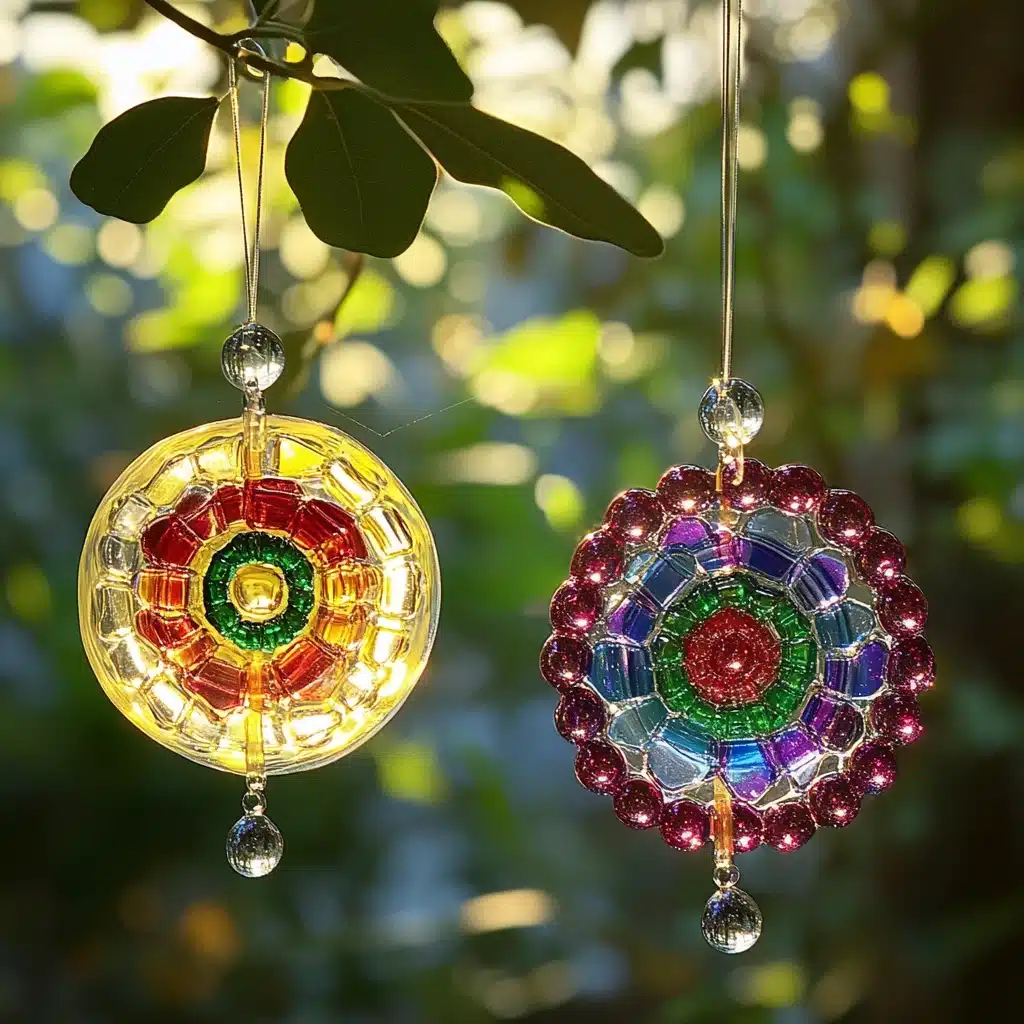
When sunshine filters through a window, there’s something magical about catching its rays in a burst of color. That’s exactly what you get with these DIY Melted Bead Suncatchers. This creative, budget-friendly craft transforms simple acrylic beads into stunning, light-catching art. Whether you’re crafting with kids, adding handmade charm to your home, or seeking a relaxing weekend project, these suncatchers are sure to bring joy to any window they grace.
Best of all? They’re incredibly easy to make, safe when handled properly, and endlessly customizable. With just a few supplies and a splash of creativity, you’ll be making rainbow reflections in no time. Let’s dive into this radiant craft that’s perfect for sunny days and rainy-day boredom busters alike!
Why You’ll Love This Craft
These melted bead suncatchers offer more than just visual appeal—they’re also a fantastic way to bond with kids, explore color theory, and practice fine motor skills. Here’s why you’ll love this fun, hands-on activity:
- Simple and accessible – No fancy tools or skills needed
- Great for all ages – Kids, teens, and adults can all join in
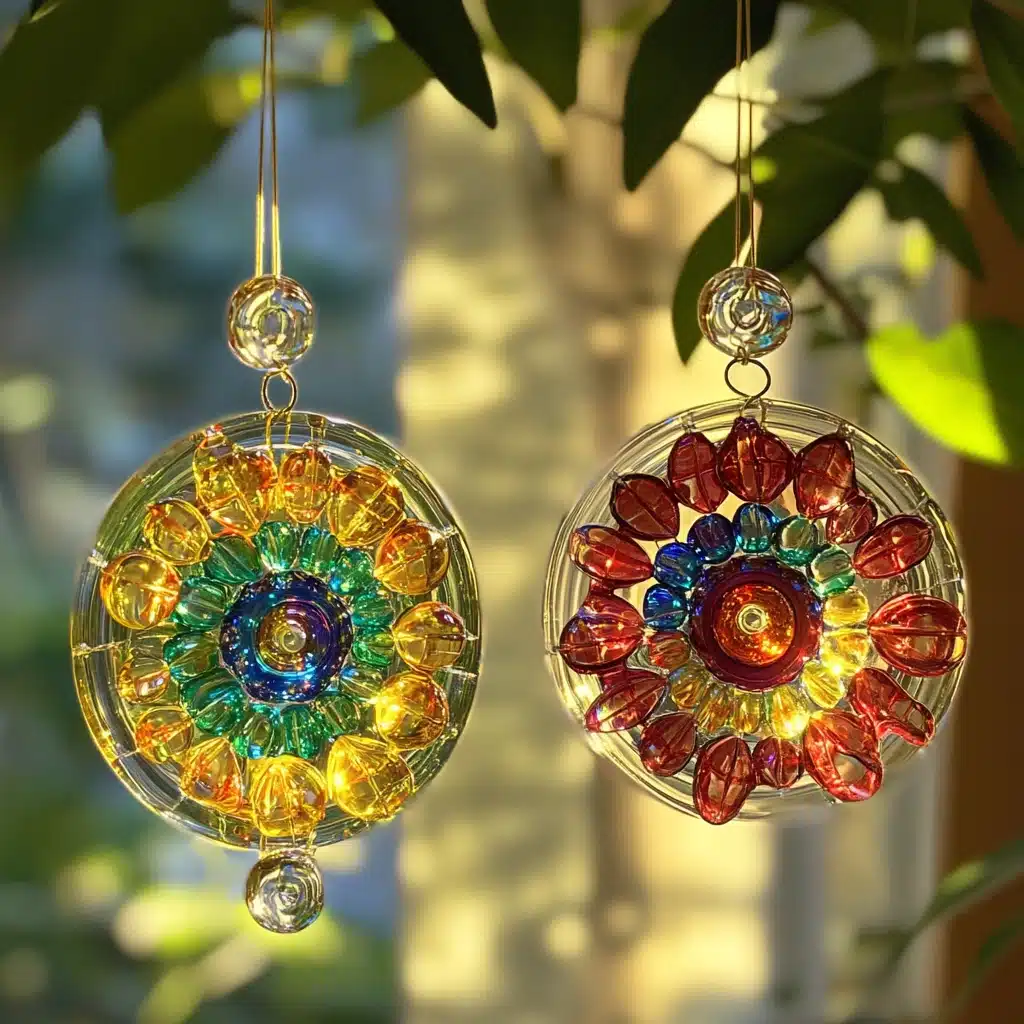
- Customizable designs – Create flowers, mandalas, abstract art, or initials
- Recycled and budget-friendly – Uses inexpensive materials, often from the craft stash
- Perfect gifts and decorations – Ideal for birthday parties, holidays, or just because
Whether you’re crafting one for a sunlit kitchen window or making multiples as party favors, these suncatchers will catch the light—and smiles—all year long.
Ingredients – What You’ll Need
- 8mm faceted acrylic beads (transparent ones melt best and create vibrant colors)
- Round silicone mold (or muffin tins lined with silicone)
- Fishing line (for hanging)
- Suction cup hook (to hang in a window)
- Toaster oven (used outside for safety)
Necessary Tools
- Baking tray
- Oven mitts
- Cooling rack or heat-safe surface
- Scissors
Ingredient Swaps and Additions
- Beads: While faceted acrylic beads work best for shine, you can also try translucent pony beads. Avoid coated or opaque beads as they may not melt evenly or emit fumes.
- Molds: Swap silicone molds for metal cookie cutters on a parchment-lined tray.
- Hanging methods: Instead of suction cups, try hanging with twine, ribbon, or fishing line looped onto a small hook.
- Design upgrades: Mix glitter beads, glow-in-the-dark beads, or spell out names or shapes for personal flair!
Step-by-Step Instructions
- Prepare your workspace. Take your toaster oven outside to a flat, well-ventilated surface. Preheat it to 350°F (175°C).
- Design your suncatcher. Lay a single layer of acrylic beads in the silicone mold. Start around the edges and work inward to create a symmetrical or colorful pattern. Make sure the beads are tightly packed to ensure smooth melting.
- Melt the beads. Place the silicone mold on a baking tray and insert it into the preheated toaster oven. Bake for 10–15 minutes, watching carefully. The beads will begin to melt and flatten into a smooth surface.
- Cool down. Remove the mold from the oven and place it on a cooling rack. Allow it to cool completely—this usually takes about 10–15 minutes.
- Remove from mold. Once cooled, gently pop the suncatcher out of the mold. You’ll have a smooth, glass-like disc with a colorful, shiny pattern.
- Attach the hanger. Cut an 8-inch piece of fishing line. Thread it through a hole in the outer edge (or drill a small hole if needed) and tie it securely. Loop the line around a suction cup hook.
- Display your masterpiece! Hang the suncatcher in a sunny window and enjoy the shimmering colors as the sunlight pours through.

Pro Tips for Success
- Always use the toaster oven outdoors to avoid fumes from melted plastic.
- Arrange beads snugly in a single layer to avoid gaps and uneven melting.
- Use metal skewers to poke holes in the melted piece while still warm if you forgot to leave a space.
- Silicone molds release easily and are perfect for this craft. Avoid hard plastic molds.
- Supervise children closely—this project includes high heat and melted plastic.
Serving Suggestions – Fun Ways to Use Your Suncatchers
- Hang several in a row across a window for a rainbow garland
- Use themed color palettes (red + pink for Valentine’s, green + gold for St. Patrick’s)
- Make a mobile using a branch and several suncatchers
- Give as homemade gifts to teachers, grandparents, or neighbors
- Decorate garden stakes, porch railings, or backyard playhouses
Storing and Reheating
These suncatchers don’t require special storage, but here are some tips:
- Storage: Keep in a cool, dry place out of direct sunlight when not in use (to avoid color fading)
- Durability: These creations are weather-resistant but not shatterproof. Store flat and avoid dropping on hard surfaces.
- Repurposing: If one breaks, melt the pieces again in a new design!
Nutritional Information
This is a craft project, not an edible recipe, so there’s no nutritional content. However, it offers enrichment for the mind and creative spirit:
- Boosts fine motor skills ✂️
- Encourages creativity and color matching 🎨
- Offers sensory play and visual stimulation 👀
- Promotes patience and process-focused crafting 🧘♀️

FAQs
- Can I use metal pans instead of silicone molds? Yes, but use parchment paper for easy release.
- Do I need a drill to make a hole? If your design doesn’t include a natural gap for threading, you can carefully drill or melt a hole using a hot nail.
- Is it safe to do this indoors? We highly recommend melting beads outdoors, as the fumes may be unsafe in enclosed spaces.
- Can I make shapes other than circles? Absolutely! Try heart, star, or flower-shaped silicone molds for variety.
- What age is this suitable for? With supervision, kids ages 5+ can help with designing. Only adults should handle the oven and melted materials.
Conclusion
DIY Melted Bead Suncatchers are a delightful way to bring color and creativity into your home. This simple project is full of hands-on fun, and the final result is a sparkling, stained-glass effect that adds magic to any sunny space. Whether you craft solo, with kids, or at a party, these colorful creations are sure to brighten your day—and your windows!
So grab your beads, fire up that toaster oven (safely outside!), and start crafting sunshine one suncatcher at a time. 🌞✨
Leave a Reply