


Introduction
There’s something truly magical about watching colors swirl and spread in unexpected ways. Imagine a craft where children can create vibrant, textured artworks that come alive with every brushstroke — all using simple materials you probably already have at home. Welcome to the enchanting world of Jellyfish Salt Painting, a delightful and engaging art activity that sparks creativity, teaches color theory, and encourages sensory exploration for kids of all ages.
This unique painting technique blends the tactile fun of salt with the fluid beauty of watercolors, resulting in shimmering, textured masterpieces that resemble jellyfish floating in the ocean’s depths. Whether you’re a parent, teacher, or caregiver looking for an easy yet captivating project, jellyfish salt painting offers hours of colorful fun, hands-on learning, and artistic expression — all while making cleanup easy and stress-free.
In this guide, we’ll explore everything you need to know to create your own jellyfish salt paintings at home or in the classroom, including materials, step-by-step instructions, pro tips for success, and ways to personalize this craft to suit your child’s unique style. Let’s dive into a world where art meets science and creativity knows no bounds!
Why You’ll Love This Jellyfish Salt Painting Activity
What sets jellyfish salt painting apart from typical craft projects? For starters, the sensory experience is unmatched. Kids get to feel the rough texture of salt, see the vibrant colors bloom magically, and watch how watercolors spread unpredictably along the salt crystals. This blend of science and art keeps children engaged, curious, and motivated to experiment with different colors and techniques.
Beyond the sensory appeal, this craft is also wonderfully simple and budget-friendly. It uses everyday household items like school glue, table salt, and watercolor paints—no need for expensive or specialized supplies. The minimal mess means it’s a perfect rainy day activity or classroom project that won’t overwhelm parents or teachers.
Another reason you’ll love this activity is its versatility. Jellyfish salt paintings can be made with varying designs—from simple outlines to intricate shapes—and kids can customize their creations with a rainbow of colors. The result is a stunning, tactile piece of art that can be framed, gifted, or proudly displayed.
Lastly, this activity encourages kids to explore color mixing and basic principles of diffusion, sparking curiosity about how water interacts with salt. It’s a fun blend of STEAM learning and creative play, making it an ideal project for homeschoolers, art classes, and family bonding time.
Ingredients: What You’ll Need
Before you embark on your jellyfish salt painting adventure, gather these simple ingredients:
- White cardstock or watercolor paper: Choose a sturdy surface that can hold glue and watercolor without warping. Watercolor paper is ideal for vibrant paint effects.
- White school glue: Liquid glue with a precision tip works best for detailed lines.
- Table salt: Regular granulated salt; avoid coarse or rock salt for best results.
- Watercolor paints or liquid food coloring: Either works well, though watercolor offers a wider palette.
- Water: For mixing paint or diluting food coloring.
- Small cups or a paint palette: To hold your mixed paints or colors.
Necessary Tools for This Craft
In addition to ingredients, you’ll need a few handy tools:
- Paintbrushes: A small, fine brush is best for applying paint drops onto the salt.
- Droppers or pipettes (optional): Helpful for precise paint application and experimenting with color drops.
- Tray or baking sheet: Place under your paper to catch any spilled salt or paint for easy cleanup.
- Paper towels or cloth: For wiping brushes and cleaning spills.
Ingredient Swaps and Additions: Customizing Your Jellyfish Salt Paintings
Want to mix things up or adapt this project to what you have on hand? Here are some fun swaps and additions:
- Salt Alternatives: Try fine sand or sugar for different textures and effects, but note color diffusion may vary.
- Glue Options: Use clear-drying craft glue for a different visual effect, though white glue provides strong contrast.
- Color Choices: Beyond watercolor or food coloring, try liquid watercolors, acrylic ink, or even diluted tempera paint for diverse results.
- Paper Types: Experiment with black or colored cardstock for dramatic backgrounds.
- Additional Embellishments: Add glitter, sequins, or small beads after painting dries for extra sparkle and texture.
- Thematic Variations: Instead of jellyfish, try other sea creatures or abstract designs using the same salt painting technique.
Step-by-Step Instructions for Jellyfish Salt Painting
Ready to create your own vibrant jellyfish salt painting? Follow these detailed steps:
Step 1: Prepare Your Workspace
Lay your cardstock or watercolor paper flat on a tray or baking sheet. This protects your table from spills and makes cleanup easier. Gather all your materials within reach.
Step 2: Draw the Jellyfish Shape with Glue
Using white school glue, carefully draw the outline of a jellyfish on your paper. Start with a rounded dome shape for the jellyfish’s bell and then add long, flowing tentacles. Don’t worry about perfection—organic, wavy lines add charm.
Step 3: Sprinkle Salt Over the Glue
While the glue is still wet, generously sprinkle table salt over the entire glue design. Make sure all glue lines are fully covered with salt crystals. Gently shake off excess salt onto the tray, leaving only salt sticking to the glue.
Step 4: Mix Your Colors
In small cups or on a palette, mix watercolor paints or liquid food coloring with a bit of water. Prepare a variety of colors for a vibrant, rainbow effect.
Step 5: Paint the Salted Glue Lines
Using a fine paintbrush or dropper, carefully touch your chosen colors onto the salted glue lines. Watch as the paint magically spreads along the salt crystals, creating beautiful, organic patterns. Continue adding colors until your jellyfish is filled with vivid hues.
Step 6: Let Your Artwork Dry
Place your painting somewhere flat and undisturbed to dry completely. Drying time can take several hours depending on paint thickness and humidity. Avoid moving it to prevent smudging.
Step 7: Admire and Display
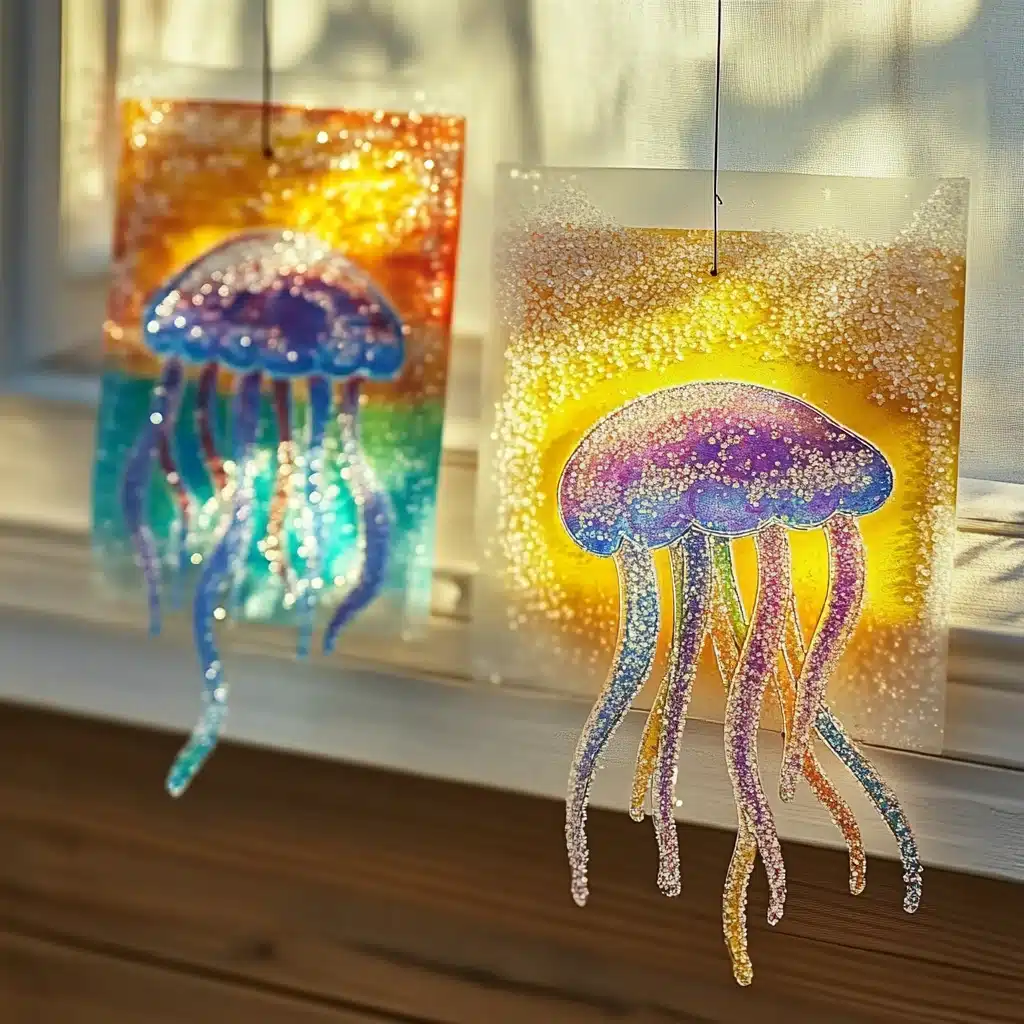
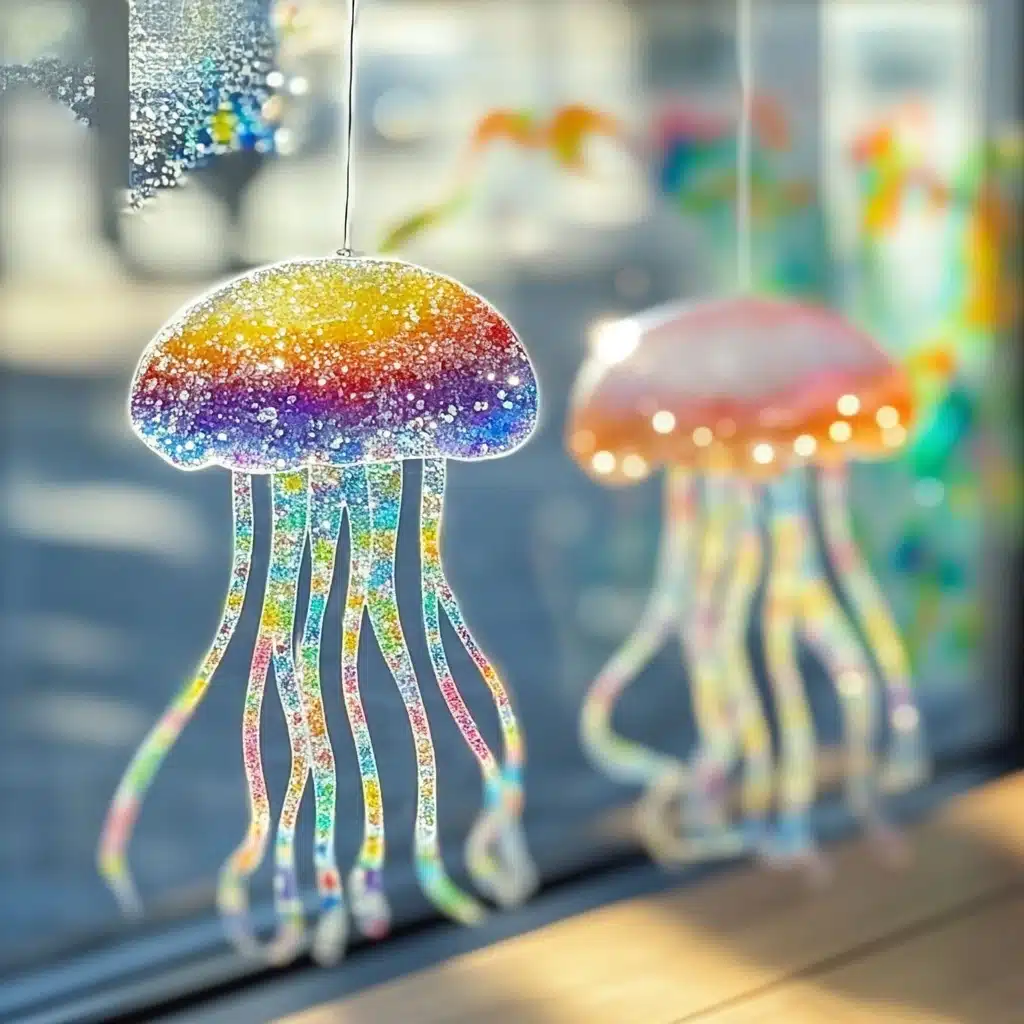
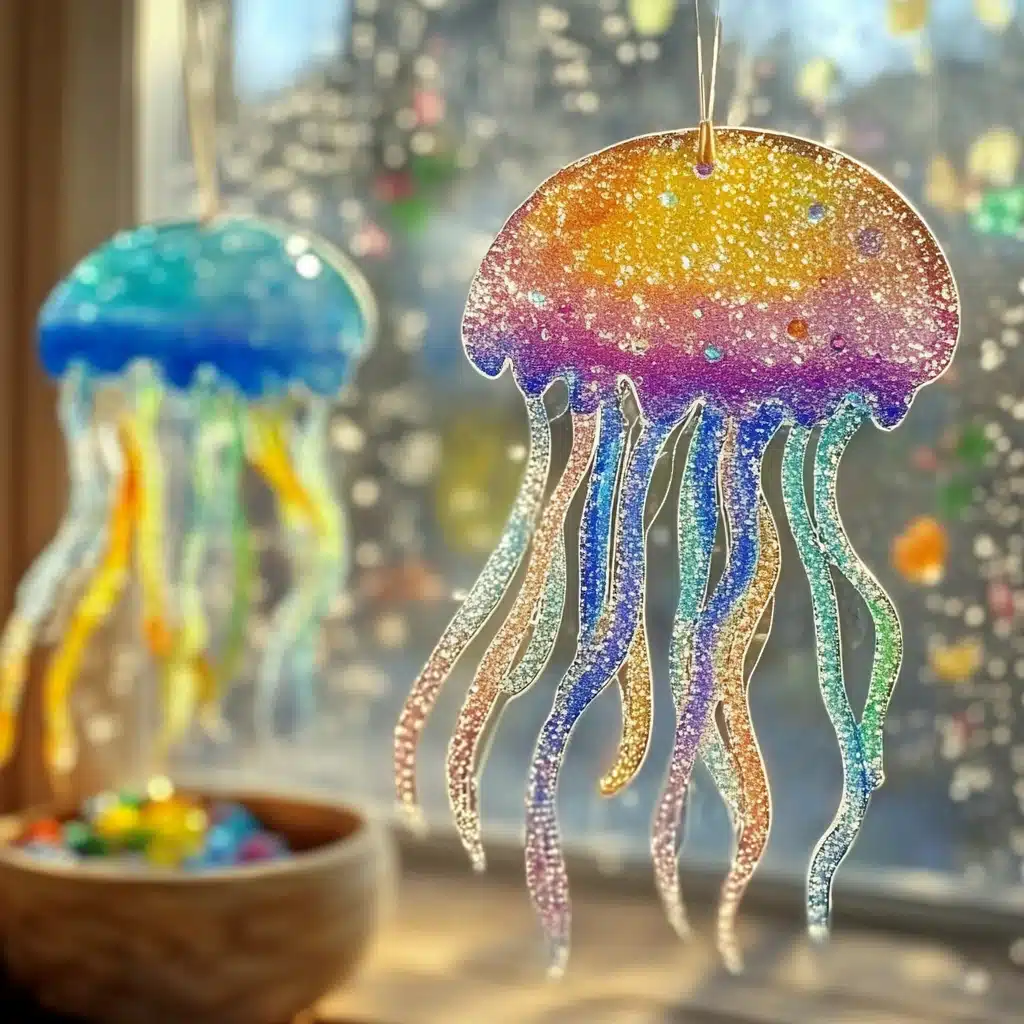
Once dry, your jellyfish salt painting will feature lovely textured colors that shimmer in the light. Frame your masterpiece, gift it to a loved one, or display it proudly in your home.
Pro Tips for Success
- Use white glue with a fine tip to draw detailed designs that hold salt well.
- Sprinkle salt immediately after applying glue to ensure it sticks properly.
- Use a light touch when shaking off excess salt to avoid disturbing your design.
- Start with small drops of paint on the salt and add more as needed to control color spread.
- Work in a well-ventilated area and cover surfaces for easier cleanup.
- Encourage kids to experiment with color blending by layering different hues.
- For younger children, pre-draw the jellyfish shape to help them focus on painting.

Serving Suggestions (Creative Uses for Your Jellyfish Salt Painting)
While this isn’t a food recipe, your jellyfish salt paintings can be enjoyed and shared in many creative ways:
- Frame the artwork to brighten a child’s bedroom or playroom.
- Use the paintings as handmade greeting cards or gifts for birthdays and holidays.
- Incorporate salt paintings into educational displays on marine life or color science.
- Turn smaller paintings into bookmarks by laminating them.
- Host a kids’ art gallery day where little artists showcase their creations.
Storing and Preserving Your Artwork
To keep your jellyfish salt paintings looking fresh:
- Store flat in a dry, cool place away from direct sunlight.
- Avoid humid environments to prevent salt clumping.
- If framed, use glass or acrylic glazing to protect the textured paint.
- Handle with care as salt crystals can be fragile.
Nutritional Information
Since this is a craft project, it doesn’t contain nutritional value. However, it promotes important developmental benefits for kids such as:
- Fine motor skills through glue drawing and painting.
- Sensory development via texture and color exploration.
- Creativity and imagination sparked by art-making.
- Cognitive skills through learning about color mixing and diffusion.
Frequently Asked Questions (FAQs)
1. Can I use other types of salt for this project?
Regular table salt works best due to its fine texture. Coarser salts like rock salt may not adhere well or create the desired diffusion effect.
2. What if the paint doesn’t spread on the salt?
Make sure your salt is fresh and fully covers the glue lines. Use watery paint or food coloring rather than thick paint. Adding more water to your paint mix can help it flow better.
3. How long does it take for the painting to dry?
Drying time varies but generally takes 2–4 hours or longer depending on humidity and paint thickness. Patience is key!
4. Can this activity be done with toddlers?
Yes, with adult supervision and pre-drawn shapes, toddlers can enjoy applying salt and painting. Expect some mess but lots of fun!
5. How do I clean up after this activity?
Use a tray or baking sheet to catch spills. Wipe surfaces with a damp cloth and sweep up loose salt. Wash brushes promptly after use.
Conclusion
Jellyfish salt painting is a fantastic, hands-on art activity that combines creativity, sensory play, and a splash of science. It’s accessible, affordable, and endlessly customizable—perfect for kids of all ages to explore colors and textures in a fresh, exciting way. By turning simple glue and salt into vibrant underwater creatures, you nurture artistic expression while making beautiful keepsakes that brighten any space. So gather your supplies, unleash your imagination, and dive into the joyful world of jellyfish salt painting today!
Leave a Reply