


Introduction
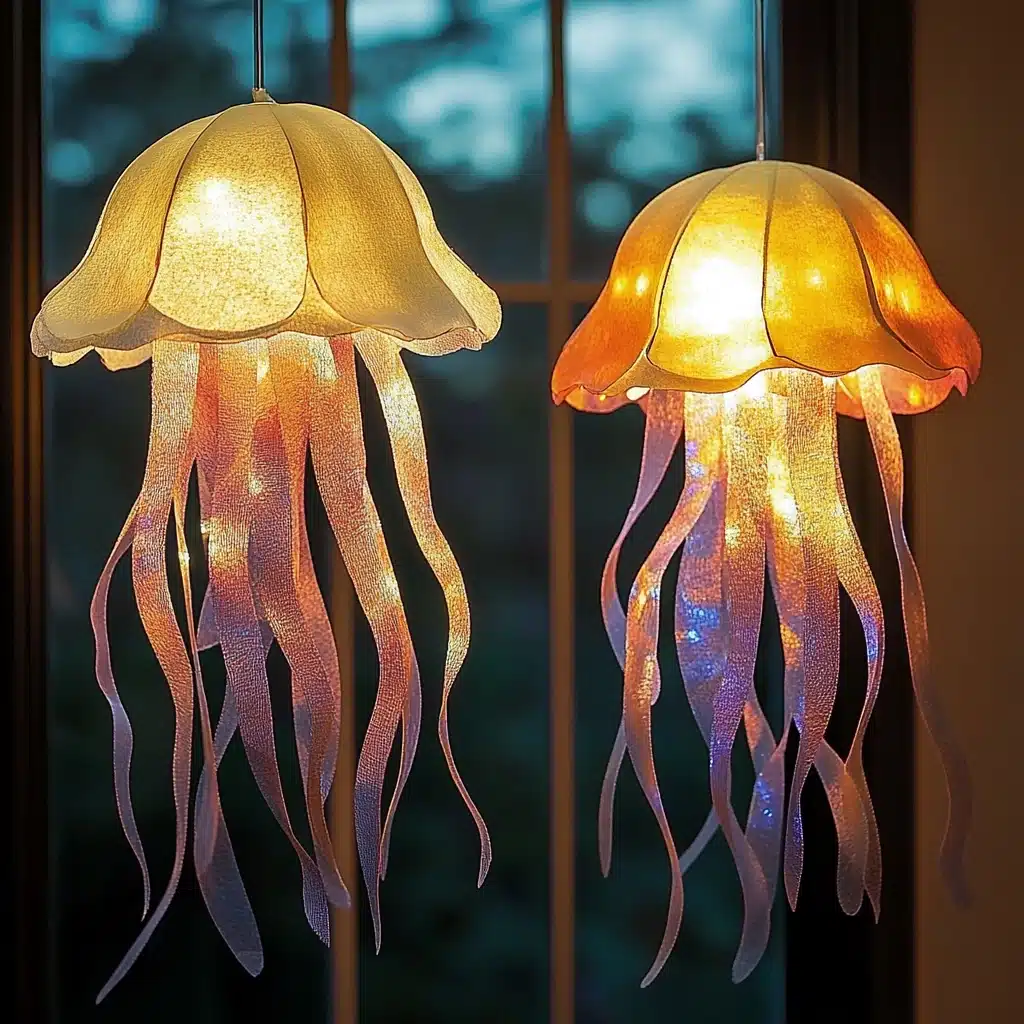
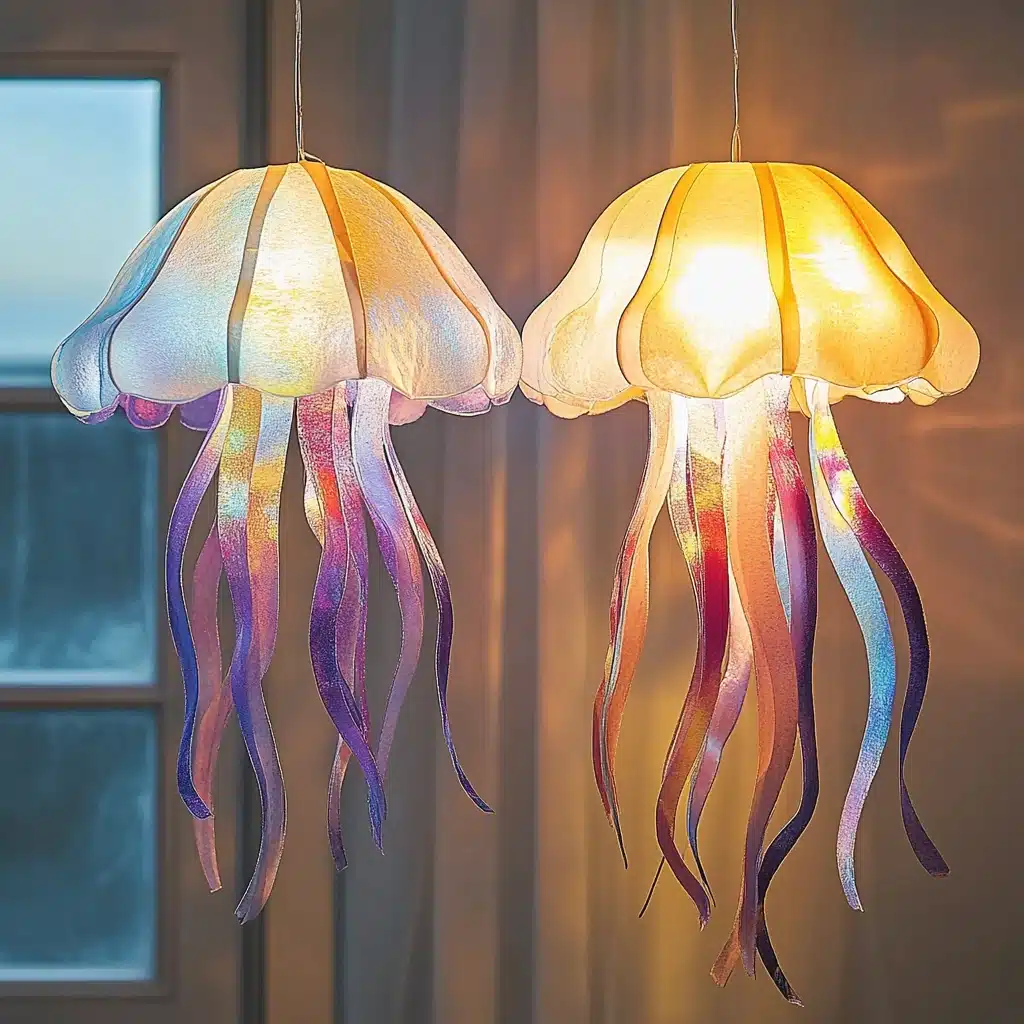
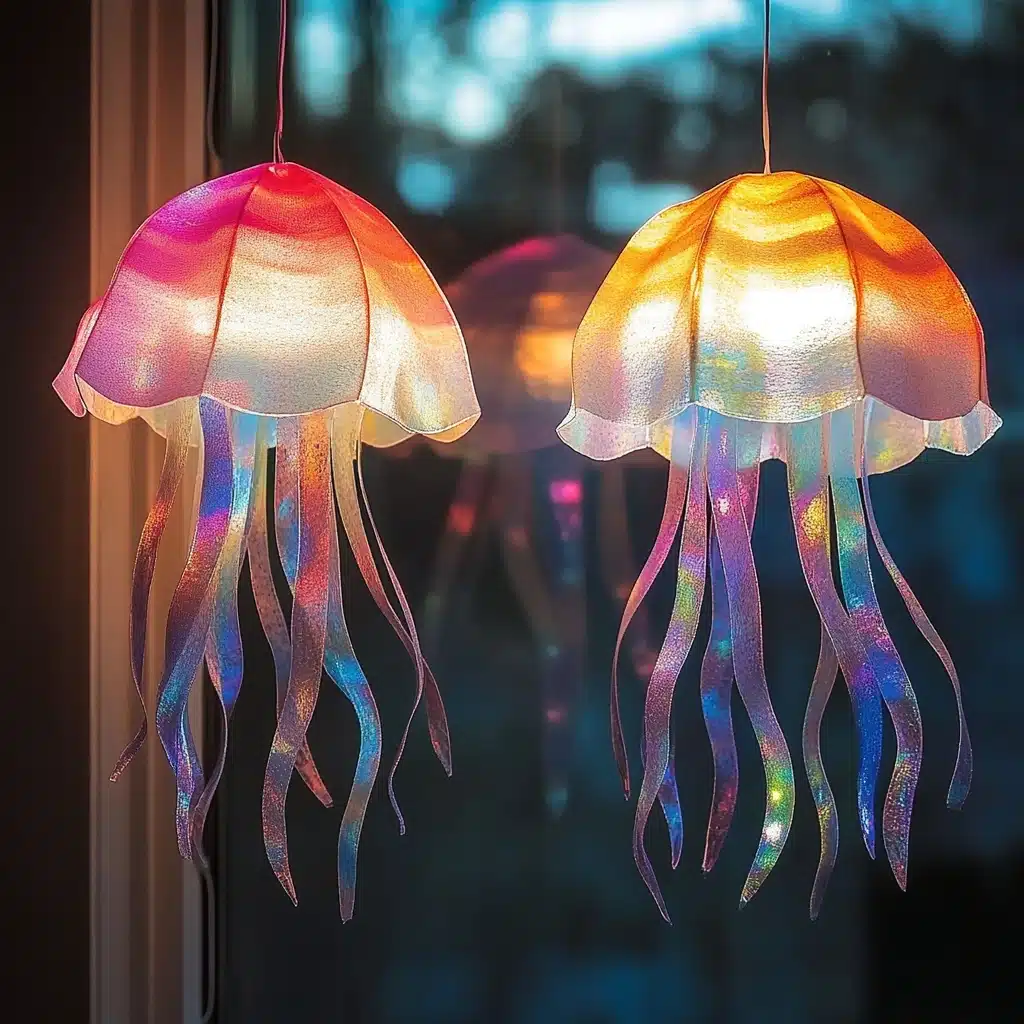
Imagine a glowing jellyfish floating gently in the sunlight, shimmering softly like a secret treasure from the ocean depths. This magical vision comes to life when you create your own glowing tissue paper jellyfish craft at home. Perfect for kids, families, and craft lovers alike, this DIY project combines creativity, simple materials, and a touch of glow-in-the-dark magic to brighten up any room. Whether it’s for a fun weekend activity, a unique nightlight, or a charming decoration, this glowing jellyfish will captivate imaginations and add a magical shimmer to your space.
Crafting is more than just making things—it’s about bonding, learning, and sharing joy. This jellyfish project is especially great because it’s hands-on, easy to customize, and encourages kids to explore textures, colors, and light. Plus, it’s eco-friendly, inexpensive, and results in a truly enchanting piece of art.
In this post, you’ll discover everything you need to know about making your glowing tissue paper jellyfish—from materials and step-by-step instructions to pro tips and creative display ideas. Let’s dive into this glowing craft adventure!
Why You’ll Love This Craft
What makes the glowing tissue paper jellyfish craft so special? First, it’s the magical glow. By incorporating LED color-changing candles inside a delicate tissue paper shell, your jellyfish will shimmer and dance with light, enchanting anyone who sees it. Unlike traditional crafts, this project blends artistry and science to create a glowing masterpiece.
Secondly, it’s incredibly kid-friendly. No complicated tools or toxic materials are involved, making it safe for children to participate and learn. It’s an ideal project for families wanting quality time together or teachers looking for a creative classroom craft.
Thirdly, the process teaches patience, fine motor skills, and creativity. Layering tissue paper with glue introduces kids to mod podge techniques, while shaping and decorating encourages artistic expression.
Lastly, this craft is versatile. You can hang your glowing jellyfish in bedrooms, playrooms, or even outdoor covered patios. It doubles as a decorative nightlight or whimsical party decoration, making it a multi-purpose project that adds charm wherever it goes.
Ingredients and Materials
To make your glowing tissue paper jellyfish, you’ll need the following materials:
- Tissue paper (light colors such as white, pastel blue, pink, or lavender work best to diffuse the light beautifully)
- PVA glue (white craft glue)
- Water (to thin the glue into a mod podge-like consistency)
- LED color-changing candle (battery-operated, flameless for safety)
- Sticky tape (transparent or double-sided)
- String (for hanging)
- Non-stick baking paper (to protect your work surface)
- Cling wrap (to line the mold)
- Small round bowl (to use as the mold for the jellyfish shell)
- Paintbrush (for applying glue)
- Scissors
- Metal skewer or needle (to make holes for threading string)
Necessary Tools
Besides the materials above, here are the essential tools to prepare your jellyfish craft easily and safely:
- A flat work surface (covered with baking paper)
- A bowl or container for mixing glue and water
- Measuring spoons or cups to ensure the right glue-to-water ratio
- A gentle drying area (a shelf or table where the jellyfish can dry undisturbed overnight)
Ingredient Swaps and Additions
Crafting is all about personalization! Feel free to experiment with these swaps and additions:
- Tissue Paper Colors: Choose vibrant hues like neon green or deep purple for a more dramatic glow, or patterned tissue paper for unique textures.
- Glue Alternative: Use a pre-made mod podge if you prefer, which can add durability and a glossy finish.
- Light Source: Swap the LED candle for small fairy lights or glow sticks, but ensure safety by avoiding anything that heats up.
- Embellishments: Add sequins, tiny beads, or glitter (biodegradable is best) on the tissue layers before drying to add extra sparkle.
- Hanging Method: Replace string with thin ribbon or fishing line for a different hanging style.
- Shape Variation: Use different bowl sizes or shapes to create various jellyfish sizes and styles.
Step-by-Step Instructions
Step 1: Prepare Your Work Area and Mold
Lay non-stick baking paper on your workspace to catch drips. Wrap the outside of your bowl tightly with cling wrap. This will make it easy to remove the tissue paper shell later.
Step 2: Cover the Bowl with Tissue Paper
Place a sheet of tissue paper over the cling-wrapped bowl. Tuck the edges neatly underneath. This forms your jellyfish shell base.
Step 3: Make Homemade Mod Podge
Mix PVA glue with water in a 3:1 ratio (three parts glue to one part water). Stir well until smooth.
Step 4: Apply Glue and Layer Tissue
Use a paintbrush to apply a thin layer of mod podge over the tissue paper. Then add another sheet of tissue paper on top, brushing mod podge over it. Repeat one more time for three layers total. This layering gives strength and texture.
Step 5: Dry Overnight
Leave your jellyfish shell to dry completely overnight in a well-ventilated area. This step is crucial for a firm but delicate shell.
Step 6: Final Mod Podge Layer
Apply one last coat of mod podge for a smooth, durable finish. Let it dry again completely.
Step 7: Remove the Jellyfish Shell
Carefully peel the hardened tissue paper shell from the bowl and cling wrap. Trim the edges gently to create a soft, ruffled jellyfish shape.
Step 8: Add Hanging String
Using a metal skewer or needle, poke two small holes near the top of the shell. Thread a string through and tie a knot to create a loop for hanging.
Step 9: Insert the LED Candle
Place the LED color-changing candle inside the shell and secure it with sticky tape or tape it to the string so it stays in place.
Step 10: Create Jellyfish Stingers
Cut strips of tissue paper, fold and fringe the edges, then tape them around the bottom edge of the shell. These mimic the jellyfish tentacles and add movement.
Step 11: Display Your Jellyfish
Hang your glowing jellyfish near a window, from the ceiling, or in any cozy corner. Watch it shimmer and glow as it catches the light and changes colors.
Pro Tips for Success
- Use light-colored tissue paper for the best glow effect; darker shades may absorb too much light.
- Don’t rush drying—overnight drying ensures your shell is sturdy enough to hold its shape.
- Thin your glue properly; if too thick, it can clump and ruin the tissue texture.
- Handle with care when removing the shell to avoid tearing.
- Choose LED candles with a timer for automatic shut-off and safety.

Serving Suggestions
While this craft isn’t edible, here’s how to “serve” or present your jellyfish creatively:
- Arrange several glowing jellyfish at varying heights for an underwater-themed party.
- Use as a whimsical nightlight in a child’s bedroom.
- Combine with other ocean-themed crafts for a fun learning display.
- Gift one to a friend or teacher as a handmade, glowing treasure.
- Incorporate in seasonal décor for magical ambiance.
Storing and Care
To keep your glowing jellyfish looking fresh:
- Store in a dry place away from moisture to prevent tissue paper deterioration.
- Remove the LED candle batteries if storing long term.
- Handle gently to avoid creasing or tearing.
- Clean lightly with a dry brush if dust collects.
Nutritional Information
This craft is 100% calorie-free but packed with creative nourishment! It boosts:
- Fine motor skills
- Hand-eye coordination
- Patience and focus
- Artistic expression
- Family bonding time
FAQs
Q1: Can I use real candles instead of LED?
A: For safety, LED candles are best. Real flames pose fire risks with tissue paper.
Q2: How long does the glue take to dry?
A: Allow at least 8-12 hours for each drying phase, ideally overnight.
Q3: Can I use other papers besides tissue?
A: Tissue paper works best for translucency, but thin rice paper or napkins might work with experimentation.
Q4: What if my shell tears during removal?
A: Try peeling slowly and gently. If tears happen, use glue to patch before adding details.
Q5: Can I make this craft with younger children?
A: Yes! Just assist with glue application and peeling for safety and ease.
Conclusion
The glowing tissue paper jellyfish craft is a magical blend of art, science, and imagination. It offers a wonderful opportunity for families to create together while producing a unique, shimmering decoration that delights both kids and adults. Whether used as a nightlight or party décor, your glowing jellyfish will brighten any space with its gentle, colorful glow. So gather your materials, invite your little ones to join, and dive into this enchanting craft project today. You’ll treasure the memories made as much as the glowing jellyfish itself!
Leave a Reply