


Introduction
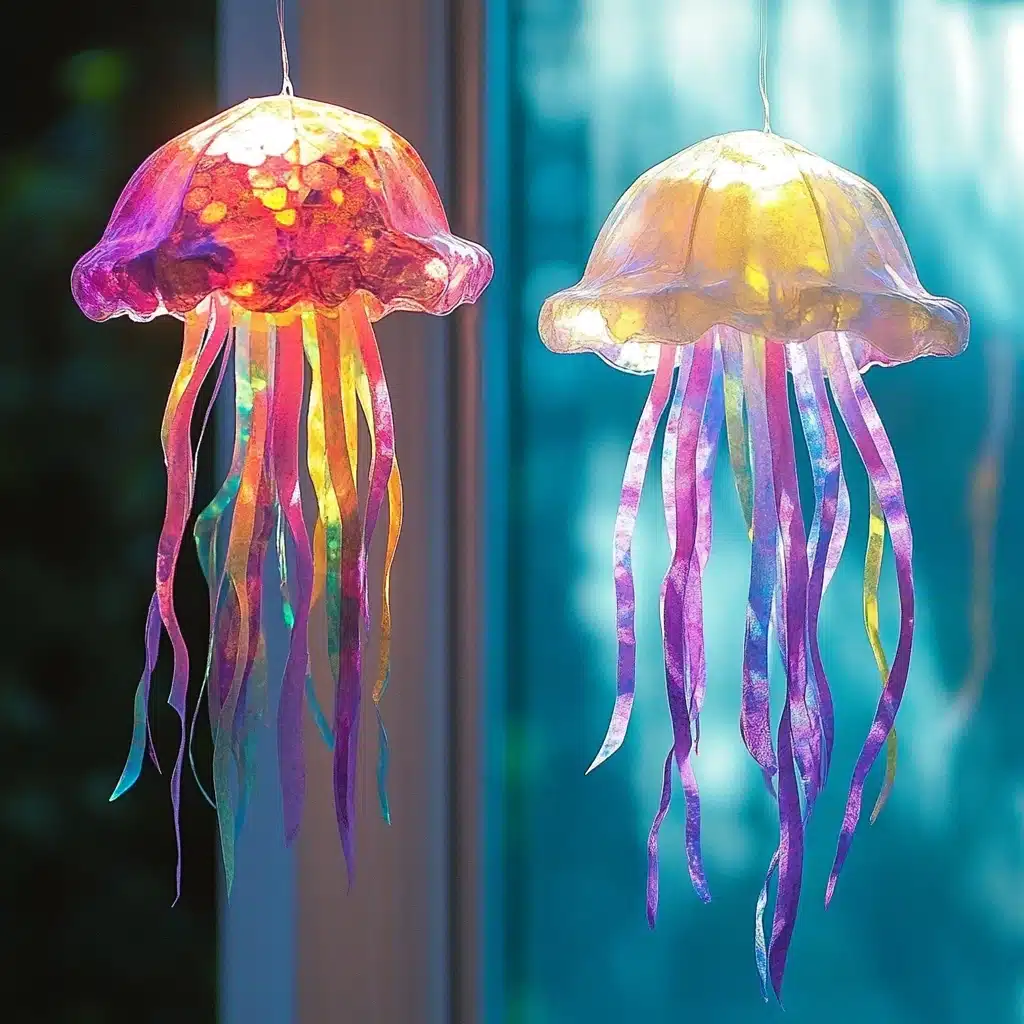
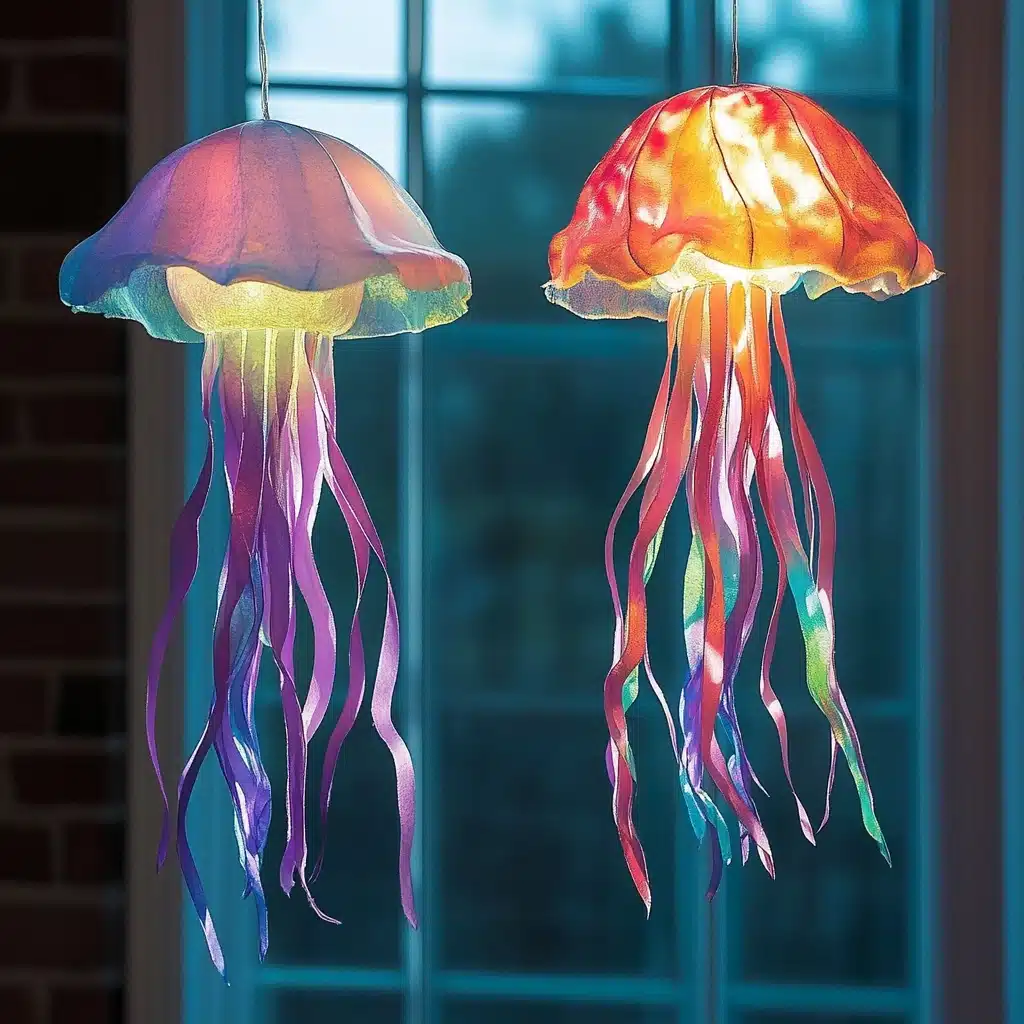
“It’s alive!” my little one shouted, eyes wide with wonder, as the glowing jellyfish floated gently in the breeze. And in that moment—watching a simple tissue paper creation light up like ocean magic—I knew we’d discovered a craft that brings joy, calm, and creativity all in one.
Welcome to the enchanting world of Glowing Tissue Paper Jellyfish, a delightful DIY activity that turns everyday materials into whimsical jellyfish lanterns. Whether you’re looking for a rainy-day project, an ocean-themed decor idea, or a glowing craft to bring a little magic to your child’s room, this hands-on activity is sure to become a family favorite.
Why You’ll Love This Craft
From start to finish, this project is filled with charm, sensory delight, and creative freedom:
- Glowing magic: The LED candle inside brings your jellyfish to life, especially in dim or natural light.
- Easy setup: No fancy tools needed—just common household items.
- All ages welcome: Safe, fun, and manageable for both young children and creative adults.
- Ocean-inspired decor: Perfect for underwater-themed parties, bedrooms, or even classroom projects.
- Sensory play meets art: The texture of tissue paper, brush strokes, and glowing lights engage multiple senses.
Whether you’re a parent, teacher, or grandparent, this craft adds a calming and imaginative touch to your day.
Materials Needed
To make your own glowing tissue paper jellyfish, you’ll need the following:
✅ Supplies:
- Tissue paper (light pastel colors like pink, blue, or white work best)
- Small round bowl (to mold the jellyfish head)
- PVA glue (white school glue)
- Warm water
- Non-stick baking paper
- Cling wrap
- LED color-changing candle (battery-operated)
- String
- Sticky tape
- Paintbrush
- Scissors
- Metal skewer or thick needle
✨ Optional Add-ons:
- Iridescent or glittery tissue paper for shimmer
- Glow-in-the-dark paint for a nighttime surprise
- Sequins or stickers for added flair
Necessary Tools
Aside from your ingredients, having the right tools makes crafting smooth and stress-free. Here’s what you should gather:
- A paintbrush (preferably flat-tipped)
- Scissors
- A bowl that fits the size of your jellyfish “head”
- Metal skewer (for poking hanging holes)
- Non-stick work surface (like baking paper or wax paper)
- Glue-safe workspace (covered table or tray)

Ingredient Swaps and Additions
Want to mix things up? Here are some simple swaps and fun variations:
- No PVA glue? Use decoupage glue or a homemade version (1:1 ratio of white flour and water).
- No cling wrap? Aluminum foil or parchment paper can also work in a pinch—just ensure it’s moldable.
- Alternative light source: A small string of fairy lights can replace the LED candle for different visual effects.
- No bowl? Use a balloon as your jellyfish mold! Let it deflate once the shell hardens.
Step-by-Step Instructions
Let’s dive into the process! 🌊
1️⃣ Prepare Your Workspace
Lay non-stick baking paper on your crafting surface. Wrap the outside of your bowl tightly with cling wrap—this will be the mold for the jellyfish dome.
2️⃣ Build the Jellyfish Head
Place one sheet of tissue paper over the bowl. Mix PVA glue with a bit of warm water to make homemade mod podge (should be thin, like pancake batter). Using a paintbrush, coat the tissue in mod podge.
Add a second sheet of tissue paper on top and brush over again. Repeat with a third layer to strengthen your shell. Press out any air bubbles gently.
Let it dry overnight.
3️⃣ Strengthen and Shape
Once the first layers are fully dry, apply one final coat of mod podge to seal it. Let this dry for another few hours (or overnight again for best results).
Once dry, carefully remove the hardened tissue dome from the bowl. Peel off the cling wrap from the inside.
4️⃣ Add Hanging Holes
Use a metal skewer or needle to poke two holes at the top of the dome. Thread string through and tie a knot to create a hanging loop, leaving enough space inside to hold your LED candle.
5️⃣ Insert the Light
Place your LED color-changing candle inside the dome. Use sticky tape to secure the candle to the inside using the two strings if needed.
6️⃣ Create the Tentacles
Cut long strips of tissue paper and fringe the edges for a flowing, tentacle effect. Tape these to the inside edge of the jellyfish dome. Let them flutter!
7️⃣ Display and Enjoy!
Hang your jellyfish near a window, in a reading nook, or above your child’s bed. Watch as it glows, flickers, and adds an ocean-inspired charm to your space!

Pro Tips for Success
💡 Use light-colored tissue paper for a glowing effect.
💡 Add a drop of dish soap to your glue for smoother application.
💡 Avoid over-saturating the paper—it can tear when too wet.
💡 If your bowl shape is too deep, trim the tissue shell to form a bell shape.
💡 Double-check that the LED candle is fully secured—safety first!
Fun Display Ideas
✨ Reading Corner Glow-Up: Hang 2–3 jellyfish for a magical under-the-sea reading space.
✨ Ocean-Themed Birthday Party: Use different colors for multiple jellyfish lanterns!
✨ Bedtime Nightlight: Place it near a bedside table with a dim LED candle for calm and cozy sleep prep.
✨ DIY Mobile: Combine with paper fish and seaweed cutouts for a baby or toddler ocean mobile.
✨ Window Wonderland: Catch the sunlight during the day and switch on the LED at night!
Storing and Reusing
While this jellyfish craft is fairly durable, here’s how to care for it:
- Storage: Keep in a dry place, away from moisture.
- Transport: Store in a shoebox or craft box to avoid crushing.
- Reuse: Swap out LED candles when needed to keep the glow going!
Nutritional Information
📝 Since this is a craft (not food), we’ll swap this with Sensory Benefits instead:
- ✅ Promotes fine motor skills
- ✅ Encourages sensory exploration through texture and light
- ✅ Inspires imaginative storytelling
- ✅ Offers calming visual stimulation
- ✅ Fosters parent-child bonding time
Frequently Asked Questions (FAQs)
Q1: Can I use regular candles instead of LED lights?
No. Real candles are a fire hazard with tissue paper. Always use battery-operated LED lights.
Q2: How long does the jellyfish take to dry?
About 12–24 hours per layer depending on humidity. Total craft time may span 2 days for optimal results.
Q3: Is this safe for toddlers?
Yes—with supervision. Adults should handle cutting, hole poking, and glue mixing. Toddlers can help with painting and choosing colors.
Q4: Can I add glitter?
Absolutely! Sprinkle glitter between layers or mix into the glue for a sparkling finish.
Q5: What other shapes can I make?
Try turning this into glowing mushrooms, lanterns, or even space-themed planets using different bowl sizes!
Conclusion
This glowing tissue paper jellyfish isn’t just a craft—it’s a little piece of magic. With soft lights, floating tentacles, and a dreamy glow, it brings ocean life into your home in the most creative, calming way. Whether you’re planning a themed party, looking for a soothing sensory activity, or just sharing some creative time with your little ones, this craft checks all the boxes.
So gather your supplies, turn up your imagination, and let the jellyfish glow begin!
Leave a Reply