






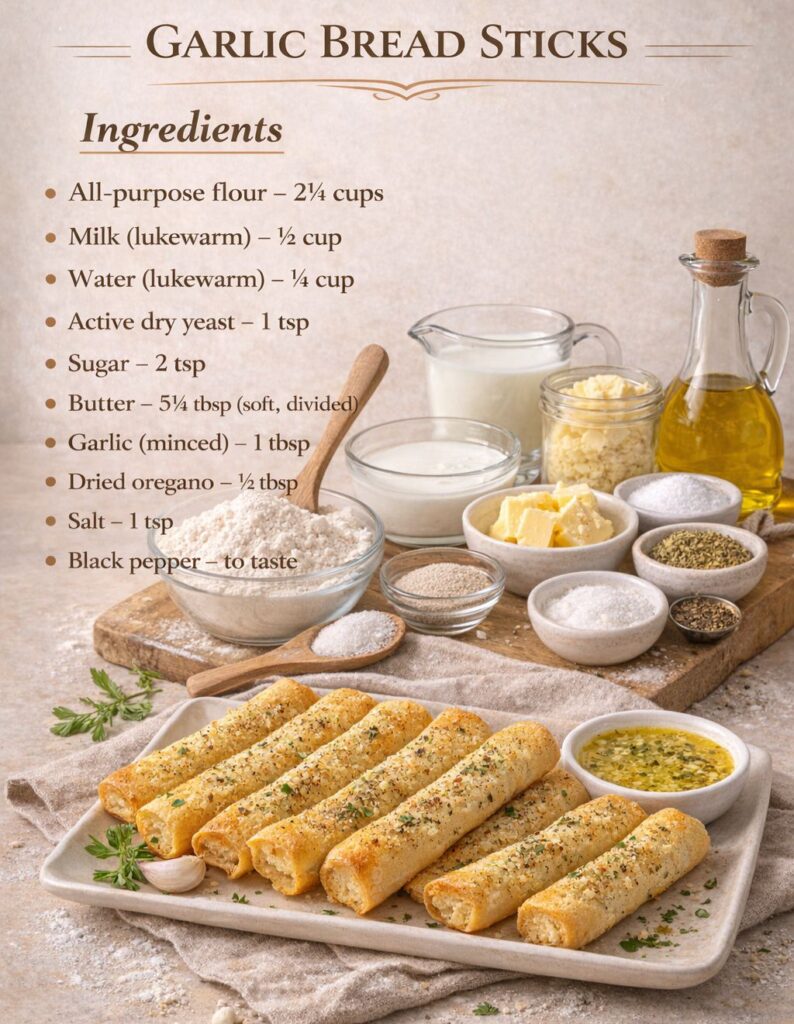
How to Prepare the Dough Perfectly
Activate yeast for a good rise
Start by mixing lukewarm milk, lukewarm water, sugar, and yeast in a bowl. Let it sit for 5 to 10 minutes until it becomes foamy.
This step ensures the yeast is active. If it does not foam, the yeast may not be working properly.
The liquid should be warm but not hot. Too much heat can damage the yeast, while cooler temperatures may slow activation.
Because this Garlic Bread Sticks Recipe depends on proper rising, activating the yeast correctly is essential.
Knead until smooth and elastic
Add flour, salt, and 3 tablespoons of soft butter to the yeast mixture. Mix until a dough forms.
Transfer the dough to a surface and knead it for several minutes. It should become smooth, soft, and slightly elastic.
If the dough feels sticky, add a little flour. If it feels too dry, add a small amount of liquid.
Proper kneading helps develop gluten, which gives the breadsticks their structure and softness.
Because the dough quality affects the final result, this step is important.
Shaping and Resting the Breadsticks
Shape evenly for consistent baking
Once the dough has risen, roll it into a rectangle on a flat surface. Cut it into long strips to form breadsticks.
Try to keep the size consistent so they bake evenly. Uneven shapes can result in different textures.
Place the shaped dough onto a greased baking tray with some space between each piece.
Because shaping affects baking, taking a moment to keep sizes even improves the outcome.
Let them rest before baking
Cover the shaped breadsticks and let them rest for about 15 minutes. This allows the dough to relax and puff slightly.
This second rest helps improve texture and ensures the breadsticks remain soft after baking.
Because this Garlic Bread Sticks Recipe focuses on softness, this step adds to the final result.
Baking Tips for Perfect Bread Sticks
Apply garlic butter before baking
Mix the remaining butter with minced garlic, oregano, and black pepper. Brush this mixture generously over the breadsticks.
This step adds flavor and helps create a golden surface during baking.
Make sure the butter is spread evenly for consistent taste.
Because the flavor depends on this mixture, applying it properly enhances the breadsticks.
Bake until golden and soft
Preheat the oven to 180°C (350°F). Bake the breadsticks for 15 to 18 minutes until they turn golden brown.
Avoid overbaking, as this can make them dry. Remove them once they are lightly golden and soft inside.
After baking, brush a little more garlic butter on top for extra flavor and moisture.
Serve warm for the best taste and texture.
Because baking time affects softness, keeping an eye on them ensures perfect results.
Serving Ideas and Variations
Serve with your favorite dishes
This Garlic Bread Sticks Recipe pairs well with pasta, soups, and salads. It also works as a standalone snack.
Serve with dips like marinara sauce, garlic dip, or cheese sauce for extra flavor.
Because the breadsticks are versatile, they fit many meals and occasions.
Try easy variations
Add grated cheese on top before baking for a cheesy version. Sprinkle chili flakes for a spicy twist.
You can also mix herbs like basil or parsley into the butter for different flavors.
Because the recipe is flexible, you can customize it easily.
Frequently Asked Questions
Why didn’t my dough rise?
The yeast may not be active or the liquid may have been too hot.
Can I use only water instead of milk?
Yes, but milk gives a softer and richer texture.
How do I keep them soft?
Brush with butter after baking and store covered.
Can I freeze the dough?
Yes, you can freeze it and thaw before baking.
Can I make them ahead of time?
Yes, prepare and refrigerate, then bake when needed.
Conclusion
This Garlic Bread Sticks Recipe makes it easy to create soft, buttery, and flavorful breadsticks at home. With simple ingredients and the right technique, you can achieve bakery-style results in your own kitchen. Whether served as a side or enjoyed on their own, these breadsticks deliver warm, satisfying flavor every time.
Leave a Reply