


There’s something timeless about the beauty of pressed flowers—delicate, colorful, and quietly elegant. When combined with a simple glass vase or jar, they become more than just dried petals; they become living memories and works of art. Whether you’re a seasoned crafter or new to DIY projects, this pressed flower vase tutorial is the perfect way to add a personal and natural touch to your space.
From foraging and pressing flowers to sealing your creation with love, this guide walks you through every step of the process. It’s ideal for spring and summer decor, nature lovers, or anyone who wants to give a handmade gift with heartfelt charm.
🌼 Why You’ll Love This Pressed Flower Vase Project
- Simple yet Stunning: You don’t need special equipment or a crafting background.
- Budget-Friendly: Many supplies are things you may already have at home.
- Customizable: Choose flowers and arrangements that reflect your personality or the season.
- Great Gift Idea: Perfect for birthdays, Mother’s Day, weddings, or housewarmings.
- Eco-Friendly: Upcycle a jar or vase and use naturally pressed flowers.
🪴 Supplies You’ll Need
- Glass vase or recycled glass jar
- Pressed flowers (store-bought or homemade)
- Mod Podge or clear-drying craft glue
- Foam brush or soft paintbrush
- Tweezers (optional, but helpful for precision)
- Clear acrylic sealer spray (optional, for shine and protection)
- Scissors (if needed for trimming stems or petals)
- Clean cloth or paper towel
Tip: Choose a vase with a smooth surface for best results. Embossed or textured glass may not hold the flowers well.
🌸 How to Press Flowers at Home (Optional DIY Step)
Step 1: Pick the Right Flowers
Choose flowers with flatter petals—like daisies, pansies, or wildflowers. Avoid thick or moist flowers like succulents.
Step 2: Dry and Press
- Place flowers between parchment paper or coffee filters.
- Insert them into a heavy book (you can layer several).
- Add more books on top for added weight.
- Leave them for 7–10 days until fully pressed and dry.
Pro Tip: Label your book with the flower types and date for future crafting sessions.
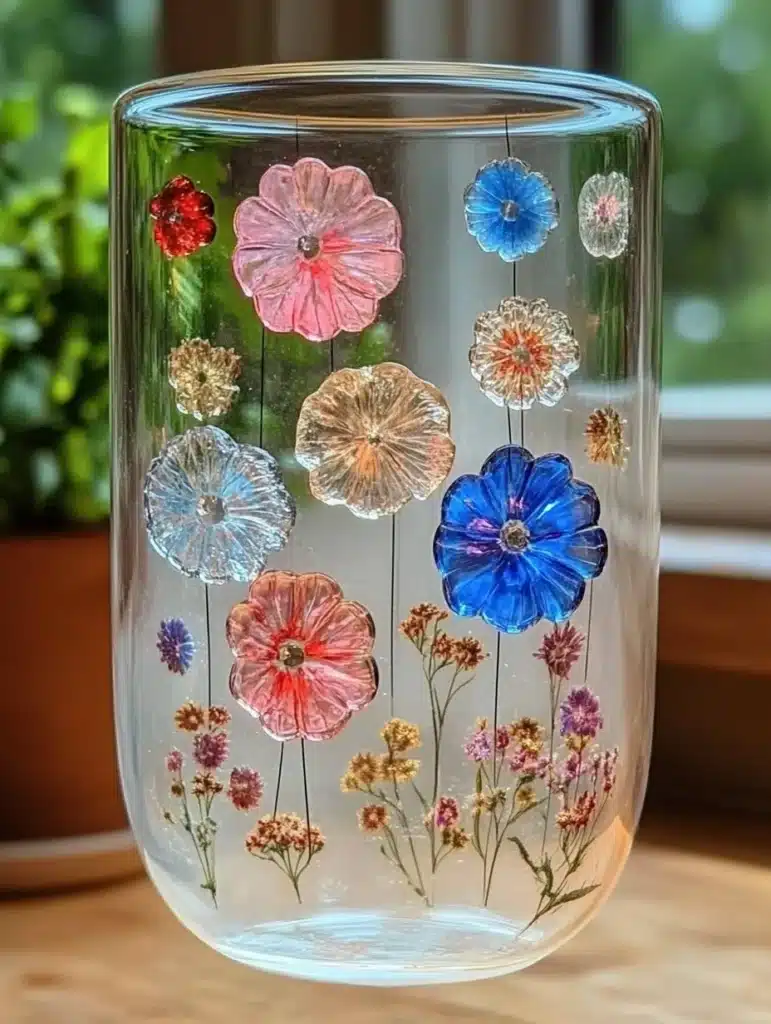
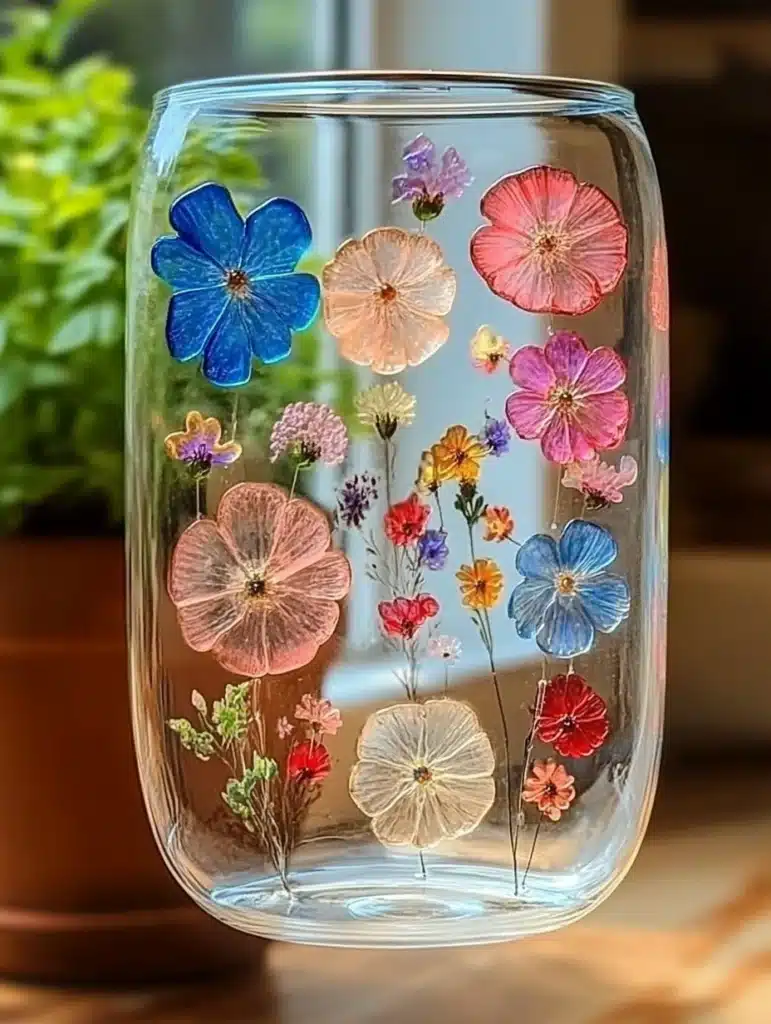
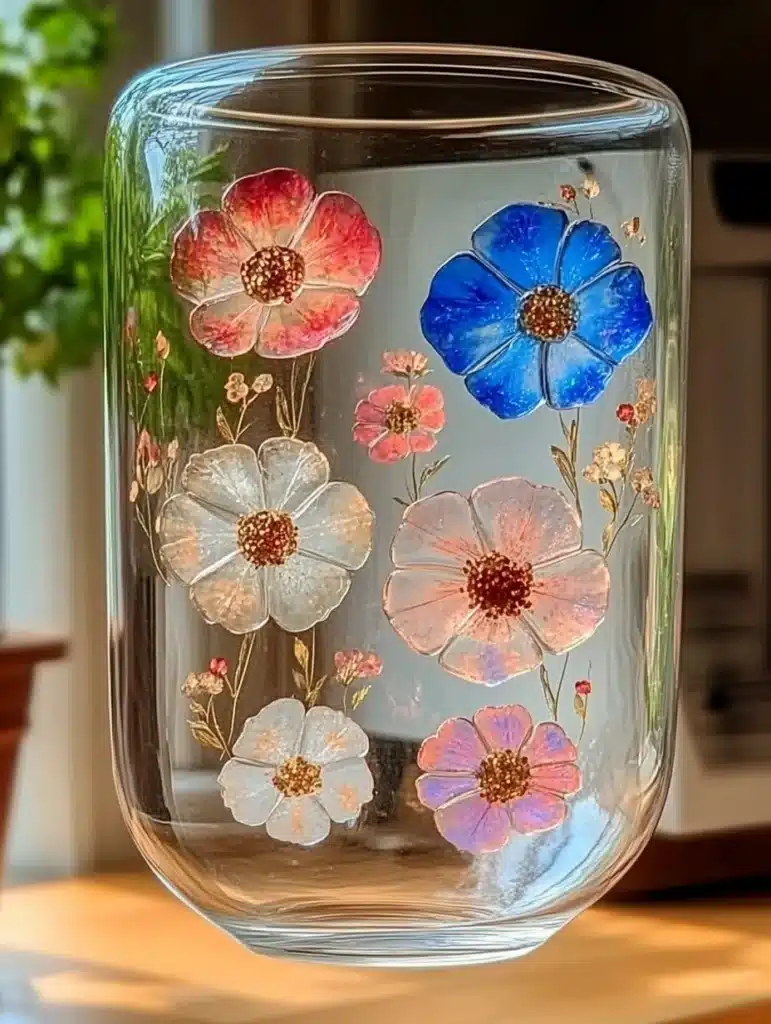
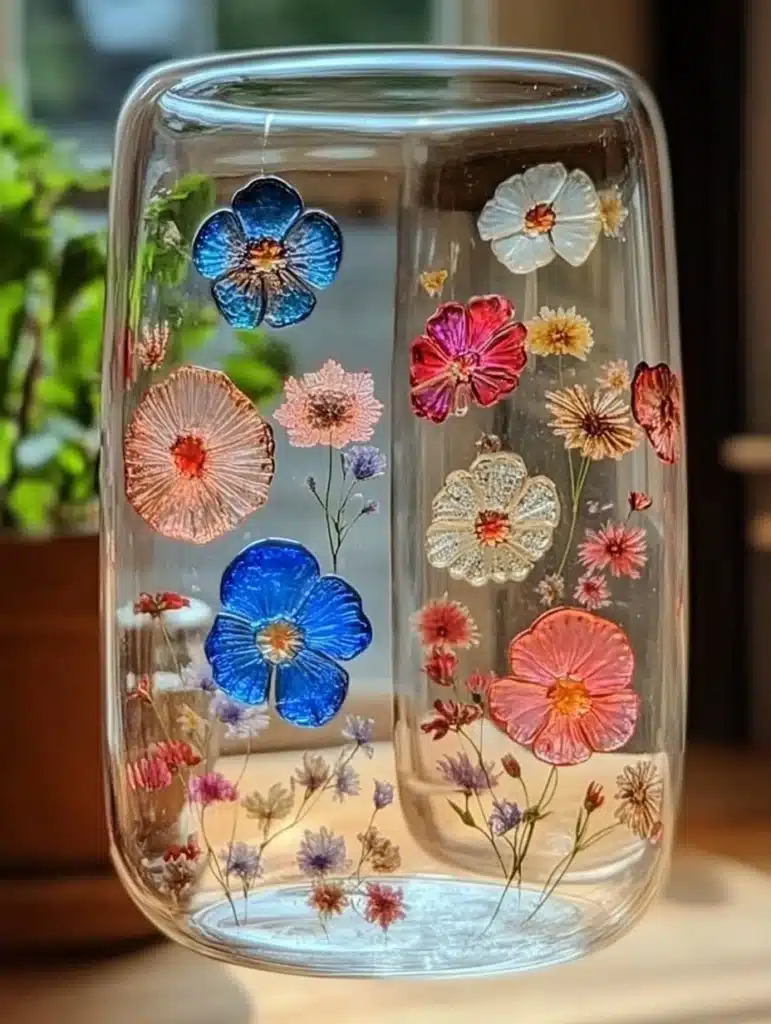
🖌️ Step-by-Step Instructions for Your DIY Pressed Flower Vase
Step 1: Prepare the Vase
Ensure your glass vase or jar is clean and dry. Wipe away fingerprints and oils with rubbing alcohol or glass cleaner.
Step 2: Plan Your Flower Layout
Lay your pressed flowers beside the vase. Arrange them in the pattern you’d like to use—horizontally, diagonally, scattered, or wrapped.
Step 3: Apply Glue
Dip your foam brush into Mod Podge and apply a thin layer onto the section of the vase where you’ll place a flower.
Step 4: Place the Pressed Flowers
Using tweezers or your fingers, gently press the flower into the glued area. Smooth it out gently to remove any air bubbles.
Repeat this step until all your flowers are placed to your satisfaction.
Step 5: Seal the Design
After the flowers are dry (about 10–15 minutes), apply another layer of Mod Podge over them to seal them in. Use gentle strokes.
Optional: For a more finished, glossy look, apply a second sealing layer after the first one dries completely.
Step 6: Optional Acrylic Spray
For added durability and water resistance, spray the finished vase with a clear acrylic sealer. Let dry thoroughly in a well-ventilated area.
🌟 Creative Variations to Try
1. Rustic Wildflower Look
Use small, naturally foraged blooms with twine tied around the jar neck for a cottagecore feel.
2. Elegant Monochrome
Stick to one flower color—like all lavender or white daisies—for a minimalist, chic vibe.
3. Seasonal Themes
- Spring: Cherry blossoms, lilac, and baby’s breath.
- Summer: Daisies, sunflowers, and buttercups.
- Autumn: Ferns, maple leaves, and warm-toned flowers.
- Winter: White blooms, silver accents, or dried baby’s breath.
4. Quote Vase
Add a short vinyl or hand-lettered quote over or alongside your flower design. Mod Podge works well over ink.
5. Glitter Accent
Mix a tiny bit of glitter into your top coat of glue for a subtle sparkle finish.
🎁 Gifting Ideas
- Tie a ribbon or burlap strip around the neck of the vase.
- Pair the vase with a handmade card or bundle of dried flowers.
- Use it as part of a larger DIY gift basket (include tea, bath salts, or homemade cookies).
This craft makes a beautiful bridal shower or baby shower favor too—just miniaturize it with small jars!
🧽 How to Care for Your Pressed Flower Vase
- Do not soak or submerge in water—wipe with a damp cloth.
- Avoid direct sunlight to prevent fading.
- Store in a cool, dry place if not in use.
- If using for fresh flowers, insert a smaller container with water inside the decorated vase to protect your design.
🌱 The Joy of Crafting with Nature
Crafting with pressed flowers connects you to nature and slows things down in the most wonderful way. It reminds us to notice the little things—how a petal curls, how color changes with time, how fragile beauty can be preserved. When you display your pressed flower vase, you’re bringing a bit of that serenity and mindfulness into your space.
Plus, this project is a great introduction to sustainable DIY practices. By using recycled jars, natural materials, and minimal waste, you’re making art that’s both beautiful and kind to the planet.
📝 Final Thoughts
This pressed flower vase project is more than just a fun weekend craft—it’s an expression of you. Every flower tells a story. Whether it’s one picked during a hike, a bloom from your garden, or petals from a bouquet you received, pressing them and displaying them in a vase preserves those moments.
So the next time you see a flower that makes you smile, remember: with a little glue and a bit of creativity, you can keep that smile blooming all year long.
Leave a Reply