


Easy Homemade Crunch Bars Recipe is the kind of treat that proves you do not need a long ingredient list or complicated steps to create something truly irresistible. These bars are rich, chocolatey, and perfectly crunchy, with a buttery caramel base that holds everything together. Every bite delivers that satisfying snap followed by smooth chocolate and a hint of salty balance.
This Easy Homemade Crunch Bars Recipe is ideal when you want a dessert that feels indulgent but comes together quickly. There is no baking involved, which makes it perfect for warm days, busy schedules, or last-minute gatherings. With simple pantry ingredients and a straightforward method, these bars are approachable for beginners and dependable for experienced home cooks.
I first made these bars when I needed a dessert that could be prepared ahead of time and transported easily. I wanted something familiar yet special, and the combination of caramel, crispy cereal, and chocolate felt like a guaranteed win. Once chilled and sliced, the bars held their shape beautifully. The first bite confirmed it. Since then, this Easy Homemade Crunch Bars Recipe has become a regular in my kitchen whenever I need a crowd-pleasing treat.
Why This Easy Homemade Crunch Bars Recipe Works
A Perfect Balance of Texture
The magic of this Easy Homemade Crunch Bars Recipe lies in contrast. The caramel base is soft and rich, while the crispy rice cereal adds lightness and crunch. The chocolate topping seals everything together with a smooth, glossy finish.
Each layer plays a role. Nothing feels heavy or overly sweet because the textures balance one another. This makes the bars easy to enjoy without feeling overwhelming.
No Baking, No Stress
Because this recipe does not require an oven, it removes a lot of the usual baking pressure. The caramel comes together quickly in the microwave or on the stovetop, and the rest is simply mixing, pressing, and chilling.
This Easy Homemade Crunch Bars Recipe is forgiving. There is no precise timing to worry about beyond chilling, and the results are consistently excellent.
Ingredients That Build Big Flavor
The Caramel Base
Sweetened condensed milk and butter form the foundation of this recipe. When heated together, they create a rich, creamy caramel that binds the crunchy elements without becoming hard or sticky.
A pinch of flaky sea salt balances the sweetness and adds depth. This small detail keeps the bars from tasting flat and enhances the chocolate later on.
The Crunch Layer
Crispy rice cereal provides the signature crunch. It stays light and airy while absorbing just enough caramel to hold together. Optional toasted nuts add extra texture and a deeper, nuttier flavor.
Toasting the nuts before mixing them in is worth the effort. It intensifies their flavor and prevents them from tasting raw inside the bars.
The Chocolate Coating
A generous layer of melted chocolate finishes the bars. Adding a small amount of coconut oil or butter helps the chocolate melt smoothly and set with a slight sheen.
This layer adds richness and creates a clean finish when slicing. It also helps the bars hold together once chilled.
Making the Caramel the Right Way
Microwave Method for Convenience
The microwave method is quick and efficient. Heating the condensed milk and butter in short intervals prevents scorching and allows you to control the texture.
Stirring between each interval ensures the mixture stays smooth and glossy. Once combined, the caramel should look thick but pourable.
Stovetop Option for Control
If you prefer the stovetop, a double boiler provides gentle, even heat. This method is especially useful if you want more control over the caramel’s consistency.
Whichever method you choose, patience is key. Gentle heat creates the best texture for this Easy Homemade Crunch Bars Recipe.
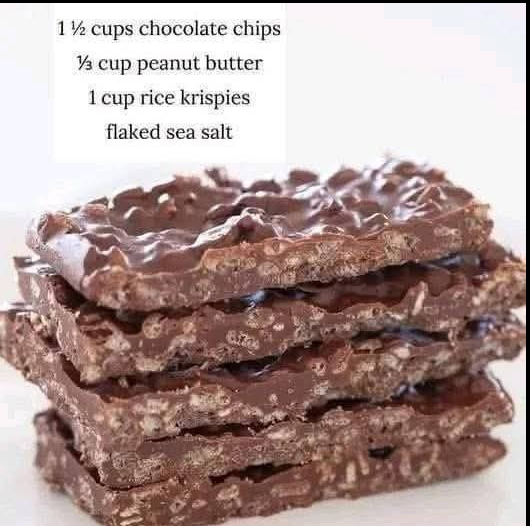
Ingredients
Equipment
Method
- Combine sweetened condensed milk and butter in a microwave-safe bowl. Heat in 30-second intervals, stirring until smooth. Stir in sea salt.
- Fold in crispy rice cereal and toasted nuts until evenly coated.
- Press mixture firmly into a parchment-lined 8×8-inch pan.
- Melt chocolate chips with coconut oil until smooth, then pour over the base.
- Chill 1–2 hours until firm, then slice into squares.
Nutrition
Notes
Tried this recipe?
Let us know how it was!Bringing the Crunch Together
Folding Without Crushing
When adding the crispy cereal and nuts, fold gently. This keeps the cereal intact and preserves the light crunch that defines these bars.
The goal is to coat everything evenly without breaking down the texture. A spatula works best for this step.
Pressing for Structure
Pressing the mixture firmly into the pan is essential. This step ensures the bars slice cleanly and do not crumble once set.
Using the back of a greased measuring cup helps apply even pressure across the surface. This small effort makes a big difference in the final result.
Adding the Chocolate Layer
Melting Smoothly
Melting the chocolate with a bit of fat prevents it from seizing and creates a smooth, spreadable texture. Heating slowly and stirring often keeps it glossy.
Once poured over the base, tilting the pan helps spread the chocolate evenly without disturbing the layer underneath.
Finishing with Sea Salt
A light sprinkle of flaky sea salt on top enhances the chocolate and balances the sweetness of the caramel. This step is optional, but it adds a refined finish that elevates the bars.
The salt also adds visual contrast, making the bars look as good as they taste.
Chilling and Slicing for Best Results
Proper Chilling Time
Allowing the bars to chill fully is crucial. This gives the caramel time to set and the chocolate time to firm up without becoming brittle.
One to two hours in the refrigerator is usually enough. The bars should feel solid to the touch before slicing.
Clean, Even Cuts
For clean slices, use a sharp knife and wipe it between cuts. This prevents the chocolate from cracking and keeps the edges neat.
Once sliced, the bars hold their shape well, making them easy to serve or package.
Serving and Storage Tips
How to Serve Easy Homemade Crunch Bars Recipe
These bars are perfect straight from the fridge or slightly softened at room temperature. They pair well with coffee, tea, or a cold glass of milk.
Because they are rich, smaller portions go a long way. This makes them ideal for dessert trays and gatherings.
Storage and Make-Ahead Options
Store the bars in an airtight container in the refrigerator for up to a week. They also freeze well, making them a great make-ahead dessert.
When freezing, separate layers with parchment paper to prevent sticking. Thaw in the refrigerator before serving.
Frequently Asked Questions
Can I skip the nuts?
Yes, the bars work perfectly without nuts.
Why press the mixture firmly?
Firm pressing prevents crumbly bars.
Can I use milk chocolate instead?
Yes, adjust sweetness to your preference.
Do these bars travel well?
Yes, especially when kept cool.
Can I double the recipe?
Yes, use a larger pan and press evenly.
Conclusion
Easy Homemade Crunch Bars Recipe delivers everything you want in a no-bake dessert: rich flavor, satisfying crunch, and simple preparation. With a buttery caramel base, crispy texture, and smooth chocolate topping, these bars feel indulgent without being complicated. Once you make them, they quickly become a go-to treat for any occasion.
Leave a Reply