


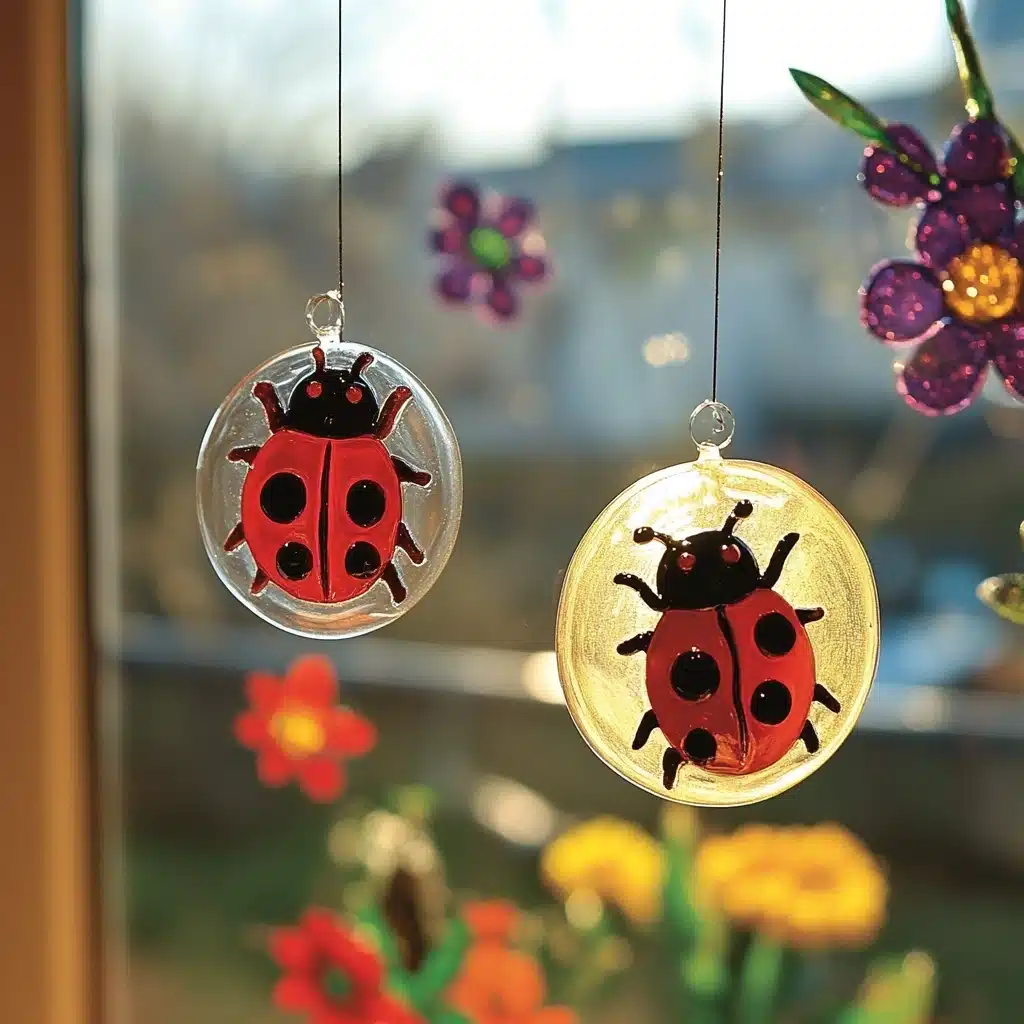
Rainy days don’t have to be dreary. In fact, they’re the perfect excuse to stay cozy indoors and unleash your creativity! One craft that brings instant charm and color to your home is DIY Ladybug Window Clings. Made using vibrant puffy paint and simple supplies, these clings are a wonderful way to keep kids engaged, decorate your space, and celebrate the simple magic of nature.
Whether you’re crafting with children, teaching a classroom, or just love whimsical window art, this project is sure to delight. Imagine colorful ladybugs dancing across your windows, catching the sunlight and making everyone smile — it’s pure, cheerful joy in cling form.
Why You’ll Love This Craft
DIY Ladybug Window Clings aren’t just adorable — they’re a total win for all ages. Here’s why you’ll love making them:
- Mess-Free & Indoor-Friendly: No need for outdoor space or messy cleanup. This project is ideal for kitchen tables or crafting corners.
- Affordable & Accessible: With just a few basic supplies like puffy paint and freezer bags, you can get started today.
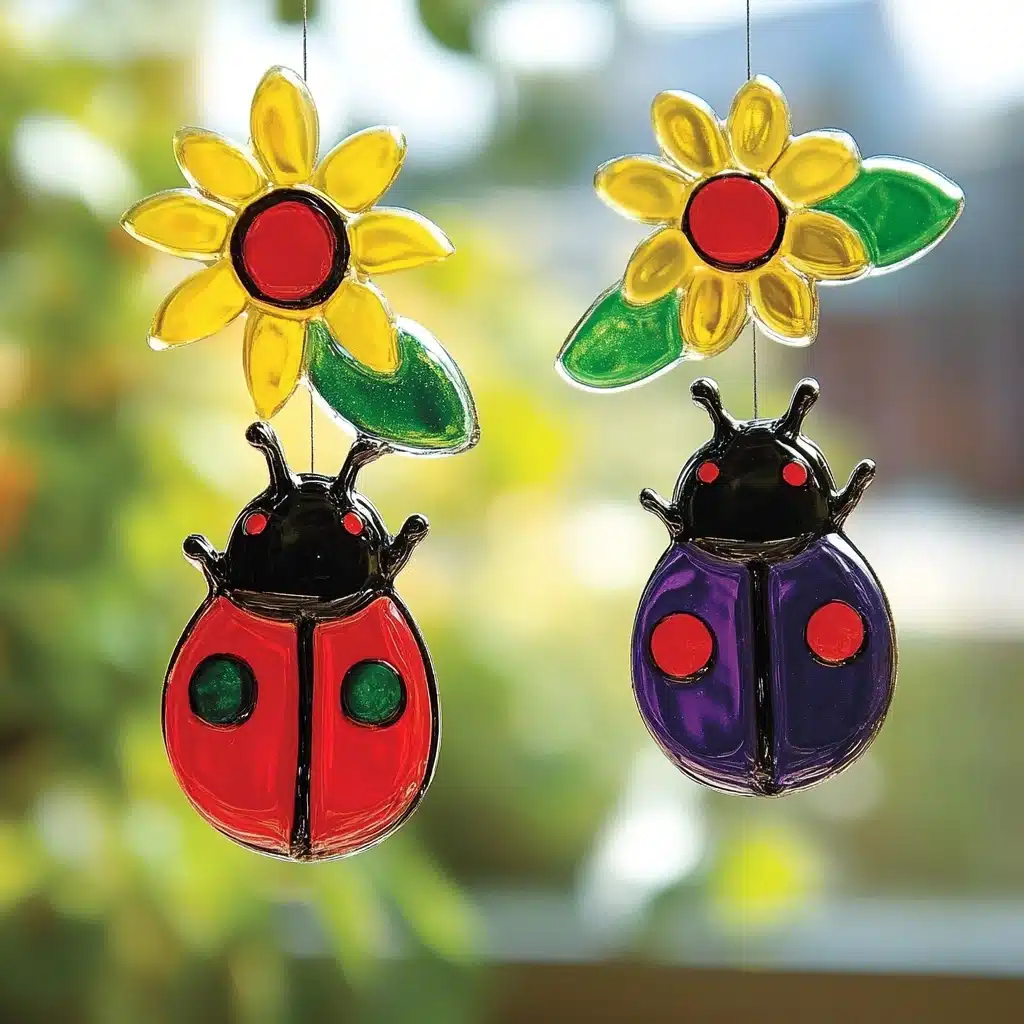
- Customizable: Pick any colors or patterns for your ladybugs — go classic red-and-black or experiment with rainbow wings!
- Reusable Decoration: Once dry, these clings can be moved from window to window — even season to season — with no damage or residue.
- Educational & Fun: This activity blends art and sensory play while also offering a great chance to talk about insects, nature, and seasons.
These clings also make thoughtful handmade gifts or decorations for spring parties, classrooms, and garden-themed celebrations.
Ingredients You’ll Need
These materials are easy to find in craft stores or online, and many might already be in your home:
- Tulip Puffy Paint – Black, red, white (or other favorite colors)
- Ladybug Template – Printed on 8.5″ x 11″ paper
- 1 Large Freezer Bag – Gallon-size works best
- Clear Tape – For securing the bag
Necessary Tools
- Scissors – For trimming the freezer bag
- Printer – To print your ladybug template
- Flat surface – Like a table or countertop for drying
- Toothpick or pin (optional) – For detail correction in wet paint
Ingredient Swaps and Additions
While the classic puffy paint is key, there’s still room to personalize:
- Alternative Paint Brands: If Tulip isn’t available, try Scribbles, Puffy 3D Paint, or any dimensional fabric paint.
- DIY Puffy Paint: Mix equal parts white glue, shaving cream, and food coloring for a homemade, temporary version (note: may not cling as well).
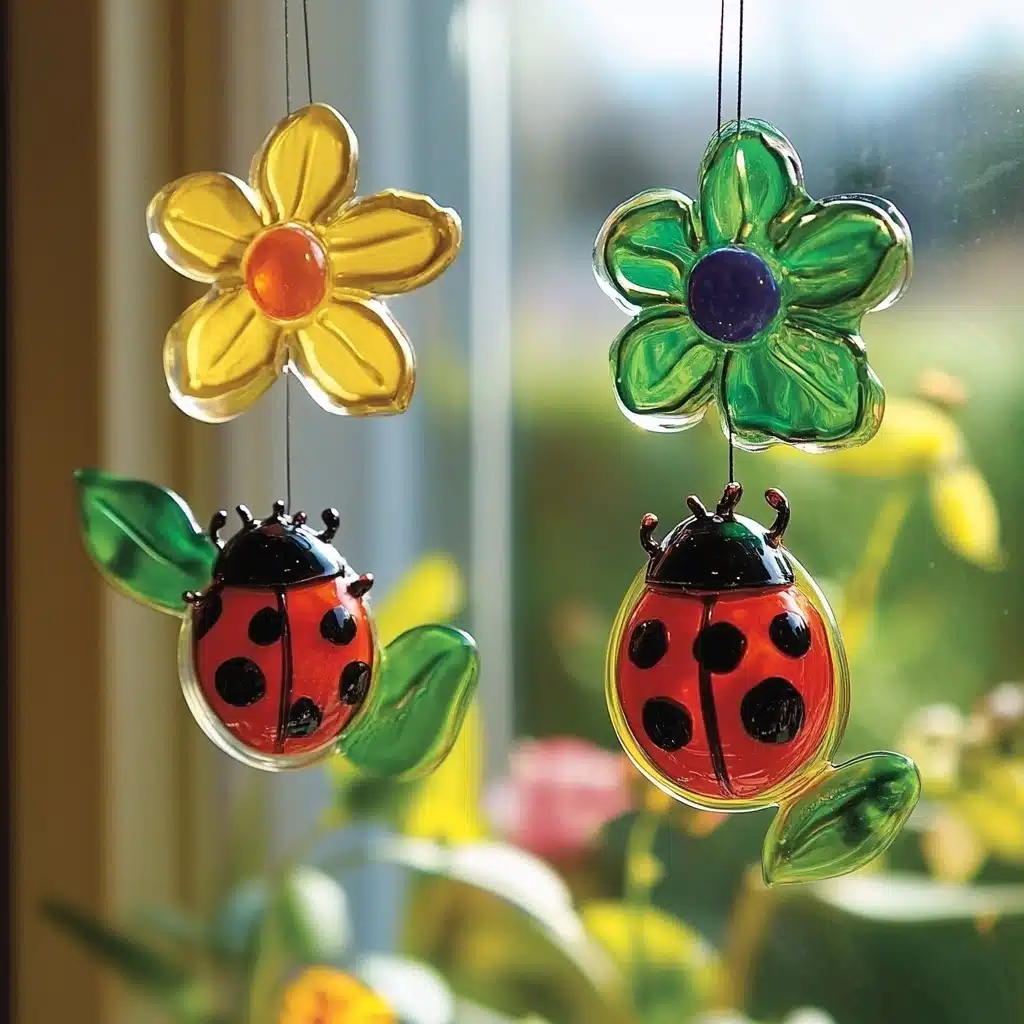
- Other Designs: Add bees, butterflies, or flowers for a whole garden scene!
- Add Glitter: Use glitter puffy paint or sprinkle glitter on wet paint for sparkle.
- Personalize Your Clings: Write names or positive words like “joy” or “shine” inside the wings.
Step-by-Step Instructions
1. Prepare Your Base
Start by cutting the zipper top off the freezer bag. Slide your printed ladybug template inside the bag and secure it on a flat surface with clear tape. This setup keeps the template visible but clean.
2. Outline with Puffy Paint
Use black puffy paint to trace the outline of the ladybug directly on the bag. Follow the lines carefully and work slowly for smooth shapes. Don’t worry if it’s not perfect — that’s part of the charm!
3. Fill in the Color
Now comes the fun part! Use red, white, or your favorite colors to fill in the ladybug’s wings, body, and spots. Be generous — thicker paint layers peel off better later. Add tiny white dots for eyes and accents if you’d like.
4. Let Dry Thoroughly
Leave your artwork to dry completely. Drying takes at least 24 hours, sometimes longer in humid weather. Keep the cling in a dust-free spot where it won’t be bumped.
5. Peel Gently
Once dry, slowly peel the painted shapes off the freezer bag. Take your time to avoid tears. If any edges curl, press them down when placing the cling.
6. Decorate Your Window
Clean the glass with a damp cloth before applying the clings. Gently press your ladybug onto the window — no adhesive needed. They’ll stick beautifully with static and paint texture.
7. Enjoy the View!
Your ladybug clings are now ready to brighten up any window, mirror, or glass jar. Watch them catch the light and add playful charm to your home.

Pro Tips for Success
- Use a Thick Paint Layer: Thin layers may tear during peeling. Aim for a generous application.
- Allow Full Drying Time: Don’t rush this step — even if the top feels dry, the underside may still be tacky.
- Keep Paint Tips Clean: Wipe the paint bottle tips regularly to avoid clogs and blobs.
- Use a Toothpick: Great for smoothing lines or popping air bubbles while the paint is wet.
- Seal Your Bag Edges: Tape down all edges of the bag to keep it flat and still.
Serving Suggestions – Creative Ways to Display
Though not edible, your ladybug clings can still be “served” in fun ways:
- Create Window Stories: Add a flower garden, sun, and clouds using extra clings for a full scene.
- Jar Lanterns: Stick clings on glass jars with a flameless LED light inside for a glowing nightlight.
- Party Decor: Perfect for spring birthday parties or insect-themed classroom bulletin boards.
- Gift Toppers: Stick a ladybug cling to a gift tag or card as a bonus keepsake.
Storing and Reusing
- To Store: Gently place clings on wax paper or back inside a freezer bag for safekeeping.
- Avoid Folding: Keep them flat to preserve their shape.
- To Reuse: Clean the window and reapply. They should stick again if stored properly.
- Do Not Heat: These are for cool surfaces only — avoid sunlight exposure that may melt or fade the paint.
Nutritional Information
As this is a craft project and not food, it has no nutritional value. However, here’s a fun learning benefit breakdown:
- Motor Skills: Painting and peeling improve fine motor coordination.
- Sensory Play: Puffy paint provides a fun tactile experience.
- Creativity Boost: Designing colors and patterns fosters artistic expression.
- STEM Tie-In: Discuss insects, their role in ecosystems, and color science while crafting.
FAQs
1. Can I use regular paint instead of puffy paint?
No, regular paint doesn’t have the thickness or texture needed for clings. Puffy or dimensional paint is essential.
2. How long do the window clings last?
With gentle handling and proper storage, they can last several months or be reused each season.
3. Can I use a plastic sheet instead of a freezer bag?
Yes, clear plastic folders or transparency film also work well.
4. Are these clings safe for toddlers?
Yes, but always supervise young children due to small parts and paint. Avoid letting them chew or lick the clings.
5. My clings don’t stick — what should I do?
Make sure the window is clean and the cling has enough paint texture. If dry and smooth, moisten slightly with water to help it adhere.
Conclusion
DIY Ladybug Window Clings are more than just a craft — they’re a creative expression of joy, a learning moment, and a splash of color on a cloudy day. Whether you’re indoors with kids on a rainy afternoon or decorating for spring, this project offers easy, satisfying fun for all.
Ready to make your windows smile? Grab your puffy paints, pick your template, and let the ladybugs fly!
Leave a Reply