


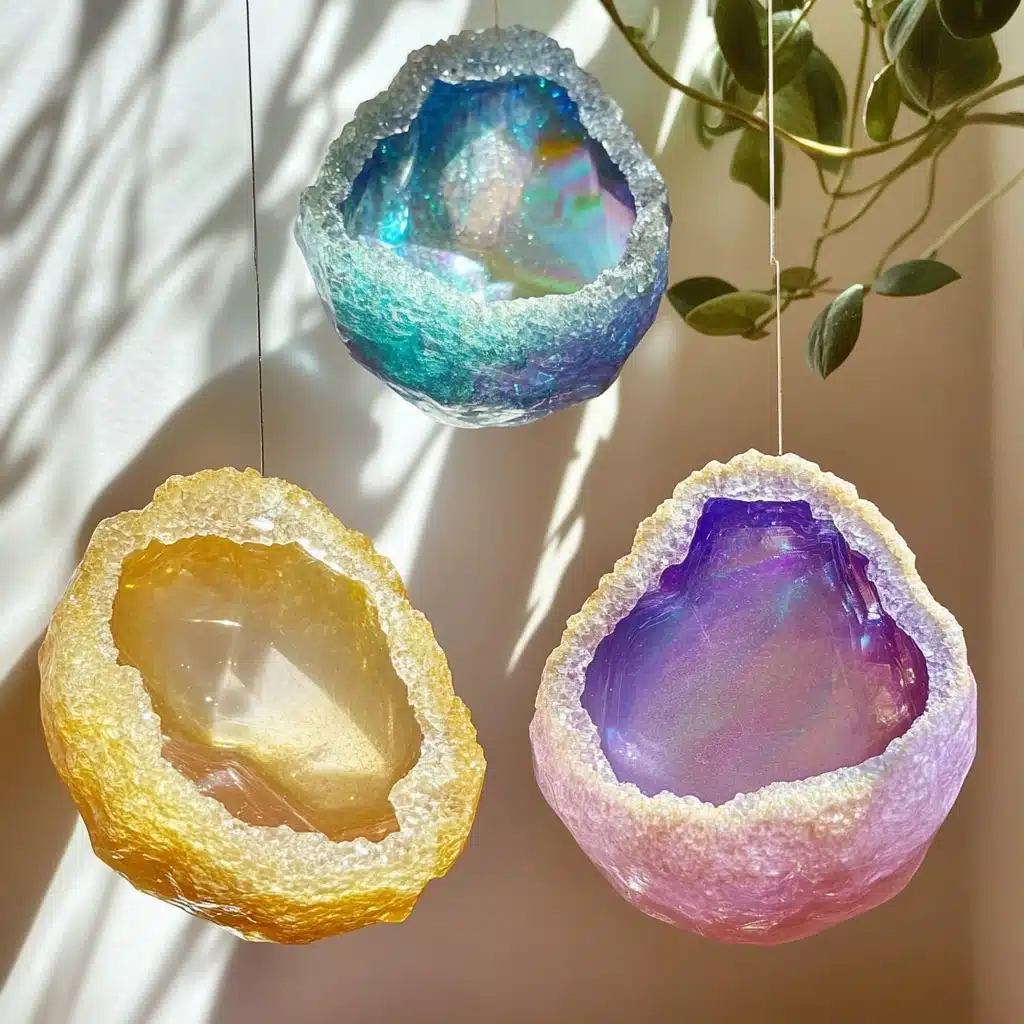
Ready to turn simple kitchen ingredients into dazzling crystal treasures? 🥚✨💎 Say hello to DIY egg geodes—a colorful science-meets-art project that transforms ordinary eggshells into glittering gems. With a bit of patience and a sprinkle of curiosity, you’ll create your own beautiful crystal geodes that are as fun to make as they are mesmerizing to look at.
This guide will walk you through every step of making egg geodes, provide helpful tips, creative variations, and explain the science behind the sparkle. Whether you’re a parent looking for an engaging project or a teacher introducing chemistry to curious minds, this activity is guaranteed to impress.
Why You’ll Love This DIY Egg Geodes Craft
This is not just a craft—it’s an experience. Here’s what makes it so wonderful:
- STEM Meets Art: Introduces kids to the basics of crystallization in a fun, hands-on way.
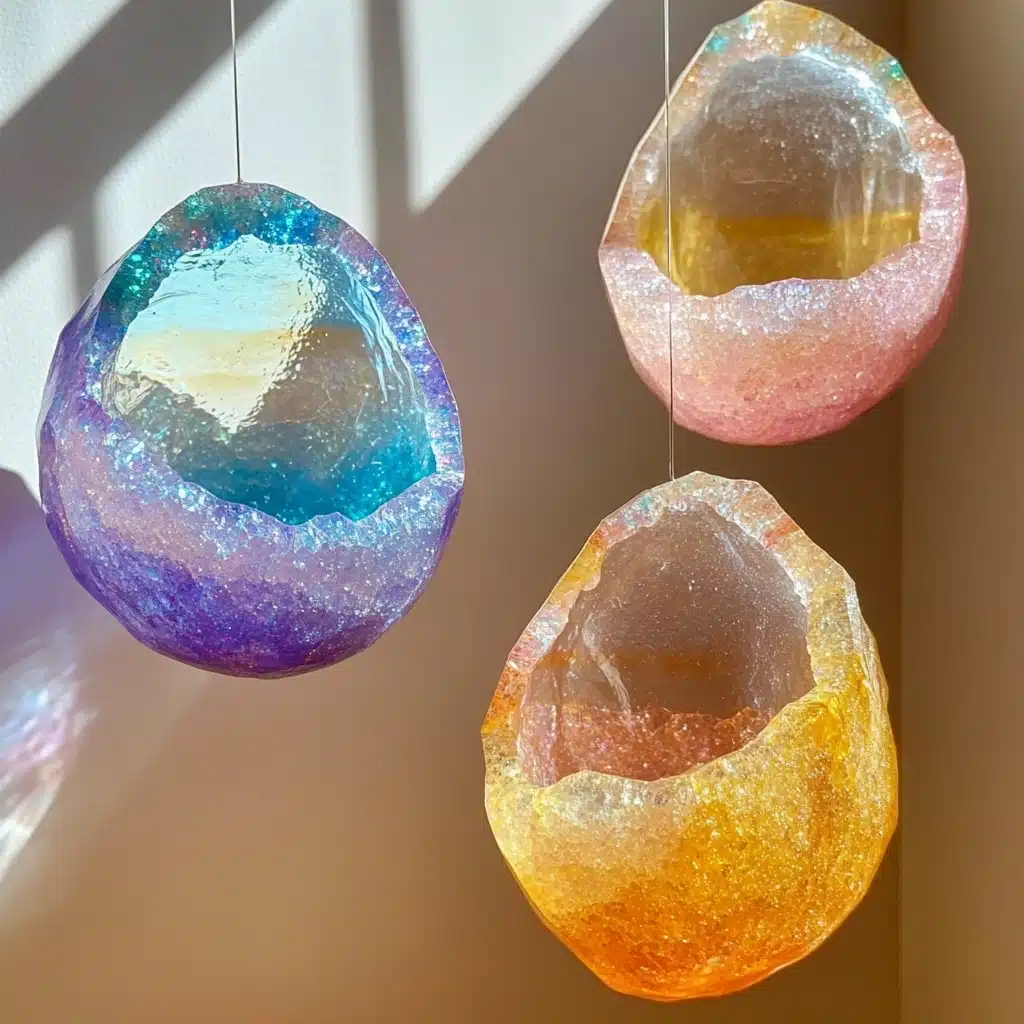
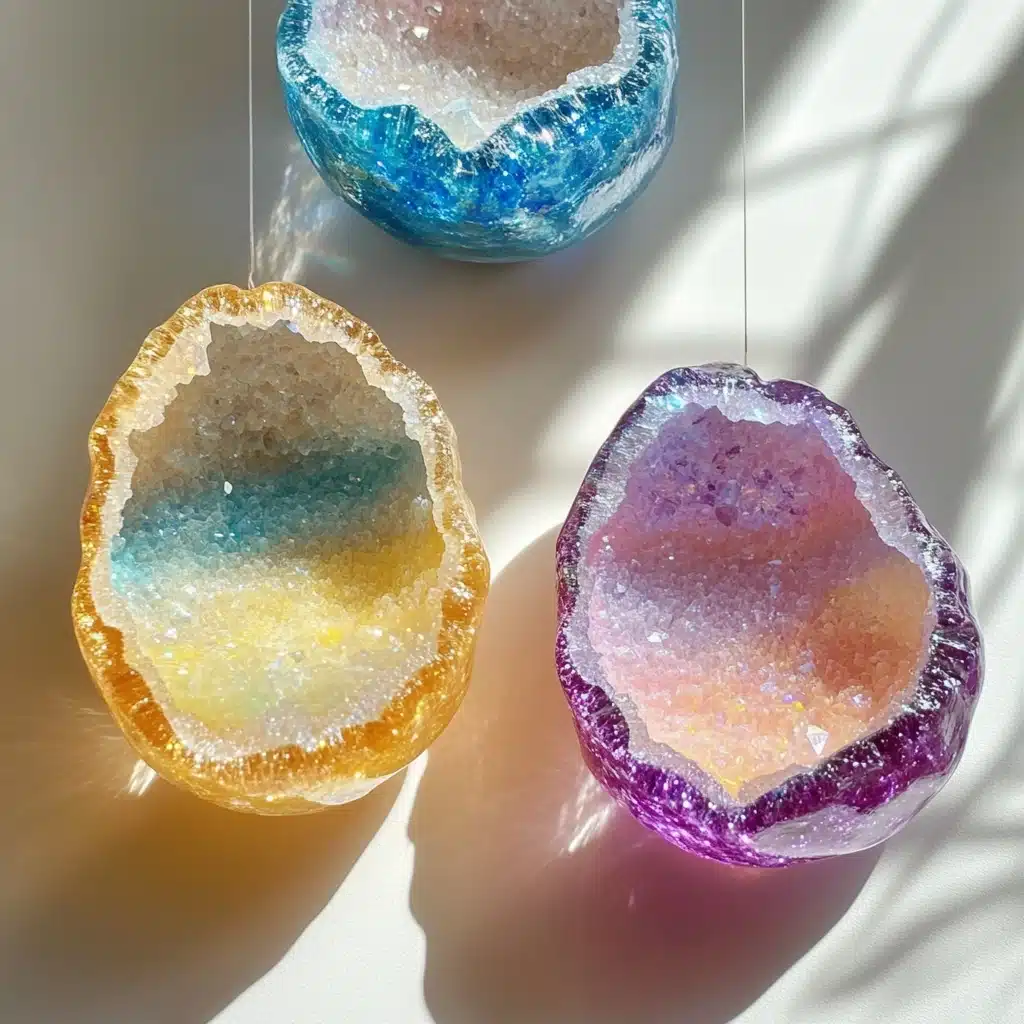
- Beautiful Results: Each geode is unique and breathtaking.
- Simple Ingredients: Everything you need is likely already at home.
- Educational and Fun: Perfect for school science fairs or at-home enrichment.
- Perfect for All Ages: With adult supervision, even young children can participate.
Whether you’re after an eye-catching decoration or a science experiment with sparkle, this project delivers.
Ingredients & Supplies
Here’s what you’ll need to make your own glittering egg geodes:
Ingredients:
- 5 large eggs
- 1 ¾ cups Borax powder
- 4 cups boiling water
- Food coloring (assorted colors)
Supplies:
- 5 plastic cups or heat-safe containers
- Spoon or whisk (for mixing borax)
- Pot or kettle (to boil water)
- Tongs or a spoon (for placing/removing eggshells)
- Paper towels (for drying eggs)
Optional: Use glitter, metallic food coloring, or glow-in-the-dark pigments for extra flair!

Step-by-Step Instructions
Step 1: Prepare the Eggshells
Gently crack each egg lengthwise, aiming for two symmetrical halves. Discard the contents or set aside for a tasty scramble. Rinse the shells under warm water, removing the inner membrane. Let them dry completely on a paper towel.
Step 2: Boil and Mix the Borax Solution
Bring 4 cups of water to a rolling boil. Carefully add 1 ¾ cups of Borax powder to the boiling water, stirring until mostly dissolved. It’s okay if a small amount remains undissolved at the bottom.
Step 3: Divide the Solution
Pour about ¾ cup of the Borax solution into each plastic cup. Quickly add food coloring to each cup and stir to combine. Use different colors for variety—blue, red, green, and purple work beautifully.
Step 4: Place the Eggshells
Gently place one clean, dry eggshell half into each cup, open side up. The shell should float or rest slightly submerged in the hot liquid. Avoid stirring or moving the cups once the shells are placed.
Step 5: Let Crystals Grow
Set the cups in a safe, undisturbed location and allow them to sit overnight—or for 24 to 48 hours for larger crystals. The longer they sit, the more dramatic the growth.
Step 6: Reveal Your Geodes
Carefully remove each eggshell using a spoon or tongs. Set them on paper towels or a rack to dry completely. Once dry, you’ll see stunning crystal formations sparkling inside the shells.
The Science Behind Egg Geodes
What’s really happening inside that cup? This craft demonstrates a basic concept of crystallization:
- Saturated Solution: Boiling water allows more Borax to dissolve than cold water.
- Cooling and Settling: As the solution cools, it can’t hold as much Borax, so crystals begin to form.
- Crystal Growth: The inner surface of the eggshell acts as a base for the crystals to grow on, creating the geode-like effect.
This simple experiment introduces children to scientific observation, hypotheses, and hands-on learning.
Creative Variations and Customizations
Take your egg geodes to the next level with these fun twists:
- Metallic Crystals: Use metallic or pearlized food coloring for a rich, luminous finish.
- Layered Geodes: Add multiple food coloring drops over time for ombre or rainbow effects.
- Glitter Geodes: Sprinkle in a pinch of fine glitter before placing the eggshell.
- Glow-in-the-Dark: Add glow powder to the Borax solution for a magical nightlight look.
- Themed Sets: Create geodes that match holidays—reds and greens for Christmas, pastels for Easter.
Safety Tips
- Always supervise children when using boiling water.
- Do not eat any part of the Borax solution or finished geodes.
- Use plastic containers to reduce the risk of breakage.
- Store the geodes out of reach of young children.
Practical Uses for Egg Geodes
Aside from being just plain cool, egg geodes can be used in multiple ways:
- Educational Displays: Perfect for school projects or science fair presentations.
- Home Decor: Add to a decorative bowl or shelf.
- Gifts: Wrap in tissue paper and give as handmade treasures.
- Party Crafts: Host a geode-making station at kids’ science-themed parties.
They’re not just pretty—they’re impressive conversation starters too!
FAQs
Q: Can I use something other than Borax?
A: Borax works best for large, quick-growing crystals. You can try alum or Epsom salt, but results may vary.
Q: How long do the geodes last?
A: If stored in a dry location, they can last indefinitely as decorative pieces.
Q: What if my crystals don’t form?
A: Try using hotter water or increasing the Borax amount. Make sure the solution is saturated.
Q: Can I reuse the leftover Borax solution?
A: Yes! Reheat it and top it off with more hot water and Borax as needed.
Q: Can I color the inside of the eggshells beforehand?
A: Yes! Painting the shells before crystal growth adds extra color dimension.
Conclusion: Science Has Never Looked So Beautiful
Creating egg geodes is a perfect blend of chemistry, creativity, and pure fun. Watching the crystals form day by day is an awe-inspiring reminder of the magic hidden in everyday materials. Whether you’re looking to teach, create, or just spend a crafty afternoon, this project offers excitement, discovery, and dazzling results.
So crack open some eggs, gather your colors, and let the crystal magic begin! 💎
Leave a Reply