


Introduction: Bring Nature’s Light Into Your Living Space
There’s something truly magical about the way sunlight dances through colorful glass, casting vibrant, shifting patterns across your walls. Imagine capturing that enchanting beauty—only this time, you create it yourself. DIY Bioplastic Suncatchers are a delightful blend of nature, science, and art that lets you bring a splash of color and joy into your home using simple, eco-friendly materials.
Whether you’re a seasoned crafter, a curious beginner, or a family looking for a wholesome activity, these suncatchers are the perfect project to brighten any room with jelly-like translucent colors. Plus, you get the satisfaction of making something beautiful and sustainable from scratch!
In this post, you’ll learn everything about how to make bioplastic suncatchers—from the easy-to-find ingredients and essential tools to creative tips that ensure your project shines. Ready to fill your windows with light and color? Let’s dive in.
Why You’ll Love This DIY Bioplastic Suncatcher Project
What makes these DIY bioplastic suncatchers so special isn’t just their charming, colorful appearance. It’s the combination of simplicity, sustainability, and creativity wrapped in one satisfying craft. Unlike conventional suncatchers made from glass or plastic, bioplastic suncatchers are made from natural ingredients, making them a more environmentally friendly choice.
You don’t need fancy tools or expensive supplies — just a few pantry staples and a little patience. Plus, the process is hands-on and fun, giving kids and adults alike a wonderful sensory experience that combines art and science.
These suncatchers:
- Promote eco-conscious crafting by using biodegradable ingredients
- Offer endless customization with colors, shapes, and sizes
- Double as an educational activity to explain the science behind plastics and sustainability
- Brighten any space with a natural, soft glow that’s perfect for spring and summer vibes
- Make charming homemade gifts for friends and family
So if you’re looking to create something meaningful, beautiful, and gentle on the planet, this project will delight and inspire you.
Ingredients: What You’ll Need for Your Bioplastic Suncatchers
To get started, gather the following simple ingredients. These are affordable, non-toxic, and easy to find in most kitchens or grocery stores:
- ½ cup water — acts as the liquid base
- 2 tablespoons cornstarch — thickens the mixture and gives it structure
- 2 tablespoons white vinegar — helps bind the mixture and adds flexibility
- Food coloring (optional) — for vibrant hues or soft pastels
- Parchment paper or silicone molds — for shaping and drying your suncatchers
Necessary Tools: What You’ll Use in This Craft
Along with your ingredients, these tools will make your crafting process smooth and enjoyable:
- Small saucepan or pot (for heating the mixture)
- Whisk or spoon (for stirring)
- Measuring cups and spoons
- Small baking tray or silicone molds (to shape and dry your suncatchers)
- Oven or a warm, dry spot for air drying
- String, ribbon, or thin wire (to hang your finished suncatchers)
Ingredient Swaps and Additions: Customize Your Suncatchers
Feel free to experiment with your bioplastic recipe to suit your style and materials at hand:
- Arrowroot powder or tapioca starch can substitute cornstarch for a different texture or if you prefer gluten-free alternatives.
- Lemon juice can replace vinegar, but keep in mind it might add a slight scent and less flexibility.
- Natural colorants like beet juice, spinach juice, or turmeric can replace food coloring for an organic touch.
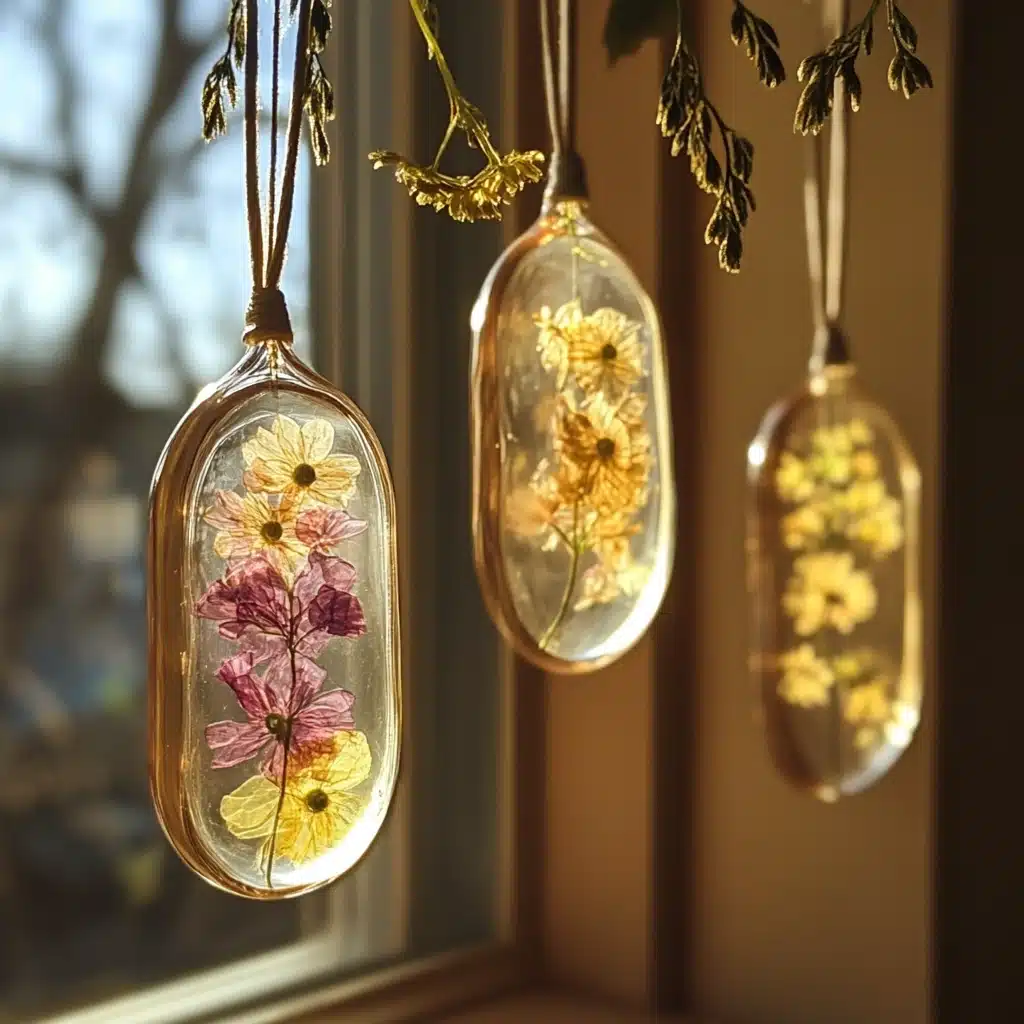
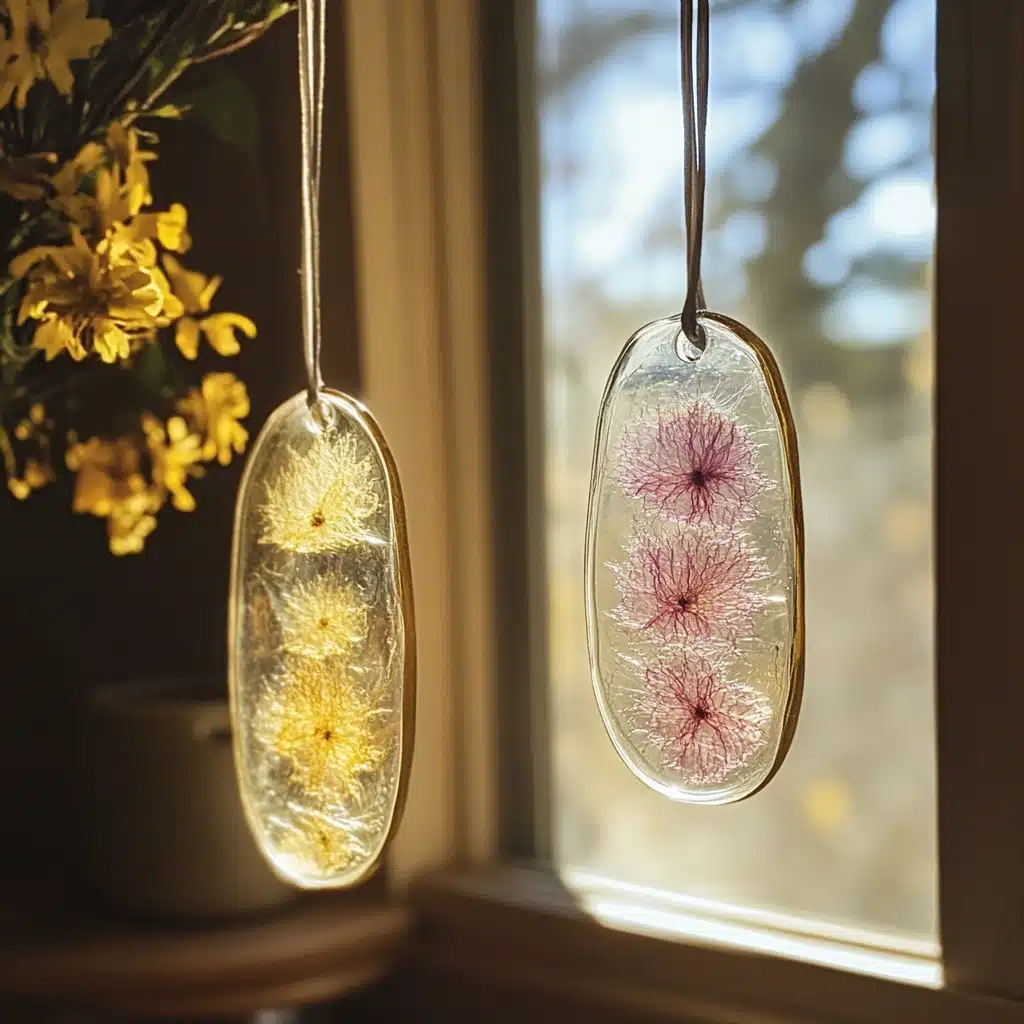
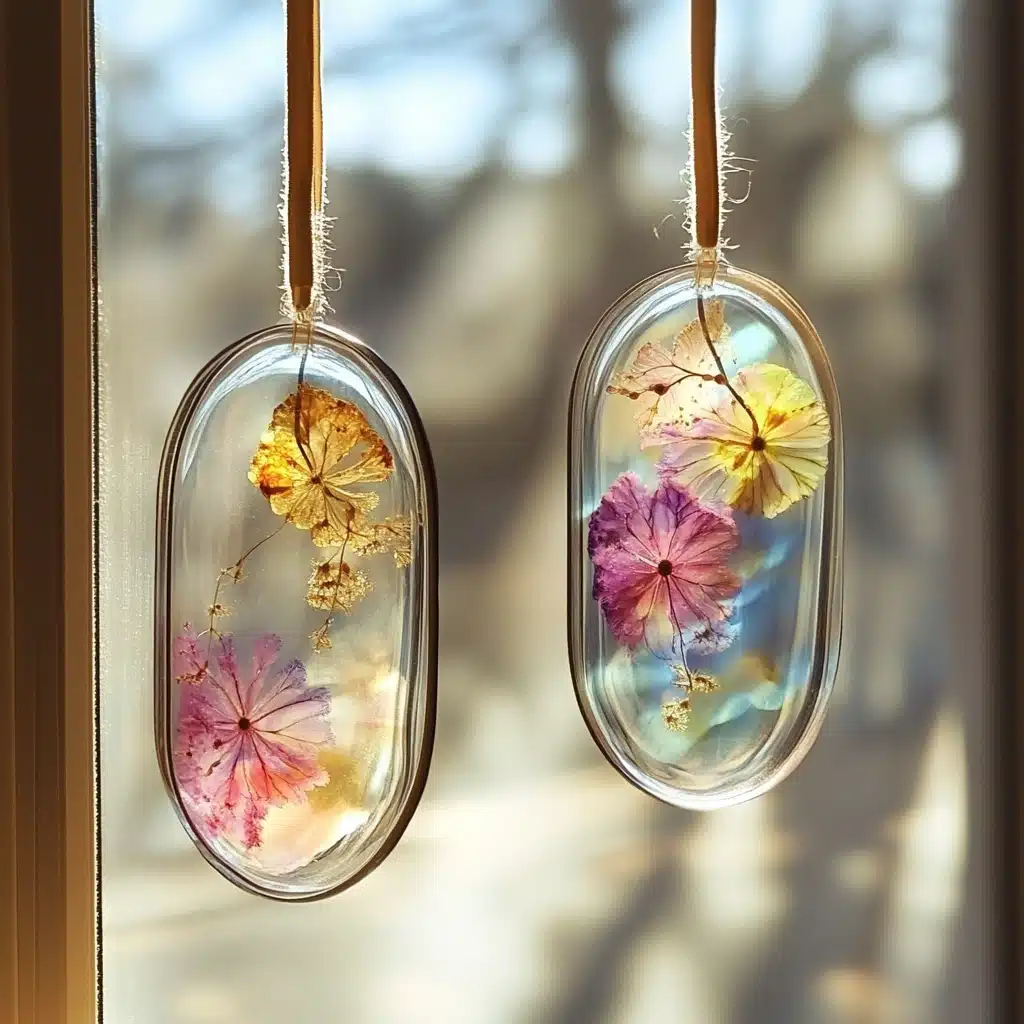
- Add glitter or small pressed flowers to embed inside the suncatcher for extra sparkle and natural beauty.
- Use cookie cutters or molds of different shapes to create stars, hearts, leaves, or any design you love.
Step-by-Step Instructions: How to Make Your DIY Bioplastic Suncatchers
Step 1: Mix Your Ingredients
In your saucepan, combine ½ cup water, 2 tablespoons cornstarch, and 2 tablespoons white vinegar. Whisk well until the mixture is smooth and lump-free.
Step 2: Heat and Stir
Place the saucepan over low-medium heat. Stir continuously to prevent lumps and burning. The mixture will start to thicken and become clear and gel-like—this usually takes about 5-7 minutes. Patience is key here!
Step 3: Add Color
Once your mixture reaches a thick, translucent consistency, remove it from heat. Add a few drops of food coloring, if desired, and stir until evenly blended.
Step 4: Shape Your Suncatchers
Pour the warm mixture onto a baking tray lined with parchment paper or into silicone molds. Use a spoon or spatula to spread it evenly or shape it to your liking.
Step 5: Dry Completely
Allow your bioplastic shapes to dry for 24 to 48 hours. You can either air dry them in a warm, dry place or speed up the process by placing them in a low oven (around 140°F/60°C) for a few hours. Make sure they’re fully dry and firm before handling.
Step 6: Add Hanging Loops
Once dried, gently peel your suncatchers off the parchment or molds. Use a small hole punch or create a hole with a toothpick near the edge, then thread string or ribbon through to hang them in your favorite sunny window.

Pro Tips for Success: Make Your Suncatchers Shine
- Stir continuously during heating to avoid lumps or burning—using a silicone spatula works well.
- If the mixture cools and thickens too much while pouring, gently reheat it to keep it pourable.
- Use thin, even layers to ensure faster drying and translucent beauty. Thick layers take much longer to dry and can stay tacky.
- If air drying, place suncatchers in a well-ventilated, warm spot to avoid cracking.
- Experiment with mixing multiple colors in swirls or layers for a marbled effect.
Serving Suggestions: Where to Display Your Bioplastic Suncatchers
- Hang them in sunny windows to create colorful light patterns in your home.
- Use them as charming ornaments for indoor plants or curtain rods.
- Attach to gift packages for a personal, eco-friendly touch.
- Create seasonal shapes (leaves, snowflakes, flowers) for festive décor.
- Use as teaching aids in classrooms to explain natural plastics and sustainability.
Storing Your Bioplastic Suncatchers
These suncatchers are best kept in dry, cool places when not hanging. Avoid exposure to high humidity or water, as moisture can soften the bioplastic over time. Store flat in a shallow box or hang gently in a sunny spot for continuous enjoyment.
Nutritional Information
Since these suncatchers are not edible, there is no nutritional value to report. Instead, think of them as a healthy, chemical-free alternative to traditional plastic crafts, helping reduce environmental impact.
FAQs About DIY Bioplastic Suncatchers
Q1: Can I use other types of vinegar?
Yes, white vinegar is best for clarity and consistency, but apple cider vinegar can work though it may tint your suncatcher slightly.
Q2: How long do bioplastic suncatchers last?
With proper care (kept dry and out of direct heat), they can last months or even years as decorative pieces.
Q3: Are these safe for kids?
Absolutely! All ingredients are non-toxic and safe, but adult supervision is recommended during heating.
Q4: Can I recycle or compost them?
These bioplastics are biodegradable under certain conditions but aren’t suitable for home composting. Check local compost guidelines for bioplastics.
Q5: What if my suncatchers crack?
Cracking can happen if the layer is too thick or dries unevenly. Try thinner layers and a warm, dry place for even drying next time.
Conclusion: Light Up Your World With Nature’s Glow
DIY Bioplastic Suncatchers are more than just pretty decorations—they’re a celebration of creativity, sustainability, and hands-on science. Making your own suncatchers allows you to connect with natural materials while producing vibrant, personalized art that literally brightens your home.
Give this project a try for a fun craft day, an educational activity, or a unique gift. With just a few simple ingredients and tools, you can create lasting beauty that captures the magic of sunlight—naturally.
Happy crafting and may your days be filled with color and light!
Leave a Reply