


Introduction
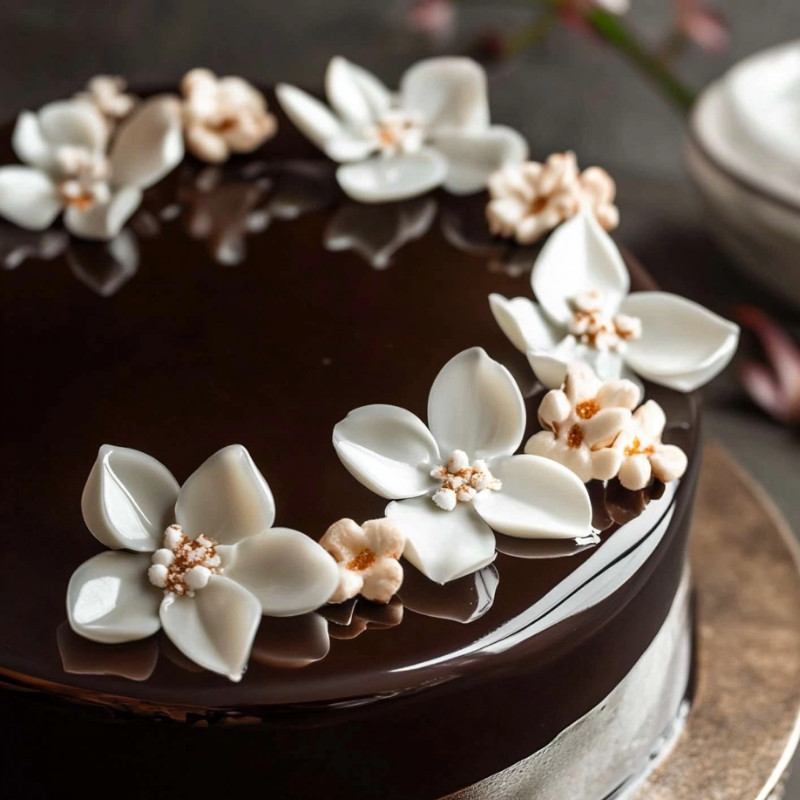
Chocolate Mirror Glaze Cake is a stunning dessert that not only tantalizes the taste buds but also delights the eyes. This luscious and glossy glaze gives your cake a professional finish, making it perfect for special occasions or when you want to impress your guests. The rich chocolate flavor combined with the reflective surface creates a sophisticated look that is sure to elevate any dessert table.
Ingredients
– 150 g dark chocolate (70% cocoa), finely chopped
– 60 g cocoa powder
– 150 g granulated sugar
– 150 ml water
– 100 ml heavy cream
– 10 g powdered gelatin
– 60 ml cold water
Prep Time
10 mins
Cook Time, Total Time, Yield
Cook Time: 15 mins
Total Time: 25 mins
Yield: 1 cake glaze
Directions
1. In a small bowl, mix the gelatin with 60 ml cold water and let it bloom for 5 minutes.
2. In a small saucepan, combine sugar, cocoa powder, and 150 ml water. Heat over medium heat while whisking until the sugar and cocoa dissolve completely.
3. Add the heavy cream and bring the mixture to a gentle simmer.
4. Remove from heat and stir in the bloomed gelatin until completely dissolved.
5. Place the chopped dark chocolate in a separate bowl and pour the hot mixture over it. Let it sit for 2 minutes before stirring until smooth.
6. Strain the glaze through a fine sieve to remove any lumps and ensure a silky texture.
7. Let the glaze cool to approximately 32°C before pouring over a chilled cake for the perfect mirror effect.
8. Pour in a circular motion from the center, ensuring even coverage. Let excess glaze drip off, then transfer the cake to a serving plate.
9. Allow the glaze to set for at least 1 hour before serving.
Enjoy your beautifully finished Chocolate Mirror Glaze Cake!
Detailed Directions and Instructions
Step 1: Bloom the Gelatin
In a small bowl, mix the gelatin with 60 ml cold water and let it bloom for 5 minutes.
Step 2: Prepare the Cocoa Mixture
In a small saucepan, combine sugar, cocoa powder, and 150 ml water. Heat over medium heat while whisking until the sugar and cocoa dissolve completely.
Step 3: Add Heavy Cream
Add the heavy cream to the saucepan and bring the mixture to a gentle simmer.
Step 4: Incorporate Gelatin
Remove the saucepan from heat and stir in the bloomed gelatin until completely dissolved.
Step 5: Combine with Dark Chocolate
Place the chopped dark chocolate in a separate bowl and pour the hot mixture over it. Allow it to sit for 2 minutes before stirring until smooth.
Step 6: Strain the Glaze
Strain the glaze through a fine sieve to remove any lumps, ensuring a silky texture.
Step 7: Cool the Glaze
Let the glaze cool to approximately 32°C before using it on a chilled cake for the perfect mirror effect.
Step 8: Pour the Glaze
Pour the glaze in a circular motion from the center of the cake, ensuring even coverage. Allow the excess glaze to drip off, then transfer the cake to a serving plate.
Step 9: Set the Glaze
Allow the glaze to set for at least 1 hour before serving.
Notes
Tip for Gelatin
Ensure that the gelatin is fully bloomed and dissolved for a smooth glaze.
Chocolate Quality
Use high-quality dark chocolate (70% cocoa) for the best flavor and shine.
Working Temperature
Make sure to keep the cake chilled before glazing, and take care to let the glaze cool to the right temperature before applying.
Serving Suggestions
This mirror glaze works beautifully on any type of cake, but is especially striking on chocolate or mousse cakes.
Storage Instructions
Room Temperature
Store the finished chocolate mirror glaze at room temperature if you plan to use it within a day. Ensure it is covered to prevent dust and debris from settling on it.
Refrigeration
If you need to store the glaze for a longer period, refrigerate it in an airtight container. It can be kept in the fridge for up to 5 days. Before using it again, gently reheat it to melt and reach the desired pouring consistency.
Serving Suggestions
Cake Pairing
Use the chocolate mirror glaze on a variety of cakes such as chocolate layer cakes, mousse cakes, or even a simple vanilla sponge.
Garnishing
Enhance your dessert by adding fresh berries, edible flowers, or chocolate shavings on top of the glaze for an attractive presentation.
Occasions
This glaze is perfect for special occasions like birthdays, anniversaries, or holidays, providing an impressive touch to your dessert spread.
Nutritional Information
Calories
Approximately 180 calories per serving (based on 1/12 of the glaze)
Fat Content
Total fat: 10 g
Saturated fat: 6 g
Carbohydrates
Total carbohydrates: 22 g
Sugars: 18 g
Protein
Protein: 2 g
Ingredient Substitutions
Dark Chocolate
You can use semi-sweet chocolate if you prefer a slightly sweeter glaze, or use dairy-free chocolate for a vegan option.
Heavy Cream
Substitute heavy cream with coconut cream or a non-dairy cream alternative for a lighter or vegan version.
Granulated Sugar
For a healthier option, use coconut sugar or a sugar substitute like stevia, keeping in mind that it may alter the texture and flavor slightly.
Gelatin
Replace powdered gelatin with agar-agar for a vegetarian or vegan alternative, adjusting the amount according to package instructions.
Cook Techniques
1. Blooming Gelatin
To ensure that gelatin activates properly, it’s essential to bloom it by soaking it in cold water for a few minutes. This process hydrates the gelatin, allowing it to dissolve smoothly when added to the warm mixture.
2. Dissolving Sugar and Cocoa
Combine sugar and cocoa powder with water in a saucepan over medium heat. Continuously whisk to ensure that both the sugar and cocoa dissolve completely, resulting in a uniform mixture without lumps.
3. Gentle Simmer
Once the sugar and cocoa are dissolved, add the heavy cream and bring the mixture to a gentle simmer. Heating it too quickly can cause the cream to scald, so monitor the temperature closely.
4. Incorporating Gelatin
After removing the saucepan from the heat, add the bloomed gelatin to the warm mixture and stir until fully dissolved. This step is crucial for achieving a smooth consistency in the glaze.
5. Chopping Chocolate
Finely chop the dark chocolate to ensure it melts evenly and smoothly when the hot mixture is poured over it. This helps create a glossy finish in the mirror glaze.
6. Straining the Glaze
Strain the chocolate glaze through a fine sieve to eliminate any possible lumps or undissolved particles. This step guarantees a silky and flawless glaze appearance.
7. Temperature for Pouring
Allow the glaze to cool to approximately 32°C (90°F) before pouring it over the cake. This temperature creates the ideal viscosity for a perfect mirror finish.
8. Pouring Technique
When pouring the glaze, use a circular motion starting from the center of the cake. This technique ensures even coverage and minimizes the risk of pooling or dripping on one side.
9. Setting the Glaze
After pouring, let the glaze set for at least one hour at room temperature. This allows the glaze to firm and maintain its glossy appearance, enhancing the overall look of the cake.
FAQ
Can I use milk chocolate instead of dark chocolate?
While you can use milk chocolate, it will result in a sweeter glaze with a lighter color. Dark chocolate is recommended for a deeper flavor and a richer gloss.
How can I store leftover glaze?
Leftover glaze can be stored in an airtight container in the refrigerator for up to a week. Reheat gently before using again.
What type of cake works best for mirror glaze?
Dense cakes such as mousse cakes, ganache cakes, or cheesecakes are ideal as they can support the weight of the glaze without collapsing.
Can I add color to the mirror glaze?
Yes, you can add food coloring to the glaze before pouring. Gel colors work best as they do not alter the consistency of the glaze.
Is it necessary to chill the cake before glazing?
Yes, chilling the cake helps set the glaze quickly and achieve a cleaner finish. A cold surface allows the glaze to maintain its mirror-like quality.
What should I do if my glaze is too thick?
If your glaze has thickened, you can reheat it gently while whisking to restore its desired consistency before pouring it over the cake.
Conclusion
The Chocolate Mirror Glaze Cake is a stunning dessert that not only tastes divine but also makes a striking visual statement. Its glossy finish is perfect for special occasions, creating a luxurious centerpiece that will impress your guests. With the right technique and ingredients, achieving that perfect mirror effect is within reach for every home baker.
Chocolate Raspberry Cake
Combine the rich chocolate glaze with a raspberry-flavored cake to create a delightful contrast of flavors, enhancing your dessert experience.
Coffee Chocolate Cake
Incorporate coffee into your cake recipe for a mocha-inspired variation that pairs beautifully with the dark chocolate glaze.
Salted Caramel Chocolate Cake
Add a layer of salted caramel between the cake layers for a sweet and salty treat, topped with the glossy chocolate mirror glaze.
Chocolate Hazelnut Cake
Incorporate ground hazelnuts into the cake batter and use hazelnut spread as a filling to complement the chocolate glaze.
Mint Chocolate Cake
Infuse your cake with mint essence for a refreshing twist, creating an enticing combination when coated with mirror glaze.
Vanilla Bean Chocolate Cake
Pair the rich chocolate glaze with a fluffy vanilla bean sponge cake for a classic yet elegant dessert option.
Spiced Chocolate Cake
Add warm spices like cinnamon and nutmeg to your cake batter for an aromatic twist that resonates with the glossy chocolate finish.
Leave a Reply