


Soft, Buttery & Irresistibly Cheesy!
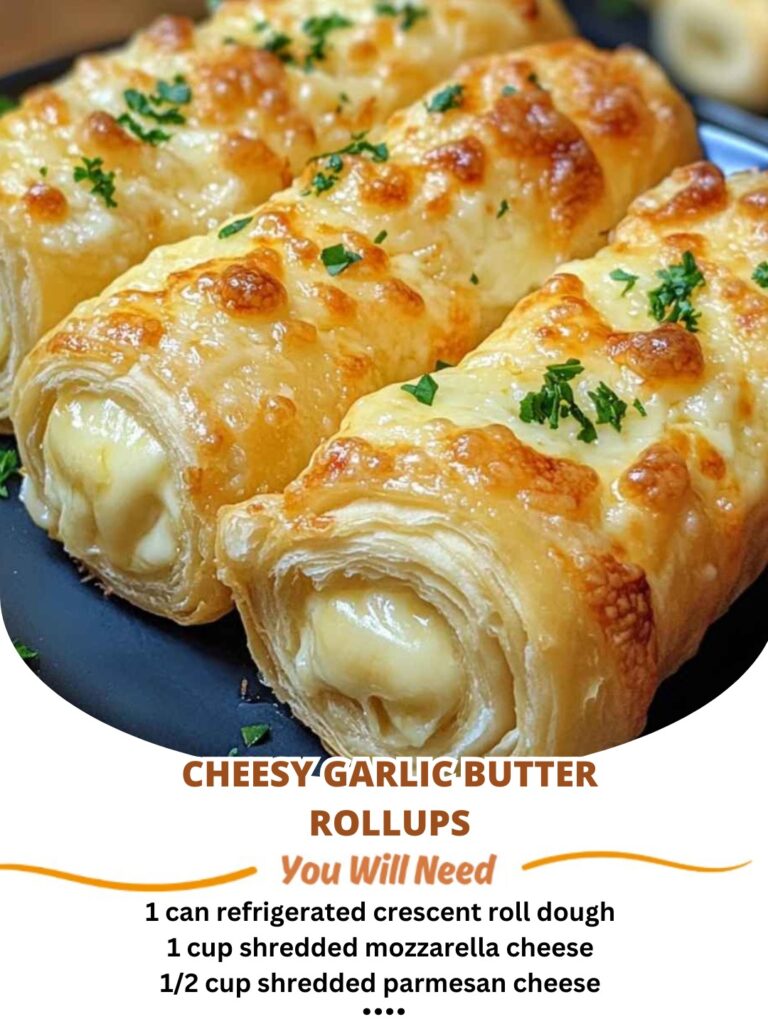
These Cheesy Garlic Butter Rollups are the definition of comfort food done right. Soft, golden bread wrapped around a gooey cheese filling and brushed with fragrant garlic butter—every bite is warm, savory, and completely addictive. They’re quick to prepare, easy to customize, and perfect for everything from casual snacking to party appetizers.
Whether you’re serving them alongside soup, pasta, or salad—or enjoying them straight from the oven—these rollups disappear fast and always earn rave reviews.
Cheesy Garlic Butter Rollups
Nutrition
Tried this recipe?
Let us know how it was!Why You’ll Love These Cheesy Rollups
- Ready in under 20 minutes
- Soft on the inside, golden on the outside
- Packed with garlic-butter flavor
- Perfect for parties, sides, or snacks
- Made with simple, easy-to-find ingredients
Ingredients You’ll Need
For the Rollups
- 1 tube (13.8 oz) refrigerated biscuit dough (or homemade dough)
- 4 tablespoons unsalted butter, melted
- 2 cloves garlic, minced (or ½ teaspoon garlic powder)
- 1 cup shredded mozzarella cheese
- ¼ cup grated Parmesan cheese
Optional Add-Ins
- ¼ teaspoon Italian seasoning
- ¼ teaspoon red pepper flakes
- Chopped fresh parsley, for garnish
Step-by-Step Instructions
Step 1: Preheat and Prepare
Preheat your oven to 375°F (190°C). Line a baking sheet with parchment paper or lightly grease it.
Step 2: Flatten the Dough
Separate the biscuit dough into individual pieces. Using a rolling pin, flatten each piece into a 4–5 inch circle.
Step 3: Make the Garlic Butter
In a small bowl, mix the melted butter with minced garlic. Stir in Italian seasoning and red pepper flakes if using.
Step 4: Assemble the Rollups
Brush each flattened biscuit with garlic butter, leaving a small border around the edges.
Sprinkle mozzarella and Parmesan evenly over the dough.
Roll each biscuit tightly into a log. Slice into 3–4 pieces to create bite-sized rollups.
Step 5: Bake to Perfection
Place rollups cut-side up on the baking sheet, spacing slightly apart. Brush tops with remaining garlic butter.
Bake for 12–15 minutes, or until golden brown and the cheese is melted and bubbly.
Step 6: Serve Warm
Garnish with fresh parsley if desired and serve immediately.
Tips for the Best Rollups
- Don’t overfill or the cheese may leak out
- Use low-moisture mozzarella for cleaner melting
- Keep rolls evenly sized for consistent baking
- Serve immediately for maximum gooeyness
Easy Variations
- Add pepperoni or cooked bacon bits
- Use cheddar, Monterey Jack, or provolone
- Brush with garlic butter again after baking
- Serve with marinara, ranch, or garlic dip
FAQs
Can I use pizza dough instead of biscuit dough?
Yes. Pizza dough works well but may need a slightly longer baking time.
Can these be made ahead of time?
They’re best fresh, but you can assemble them ahead and refrigerate for up to 8 hours before baking.
Can I freeze Cheesy Garlic Butter Rollups?
They can be frozen after baking. Reheat in the oven until warm and crispy.
What should I serve with these?
They pair perfectly with pasta dishes, soups, salads, or as a party appetizer.
How do I keep them soft?
Cover loosely with foil if reheating and avoid overbaking.
Conclusion
These Cheesy Garlic Butter Rollups are everything you want in a comfort-food bite—soft, buttery, cheesy, and full of garlic flavor. Easy enough for busy days yet impressive enough for entertaining, they’re a guaranteed crowd-pleaser no matter the occasion. Once you make them, they’ll quickly become a go-to favorite in your kitchen.
Leave a Reply