


Introduction
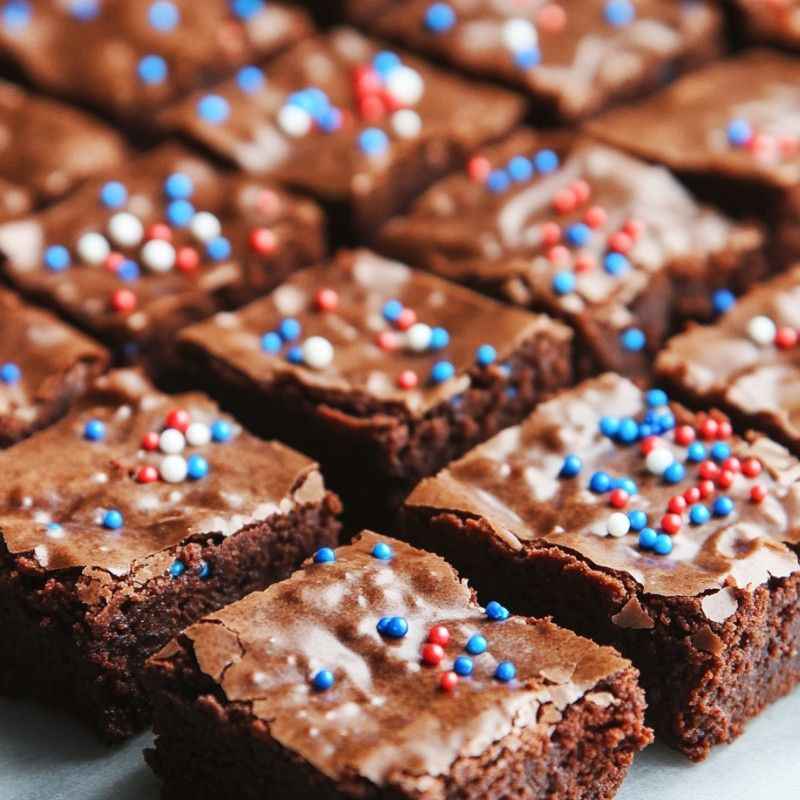
Celebrate Independence Day with a delicious twist on a classic dessert—4th of July brownies! These rich, fudgy brownies are adorned with festive red, white, and blue decorations, making them the perfect treat for any holiday gathering. Impress your friends and family this Fourth of July with these delightful sweet treats that are as easy to make as they are to share.
Detailed Ingredients with measures
– 200g dark chocolate, chopped
– 150g unsalted butter
– 200g granulated sugar
– 100g brown sugar
– 3 large eggs
– 1 tsp vanilla extract
– 120g all-purpose flour
– 30g cocoa powder
– 1/2 tsp salt
– 1/2 tsp baking powder
– 150g white chocolate chips
– 50g red and blue sprinkles
Prep Time
15 minutes
Cook Time, Total Time, Yield
Cook Time: 30 minutes
Total Time: 45 minutes
Yield: 12 brownies
Enjoy your baking and have a wonderful Fourth of July celebration!
Detailed Directions and Instructions
Step 1: Preheat Oven
Preheat the oven to 175°C (350°F) and line a 23cm x 23cm (9×9 inch) baking pan with parchment paper.
Step 2: Melt Chocolate and Butter
In a heatproof bowl, melt the dark chocolate and butter over a double boiler or in short intervals in the microwave, stirring until smooth.
Step 3: Combine Sugars
Add the granulated sugar and brown sugar to the melted chocolate mixture and stir well until combined.
Step 4: Add Eggs and Vanilla
Whisk in the eggs one at a time, followed by the vanilla extract, ensuring each egg is fully incorporated before adding the next.
Step 5: Mix Dry Ingredients
In a separate bowl, sift together the all-purpose flour, cocoa powder, salt, and baking powder.
Step 6: Combine Wet and Dry Mixtures
Fold the dry ingredients into the wet mixture until just combined. Be careful not to overmix.
Step 7: Add White Chocolate Chips
Stir in half of the white chocolate chips, ensuring they are evenly distributed throughout the batter.
Step 8: Pour Batter into Pan
Pour the batter into the prepared baking pan and spread it evenly with a spatula.
Step 9: Add Toppings
Sprinkle the remaining white chocolate chips and red and blue sprinkles on top of the brownie batter.
Step 10: Bake Brownies
Bake in the preheated oven for 25-30 minutes or until a toothpick inserted in the center comes out with a few moist crumbs.
Step 11: Cool and Cut
Allow the brownies to cool completely in the pan before lifting them out and cutting them into squares.
Notes
Note 1: Chocolate Quality
Use high-quality dark chocolate for a richer flavor.
Note 2: Storing Brownies
Store any leftovers in an airtight container at room temperature for up to 3 days.
Note 3: Customization
Feel free to customize the sprinkles or add nuts for added texture.
Note 4: Serve with Ice Cream
These brownies pair wonderfully with vanilla ice cream for a delicious dessert.
Note 5: Accurate Baking Time
Oven temperatures may vary, so keep an eye on the brownies during the last few minutes of baking.
Storage Instructions
Cooling and Storing
Once the brownies have cooled completely, cut them into squares and store them in an airtight container.
Refrigeration
For longer freshness, you can refrigerate the brownies. They will keep well for up to one week.
Freezing
If you want to store them for even longer, wrap individual brownie squares in plastic wrap and place them in a freezer-safe bag. They can be frozen for up to three months; simply thaw at room temperature when ready to serve.
Serving Suggestions
Presentation Ideas
Serve these festive brownies on a red, white, and blue platter for an eye-catching display at your 4th of July gathering.
Pairings
These brownies pair beautifully with whipped cream or vanilla ice cream. A scoop of ice cream on top can elevate the dessert experience.
Drizzle Options
Consider drizzling some melted chocolate or a berry sauce over the brownies for an extra touch of elegance.
Nutritional Information
Per Serving (1 brownie)
Calories: 250
Total Fat: 12g
Saturated Fat: 7g
Cholesterol: 80mg
Sodium: 100mg
Total Carbohydrates: 35g
Dietary Fiber: 2g
Sugars: 20g
Protein: 3g
Ingredient Substitutions
Butter Alternatives
For a dairy-free version, you can substitute unsalted butter with coconut oil or a plant-based butter alternative.
Chocolate Options
You can use milk chocolate or a dairy-free chocolate chip if dark chocolate is not available or if you prefer a sweeter taste.
Flour Variations
For a gluten-free option, replace all-purpose flour with a gluten-free flour blend.
Sweetener Adjustments
You may also use coconut sugar or a sugar substitute for a lower-sugar option, though this may slightly alter the texture and taste.
Cook techniques
Melting Chocolate
Use a double boiler or microwave to melt chocolate gently. If using a microwave, heat in short intervals and stir to prevent burning.
Mixing Ingredients
When combining wet and dry ingredients, use a folding technique to maintain the brownie’s fudgy texture. Overmixing can lead to cake-like brownies.
Baking
Check for doneness by inserting a toothpick in the center. Remove the brownies when there are a few moist crumbs clinging to the toothpick for the best texture.
Cooling
Allow the brownies to cool completely in the pan before cutting to achieve clean edges and prevent them from crumbling.
Decorating
Use red, white, and blue sprinkles for a festive look. Add them before baking to ensure they stick to the top of the brownie.
FAQ
Can I use milk chocolate instead of dark chocolate?
Yes, you can substitute milk chocolate, but the flavor will be sweeter and less intense.
How can I store the brownies?
Store the brownies in an airtight container at room temperature for up to 3 days or refrigerate for up to a week.
Can I freeze the brownies?
Yes, brownies can be frozen. Wrap them tightly in plastic wrap and then aluminum foil for up to 3 months. Thaw before serving.
Is it necessary to use parchment paper?
While not strictly necessary, parchment paper helps with easy removal and cleanup. It prevents the brownies from sticking to the pan.
Can I add nuts or other mix-ins?
Absolutely! Feel free to add chopped nuts, or other chocolate chips to enhance the flavor and texture of the brownies.
Conclusion
Celebrating the 4th of July with these decadent brownies is a delightful way to express your patriotism. Their rich, chocolatey goodness combined with festive decorations makes them a standout treat at any Independence Day gathering. Whether enjoyed with family or friends, these brownies are sure to leave a lasting impression and sweeten the holiday festivities.
Red Velvet Brownies
For a twist on classic brownies, try red velvet brownies! Use red food coloring in your brownie batter and top with a cream cheese frosting for a beautiful and delicious dessert.
Chocolate Mint Brownies
Incorporate refreshing mint by adding mint extract to the batter. Top the brownies with a layer of chocolate ganache and some crushed peppermint candies for a festive finish.
Peanut Butter Swirl Brownies
Add a ribbon of creamy peanut butter through the brownie batter for an irresistible combination. Swirling the peanut butter creates a marbled effect that’s not only eye-catching but also delicious.
Fruit Topped Brownies
Top your baked brownies with fresh strawberries, blueberries, and whipped cream for a light and fruity dessert that complements the rich chocolate flavors.
Nutty Brownies
Incorporate chopped nuts such as walnuts or pecans into your brownie batter. Their crunch adds texture and flavor that pairs beautifully with the fudgy base.
Cookies and Cream Brownies
Add crushed chocolate sandwich cookies into the brownie batter for an indulgent cookies and cream twist. Top with extra cookie pieces for added crunch and visual appeal.
Leave a Reply