


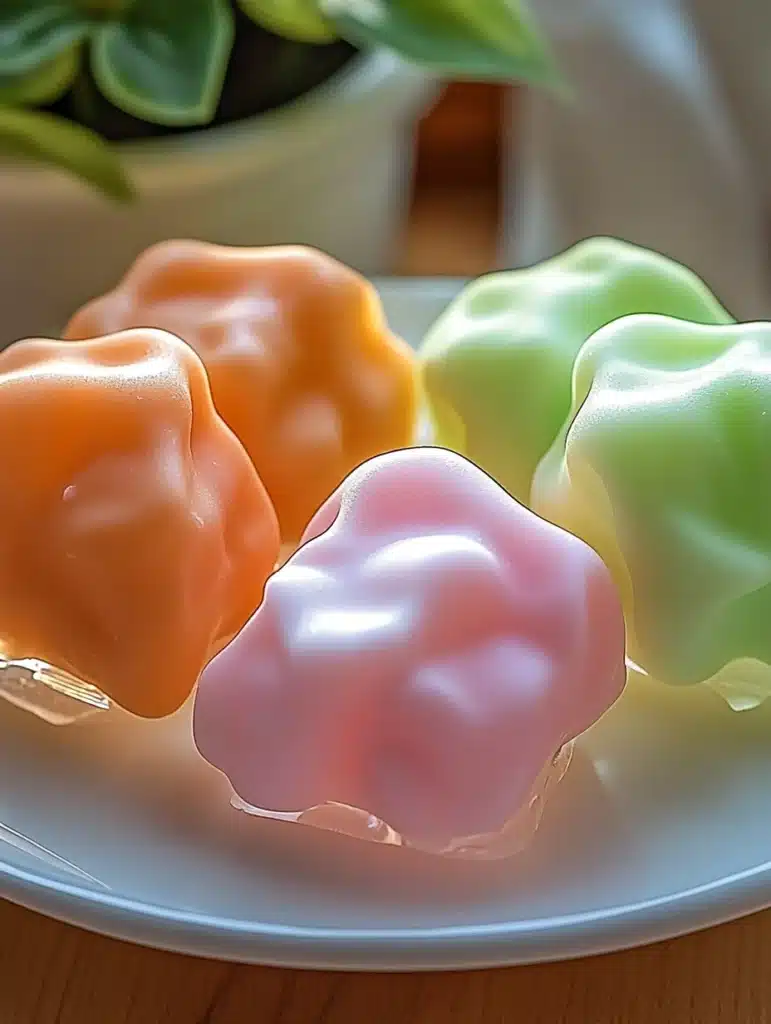
There’s something magical about saltwater taffy—the chewy texture, the sweet flavors, and the colorful variety make it a beloved treat for all ages. Making your own saltwater taffy at home is not only fun but also incredibly rewarding. With just a few simple ingredients and some elbow grease (literally—you’ll be pulling taffy!), you can create delicious, personalized candies perfect for any occasion.
In this comprehensive guide, we’ll walk you through the entire process of making homemade saltwater taffy rolls, from boiling sugar to pulling and wrapping your candy. Whether you’re a seasoned candy maker or trying it for the first time, you’ll find this guide easy to follow and full of helpful tips.
🧁 Ingredients for Homemade Saltwater Taffy
- 2 1/2 cups granulated sugar
- 2 tablespoons cornstarch
- 1 cup water
- 1/2 cup light corn syrup
- 1/2 teaspoon salt
- 1 teaspoon flavoring (vanilla, peppermint, orange, or any extract of your choice)
- Food coloring (optional)
These ingredients form the base of your taffy. The cornstarch helps keep the sugar crystals from forming, ensuring a smooth texture. The flavoring and food coloring can be customized to suit any taste or holiday theme.

🍬 Step-by-Step Directions
1. Prepare Your Candy-Making Space
Before you start cooking, prepare your work area. Grease a heatproof surface (like a marble slab or baking sheet) with butter or non-stick spray. Have your candy thermometer, wax paper, and a pair of kitchen scissors ready.
2. Mix the Base Ingredients
In a large saucepan, combine the sugar, cornstarch, water, corn syrup, and salt. Stir until everything is well mixed.
3. Cook the Mixture
Place the saucepan over medium heat. Stir the mixture continuously until it starts to boil. Once boiling, stop stirring and allow it to continue boiling undisturbed until the temperature reaches 270°F (the hard ball stage) on your candy thermometer.
Pro Tip: Don’t stir after the mixture begins to boil—this can cause crystallization.
4. Add Flavor and Color
Once the mixture reaches 270°F, remove it from the heat. Stir in your chosen flavor extract and food coloring, if using. Work quickly, as the mixture will begin to set.
5. Cool the Mixture
Pour the hot candy onto your greased surface. Let it cool just enough so you can handle it—this usually takes 5–10 minutes.
6. Pull the Taffy
Butter your hands generously. Begin pulling the taffy: stretch it out, fold it over, and repeat. This process incorporates air into the candy, giving it its characteristic chewy texture and shiny appearance. Continue pulling for about 10–15 minutes, or until the taffy is light in color and firm enough to hold its shape.
7. Roll and Cut
Roll the taffy into long ropes about 1/2 inch thick. Use kitchen scissors to cut into bite-sized pieces.
8. Wrap and Store
Cut wax paper into small squares and wrap each piece individually. Twist the ends to seal. Store wrapped taffy in an airtight container at room temperature for up to two weeks.
🔄 Tips & Tricks for Perfect Taffy Every Time
– Use a Candy Thermometer
Precision is key when making candy. A few degrees too low or high can completely change the texture of your taffy.
– Avoid Crystallization
Make sure your saucepan is completely clean before starting. Any sugar crystals can cause the entire batch to crystallize.
– Cornstarch Helps
Dusting your hands or surface with cornstarch can help reduce stickiness during the pulling phase.
– Butter Your Hands Well
Don’t skimp on the butter—it prevents sticking and makes pulling much easier.
– Let Kids Help Safely
Once the taffy has cooled a bit, kids can help with pulling (with supervision). It’s a great family activity!
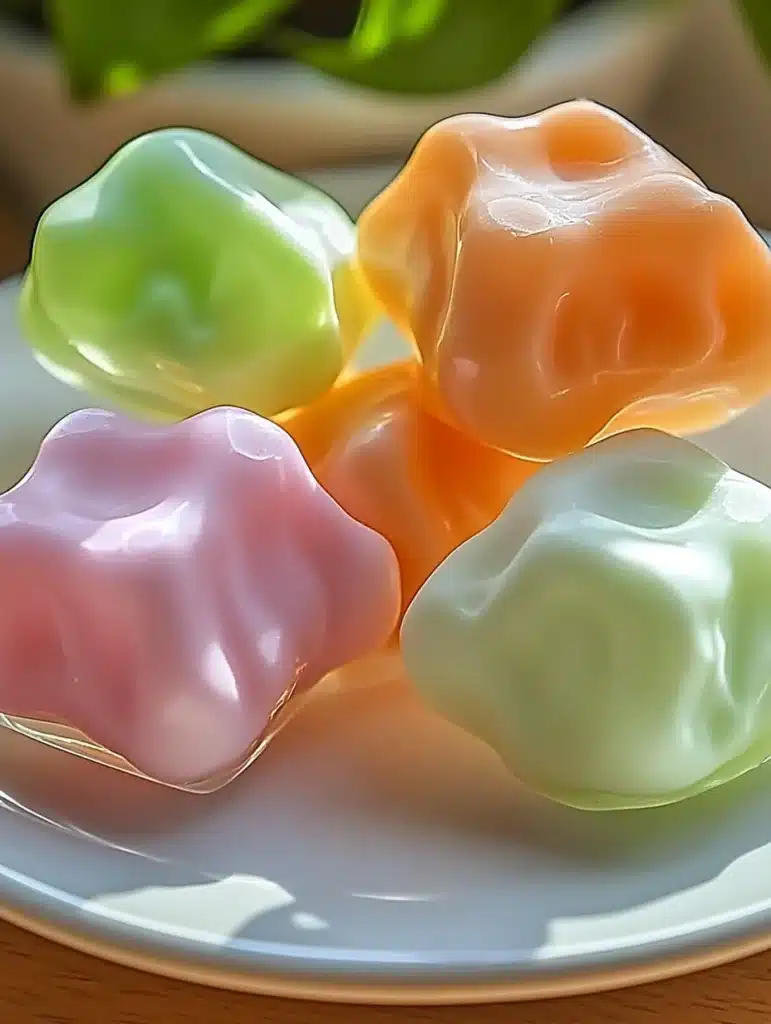
🌈 Flavor Variations
– Classic Vanilla
Add 1 tsp vanilla extract and a few drops of yellow food coloring.
– Peppermint Swirl
Add 1 tsp peppermint extract and red coloring. Twist two differently colored ropes together for a festive effect.
– Fruity Favorites
Try raspberry, lemon, or orange extracts. Match with bold colors for visual appeal.
– Cotton Candy Dream
Use cotton candy flavoring and pastel food coloring for a carnival-style treat.
🎁 Creative Ways to Gift Taffy
Saltwater taffy makes a perfect homemade gift! Try these ideas:
- Package in small mason jars with ribbon for party favors.
- Fill themed tins for holidays like Christmas, Halloween, or Valentine’s Day.
- Use custom stickers on the wax paper for a personalized touch.
🧪 Candy-Making Science: Why Pulling Matters
Pulling taffy isn’t just for fun—it’s essential to the candy’s texture. When you pull taffy, you incorporate tiny air bubbles, which give the final product its chewiness and lightness. Skipping this step will leave your candy dense and sticky rather than airy and satisfying.
🧼 Cleanup Tips
- Soak sticky pans in hot water for 10–15 minutes before washing.
- Use parchment paper or silicone mats for easier cleanup.
- Avoid metal tools with non-stick surfaces to prevent scratching.
📦 How to Store Homemade Taffy
Wrapped taffy can be stored at room temperature in an airtight container for up to 2 weeks. For longer storage, refrigerate and bring to room temperature before serving. Avoid direct sunlight and moisture to keep the texture just right.
📝 Final Thoughts
Making saltwater taffy at home is more than just a recipe—it’s an experience. It’s sticky, sweet, colorful, and just the right amount of challenging to make the results feel extra satisfying. Whether you’re crafting for a special event or just want to enjoy an old-fashioned treat, this saltwater taffy recipe delivers chewy, flavorful perfection.
Happy taffy-making!
Leave a Reply