


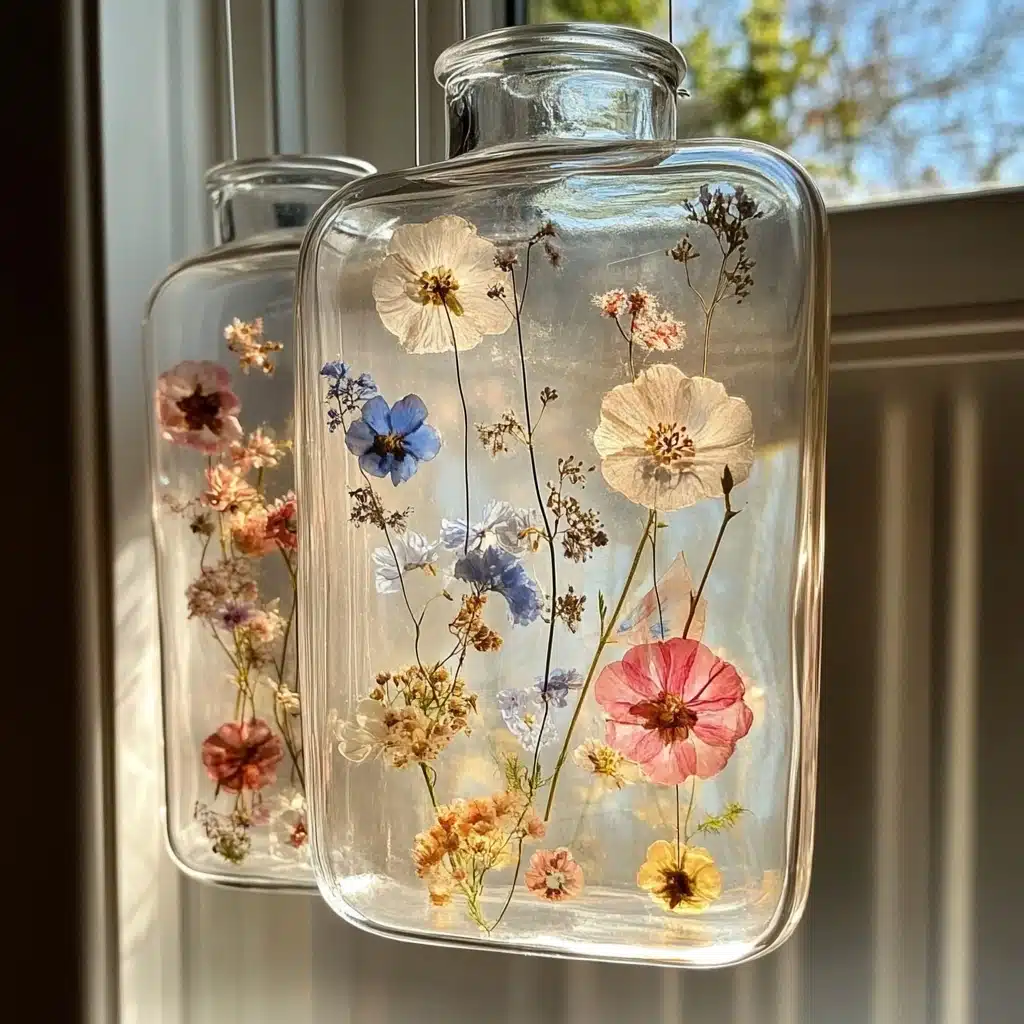
Nothing captures the delicate beauty of nature quite like pressed flowers. Their soft hues and fragile textures evoke a timeless charm, and when paired with a simple glass vase, they create a stunning piece of decor that brings nature indoors. In this DIY guide, we’ll walk you through creating your very own pressed flower vase—a sustainable, creative, and truly beautiful project that’s perfect for every season.
Why You’ll Love This DIY Pressed Flower Vase
Pressed flower art is more than just a craft; it’s a gentle tribute to nature. This project offers multiple benefits that make it a joy to create:
- Personal and Sentimental: Use flowers from a special walk, garden, or event.
- Eco-Friendly: Reuse glass jars or vases you already have.
- Customizable: Choose flowers and designs that match your personal aesthetic.
- Easy and Relaxing: This project is beginner-friendly and therapeutic.
- Giftable: Makes a thoughtful handmade gift for birthdays, housewarmings, or Mother’s Day.
Crafting with flowers connects us with the changing seasons, encourages mindfulness, and results in a lasting piece of natural art. Whether you’re sprucing up your living room or creating personalized gifts, this craft adds a soft, botanical elegance to any space.
Supplies You’ll Need
Gathering your materials ahead of time makes for a smoother, more enjoyable crafting experience. Here’s what you’ll need:
- Small glass vase or recycled glass jar
- Pressed flowers (DIY or store-bought)
- Mod Podge or clear-drying craft glue
- Foam brush or paintbrush
- Tweezers (optional but helpful)
- Clear acrylic sealer spray (optional, for a glossy and protective finish)
Tip: Use a simple, smooth glass surface to allow the flowers to adhere cleanly and to keep the design visible.
Step-by-Step Instructions
Step 1: Prepare Your Vase
Make sure your vase or glass jar is completely clean and dry. Remove any labels or residue using warm, soapy water or rubbing alcohol. A spotless surface ensures better adhesion and a cleaner look.
Step 2: Plan Your Design
Lay out your pressed flowers on a table or flat surface to visualize your design. Do you want a scattered wildflower look? Or a symmetrical pattern? Taking time here helps guide your gluing process.
Step 3: Apply Glue
Using a foam brush, apply a thin, even layer of Mod Podge (or glue) to the area where you plan to place your first flower. Avoid over-brushing to prevent wrinkling.
Step 4: Place the Flowers
Use tweezers or your fingers to carefully place the pressed flower on the glued area. Gently press it down, smoothing out any bubbles or edges with your fingertip or the edge of the brush.
Step 5: Repeat and Layer
Continue the process, one flower at a time. Layer smaller flowers or leaves around larger focal blooms to create depth and variety. Don’t overcrowd—let each bloom have space to shine.
Step 6: Seal the Flowers
Once all your flowers are in place and the glue is dry, apply another thin coat of Mod Podge over the entire design. This seals the flowers and adds durability.
Step 7: Optional Finishing Touch
After the Mod Podge layer is dry, spray a light coat of clear acrylic sealer to add a glossy finish and protect your design from moisture. Let it dry completely before handling.
Step 8: Display
Place your beautiful new vase on a sunny windowsill, bedside table, or open shelf where it can catch the light and brighten the space.
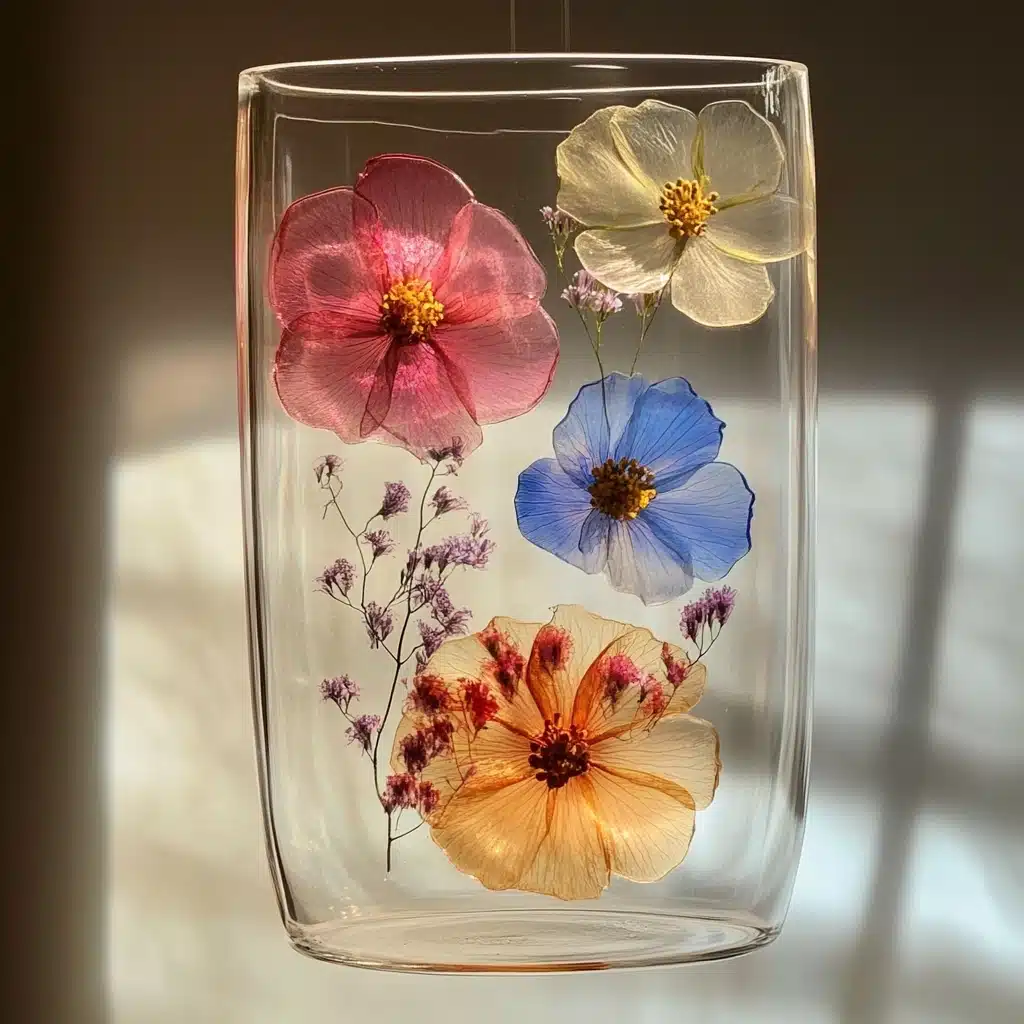
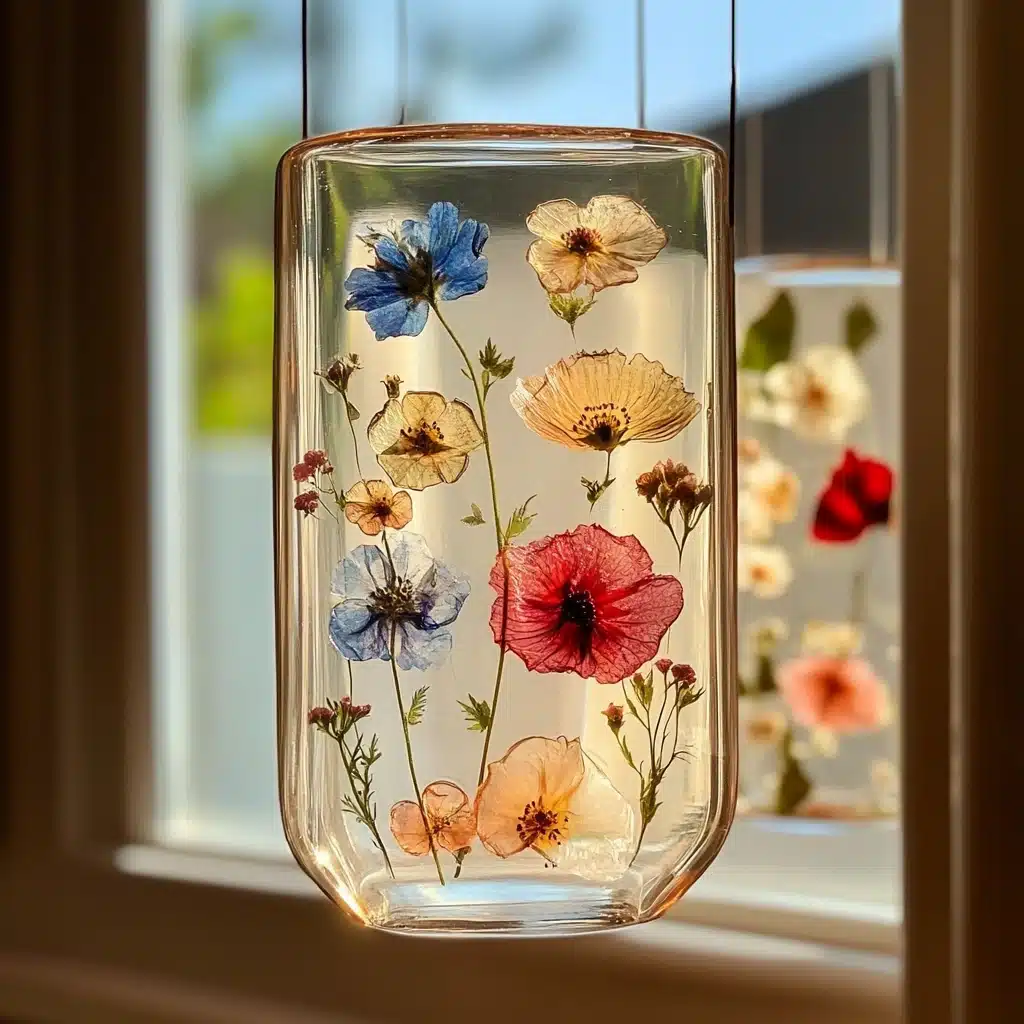
Creative Design Ideas
The possibilities are endless with pressed flower designs. Here are a few to inspire you:
- Seasonal Themes: Use spring blossoms, summer wildflowers, or autumn leaves.
- Color Palettes: Try a monochrome look with all white flowers or a vibrant rainbow assortment.
- Minimalist Design: Use one or two flowers spaced out on the vase.
- Botanical Collage: Cover the vase with an overlapping garden of blooms.
You can even personalize your vase by adding pressed herbs like lavender or rosemary for a lightly scented accent.
Pro Tips for Best Results
- Use flat, well-pressed flowers: They should be completely dry with no moisture left.
- Thin glue layers are key: Thick glue can bubble and discolor delicate petals.
- Practice on paper first: Try out your design on paper before applying it to glass.
- Avoid handling with wet hands: This can loosen the glue or damage petals.
- Use a hairdryer on low to speed up drying if you’re in a hurry (just don’t overheat the glue).
Caring for Your Pressed Flower Vase
To keep your creation looking fresh and lovely:
- Avoid submerging in water: Wipe the outside gently with a damp cloth.
- Keep away from direct sunlight: Prolonged exposure can cause the flowers to fade.
- Store in a dry place when not in use to avoid humidity damage.
These vases are decorative, not dishwasher-safe, so treat them like delicate artwork.
Ways to Use or Gift This Craft
Pressed flower vases are versatile and thoughtful gifts. Here are some ways to enjoy them:
- Gift Idea: Pair with fresh flowers, dried stems, or a handwritten note.
- Wedding Decor: Use as table centerpieces or bridesmaid gifts.
- Home Styling: Add to your bathroom shelf, kitchen windowsill, or reading nook.
- Seasonal Swaps: Make different vases for spring, summer, and fall to rotate through the year.
This project is also great for kids (with adult supervision) and can double as a bonding experience or weekend family craft.

Frequently Asked Questions (FAQs)
Q1: Can I use real, fresh flowers?
No. Fresh flowers will wilt and won’t stick properly. Use only completely dried and pressed flowers.
Q2: Where can I buy pressed flowers?
You can find them on Etsy, Amazon, or at craft stores. Or, press your own using a heavy book and parchment paper!
Q3: What kind of glue works best?
Mod Podge is preferred for its sealing properties, but any clear-drying craft glue works.
Q4: Can I wash the vase?
Only gently wipe the outside. These vases are decorative and not designed to be submerged or dishwashed.
Q5: How long do pressed flowers last?
With proper care (avoiding moisture and sunlight), pressed flowers can last for years.
Conclusion and Inspiration
Pressed flower vases are a gentle reminder that nature’s beauty doesn’t have to fade. By preserving blooms and sealing them into a decorative item, you’re crafting more than just a vase—you’re capturing a memory, a moment, a season. This project is a perfect example of how creativity and sustainability can meet to beautify our homes.
Try it once and you’ll be hooked. Your windowsill has never looked so lovely.
Leave a Reply