


Get ready to bounce into creativity! This homemade bouncy ball recipe is not only fun and easy but also a hands-on science experiment disguised as a playful craft. Whether you’re looking to entertain the kids on a rainy afternoon or want a unique party favor idea, this DIY project is a fantastic way to mix learning with play.
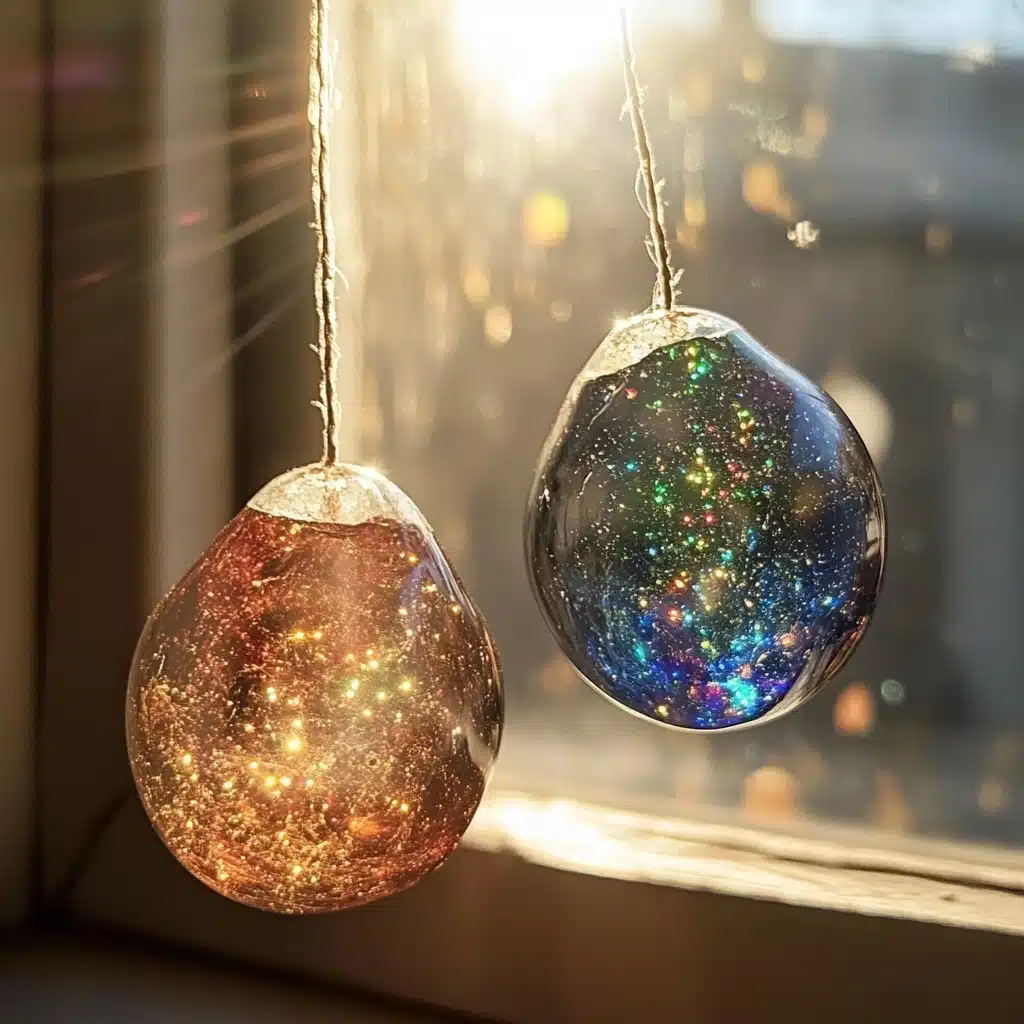
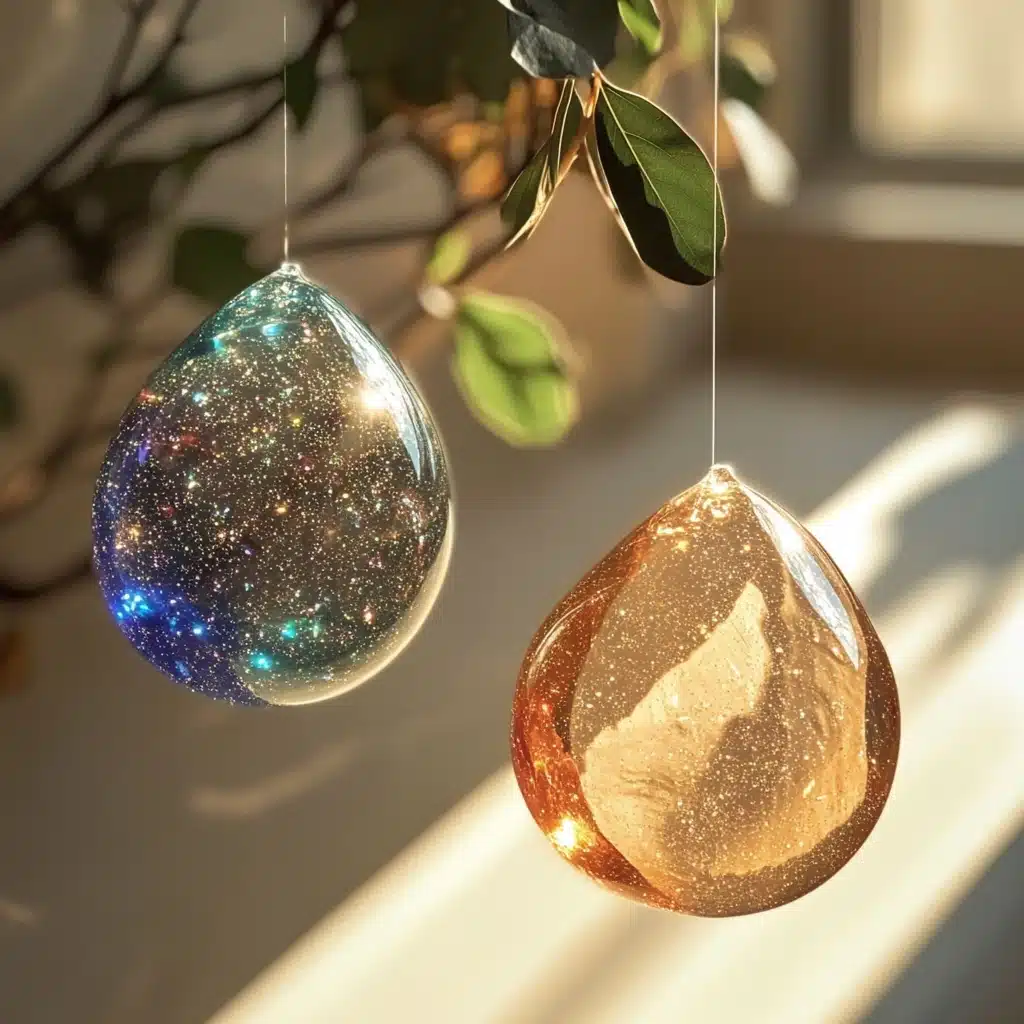
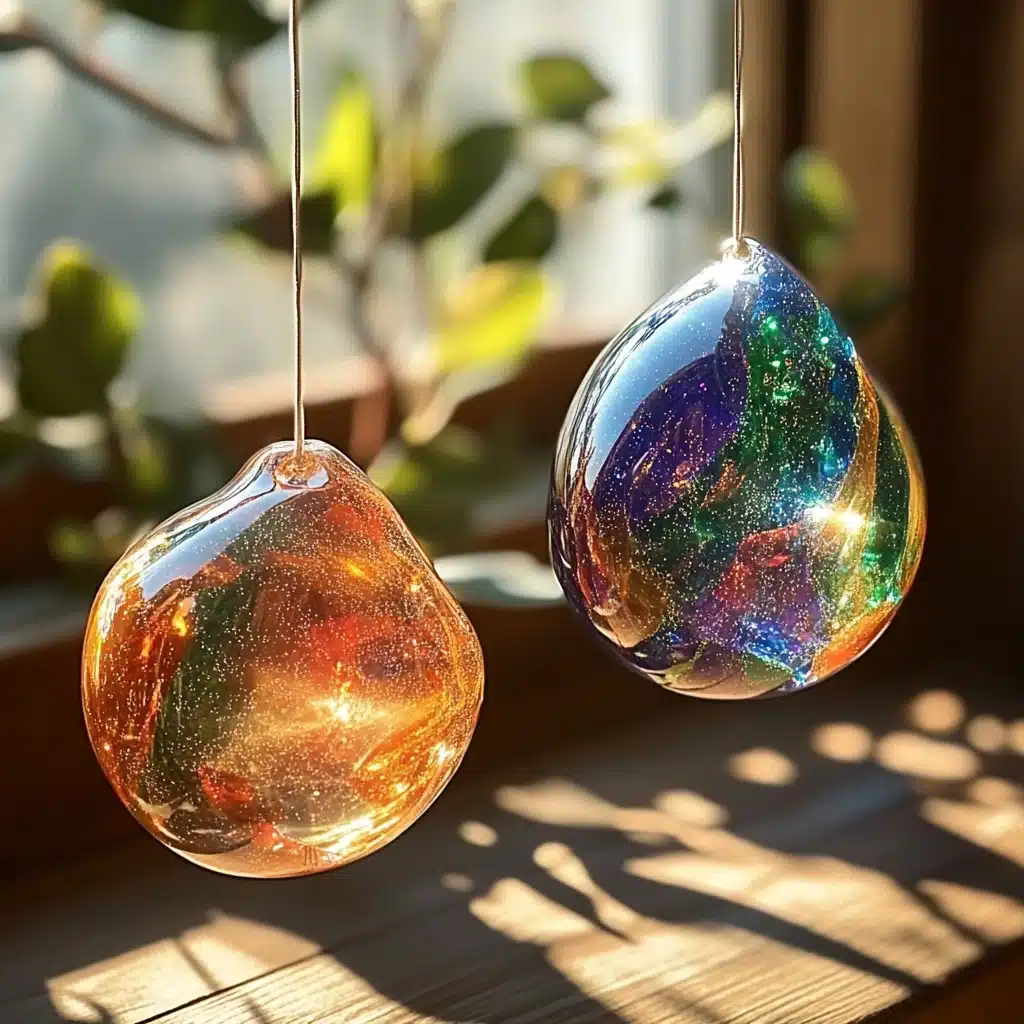
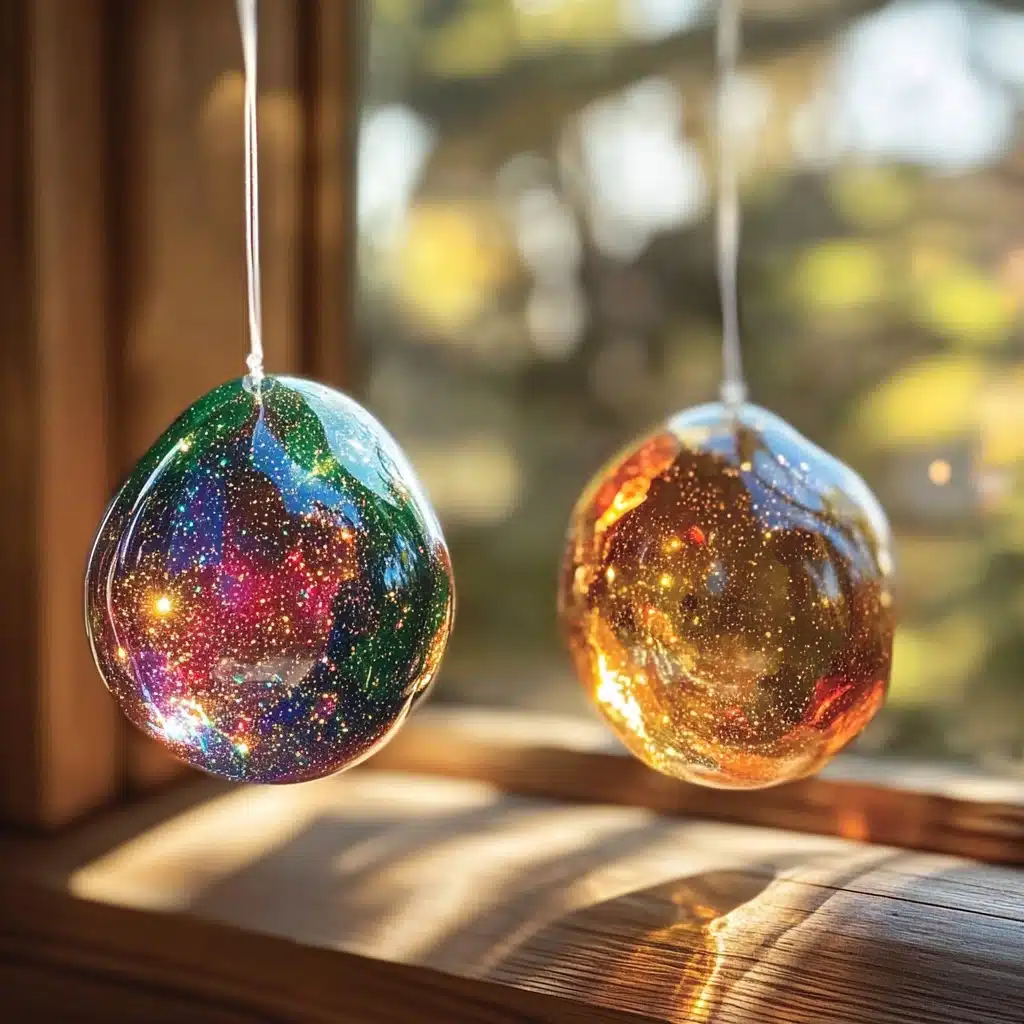
These bouncy balls are made from simple ingredients like glue, water, and borax. With just a few household items, you’ll create vibrant, rubbery balls that actually bounce! Kids love the squishy texture, the glittery designs, and the magic of watching their creation come to life. Plus, it’s a wonderful opportunity to explore concepts like chemical reactions, elasticity, and polymers — all in a safe, mess-friendly way.
Why You’ll Love This DIY Bouncy Ball Recipe
This isn’t just another craft — it’s an experience. Here’s why this recipe stands out:
- Educational Value: Teaching kids basic science through hands-on learning.
- Creative Expression: Add food coloring, glitter, or even glow-in-the-dark powder for unique results.
- Budget-Friendly: All ingredients are inexpensive and commonly found in most households.
- Quick and Simple: You can make a bouncy ball in under 10 minutes.
- Customizable: Adjust the size, color, or texture to suit your style.
- Interactive: Great for classroom science projects, birthday parties, or rainy day activities.
There’s something genuinely joyful about crafting something that not only looks cool but works too. These homemade bouncy balls will keep your kids entertained long after the mixing is done.
Ingredients You’ll Need
You probably already have most of these ingredients in your kitchen or craft cupboard. Here’s what you’ll need:
- ½ cup warm water
- 1 tablespoon Borax Detergent Booster (You can find this in the laundry aisle.)
- 2 to 3 tablespoons Elmer’s Clear Glue (More glue = bigger ball!)
- Glitter (Optional but fun!)
- Food coloring (Optional, for custom colors)
💡 Note: While this recipe is safe with adult supervision, it’s not edible. Make sure kids avoid putting the materials in their mouths.
Tools Required
You don’t need any special equipment to make these bouncy balls. Just grab the following tools:
- Mixing bowl
- Measuring spoons and cups
- Stirring stick or spoon
- Disposable gloves (optional for less mess)
- Paper towels or wipes for cleanup
- Airtight container or zip-top bag (for storing finished balls)
Having everything ready before you begin makes the process smoother — especially when working with enthusiastic little crafters!
Ingredient Swaps and Additions
Want to tweak the recipe to fit your materials or get more creative? Try these ideas:
🌈 Color Options:
- Food Coloring Gel: For brighter, more vivid colors.
- Liquid Watercolors: A washable and kid-friendly alternative.
✨ Add-Ons:
- Glow-in-the-Dark Paint: Mix a small dab with glue for nighttime fun.
- Confetti or Mini Beads: Add fun textures and visual surprises.
- Essential Oils: Add a drop or two for a scented version (lavender is calming!).
🧪 Borax-Free Alternative:
Concerned about borax? You can try using cornstarch and baking soda with contact lens solution. It won’t bounce as well, but it’s a safer choice for very young kids.
Step-by-Step Instructions: How to Make DIY Bouncy Balls
Let’s get crafty! Here’s the full guide to creating your homemade bouncy balls:
Step 1: Mix the Borax Solution
In a small mixing bowl, combine ½ cup of warm water with 1 tablespoon of Borax. Stir until the Borax is completely dissolved. This forms the base solution that reacts with the glue.
🔍 Science Tip: Borax links the glue molecules together to form a polymer — a stretchy, bouncy material!
Step 2: Add Color and Sparkle
Add a few drops of food coloring and a pinch of glitter into the Borax solution. Stir gently. This is your chance to get creative with color combos and shimmer!
Step 3: Add the Glue
Pour 2 to 3 tablespoons of clear glue directly into the Borax solution. You’ll notice the glue starts to thicken almost immediately.
Step 4: Stir and Watch It Form
Stir quickly! The mixture will begin to clump together into a slimy blob. This is the bouncy ball forming — the glue and borax are reacting!
Step 5: Shape the Ball
Use your hands to pull out the mixture. It will be sticky at first. Roll it between your palms until it forms a smooth, round ball.
Step 6: Adjust if Necessary
If the ball is still sticky, dip it back into the Borax solution and continue rolling until it firms up. It should feel rubbery and slightly stretchy.
Step 7: Play and Store
Once your ball feels smooth and dry, it’s ready to bounce! Test it on a hard surface — you’ll be amazed at how high it goes. After playtime, store your homemade bouncy ball in an airtight container or ziplock bag to keep it from drying out.
If you’ve made multiple balls, consider labeling them by color or design for easy identification. These little guys make great mini-collection items for kids!
Pro Tips for Success
To make sure your bouncy ball crafting experience is smooth and fun from start to finish, follow these expert tips:
- Use warm water, not cold. Warm water helps the Borax dissolve completely, creating a more effective solution.
- Don’t over-mix. Once the glue starts to clump, get in there with your hands. Over-stirring can make the texture lumpy.
- Work fast. The reaction begins quickly, so once you add the glue, be ready to shape it.
- Wear gloves for easy cleanup. Not necessary, but helpful for avoiding sticky hands.
- Keep a backup batch of Borax solution. If the ball gets sticky later, a quick dip can refresh its texture.
- Avoid carpeted areas. Bouncy balls can roll away fast — stick to tile or wood flooring.
🎨 Pro Crafting Idea: Use silicone molds to pre-shape your balls or try making different shapes like cubes or stars!
Creative Ways to Use Your Homemade Bouncy Balls
These DIY bouncy balls aren’t just fun to make—they’re also super versatile when it comes to playtime and gifting!
1. Birthday Party Activities
Set up a DIY station and let kids make their own party favors. Provide lots of color and glitter options to personalize their balls.
2. Science Class Experiments
Use this recipe to demonstrate basic polymer chemistry. Challenge kids to test bounce heights or elasticity with different glue types.
3. Treasure Hunt Toys
Hide them in Easter eggs, small boxes, or treasure chests for an exciting scavenger hunt.
4. Rainy Day Games
Set up a mini obstacle course where kids must bounce their ball into different zones. Great for indoor play and hand-eye coordination.
5. Themed Crafts
Make “galaxy balls” with dark blue and silver glitter, or “unicorn balls” with pastel shades and rainbow sprinkles.
🛍 Gifting Idea: Package a few balls in a mesh bag with a tag that says “Have a ball!” — great for classroom handouts or goodie bags.
Storing and Reheating Your Bouncy Balls
Homemade bouncy balls don’t last forever, but with the right care, you can extend their lifespan.
✅ How to Store:
- Place in a ziplock bag or small airtight container
- Store in a cool, dry place (avoid direct sunlight)
- Keep separate from other balls to prevent sticking
♻️ How to Refresh or Soften:
If your ball becomes hard or loses its bounce:
- Dip it briefly in warm water
- Roll it between your hands again
- If that doesn’t work, make a new one — it only takes a few minutes!
These balls are best enjoyed within the first 3–5 days of making, though some can last a week with proper storage.
Nutritional Information (Safety Overview)
While these aren’t edible, here’s what’s inside — helpful for safety-conscious parents and educators:
- Borax (Sodium Borate): Used in small amounts, acts as the activator. Not safe for consumption, so supervise closely.
- Elmer’s Glue (PVA-based): Non-toxic but also not food-safe.
- Food Coloring & Glitter: Ensure you use non-toxic, child-safe varieties.
⚠️ Important: Always supervise children during this activity and ensure they do not ingest any of the materials.
Frequently Asked Questions (FAQs)
1. Can I make these without Borax?
Yes! You can substitute Borax with baking soda and contact lens solution for a borax-free alternative. The bounce might be softer, but it’s safer for very young children.
2. Why is my bouncy ball sticky or too soft?
It likely hasn’t absorbed enough Borax. Dip it back into the solution briefly, then roll again until smooth.
3. How long do these bouncy balls last?
Typically 3–5 days with proper storage. They will gradually lose bounce and flexibility as they dry out.
4. Can I use white glue instead of clear?
Absolutely. White glue works just as well but will result in an opaque ball instead of a translucent one.
5. Is Borax safe for kids?
When used in small amounts and with adult supervision, Borax is generally considered safe for crafts. Avoid contact with eyes and mouth.
Conclusion: Craft, Bounce, and Repeat!
Making your own bouncy balls at home is more than just a fun craft — it’s a gateway to hands-on science, creativity, and hours of joyful play. With just a few simple ingredients, you and your kids can craft colorful, glittery balls that bounce, sparkle, and amaze.
From parties to classroom projects to rainy afternoons, this activity is a sure-fire hit that’s easy to replicate and customize. Once you’ve mastered the basics, get creative with colors, themes, and shapes. You’ll be surprised how much fun can come from a little glue and science.
Leave a Reply