


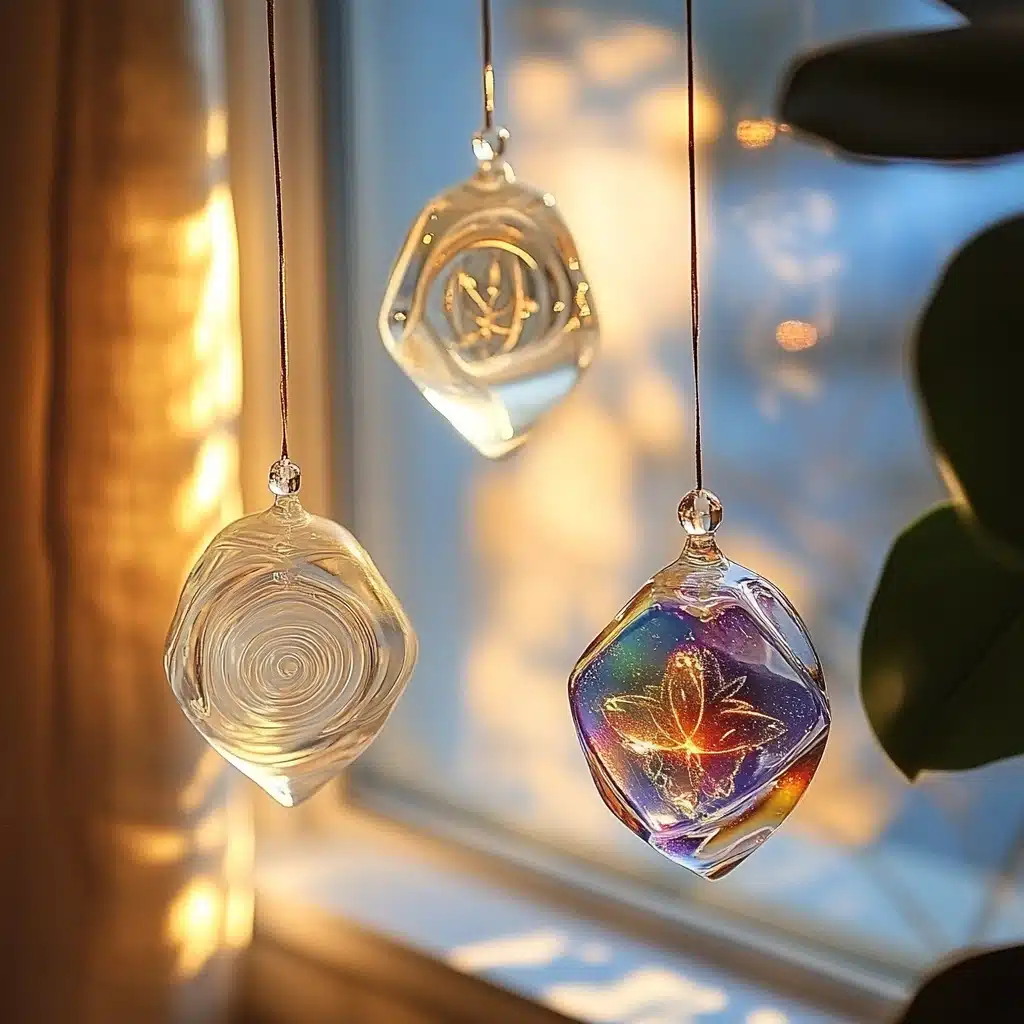
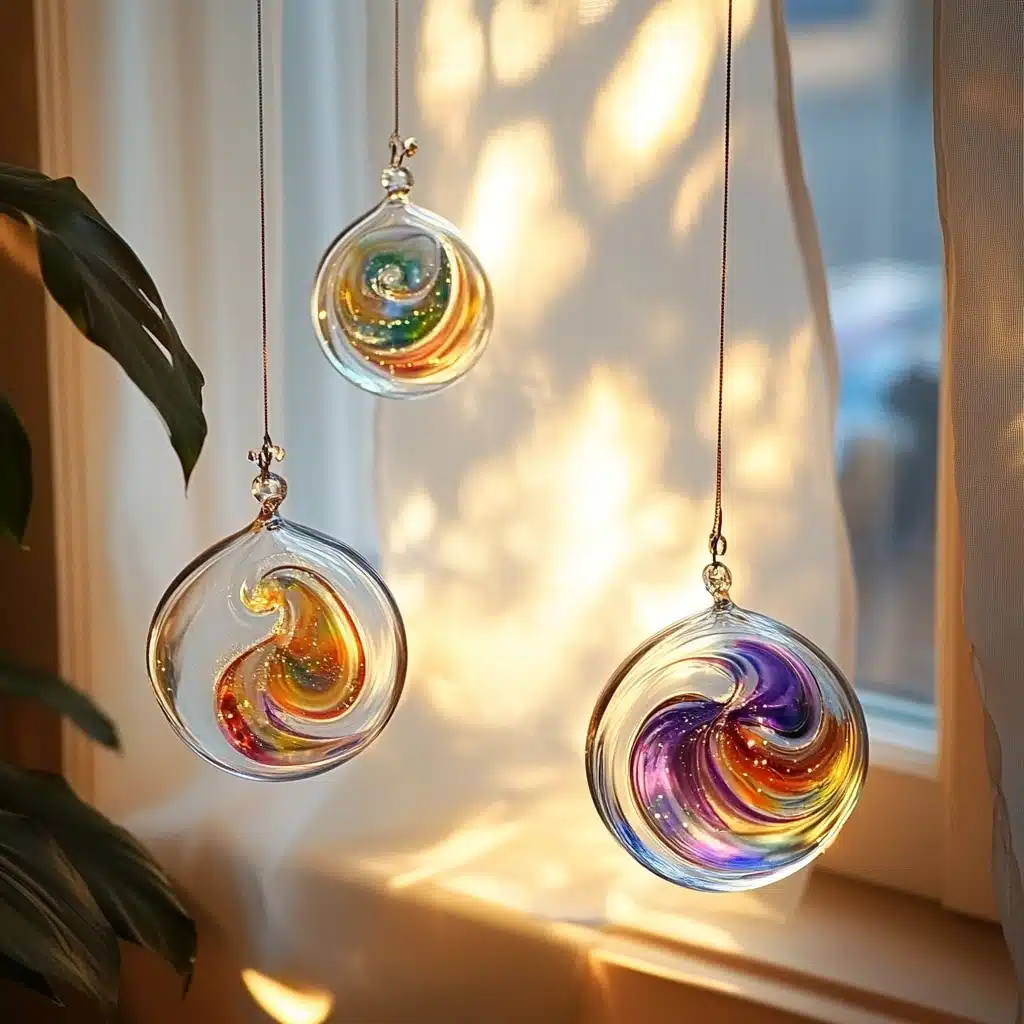
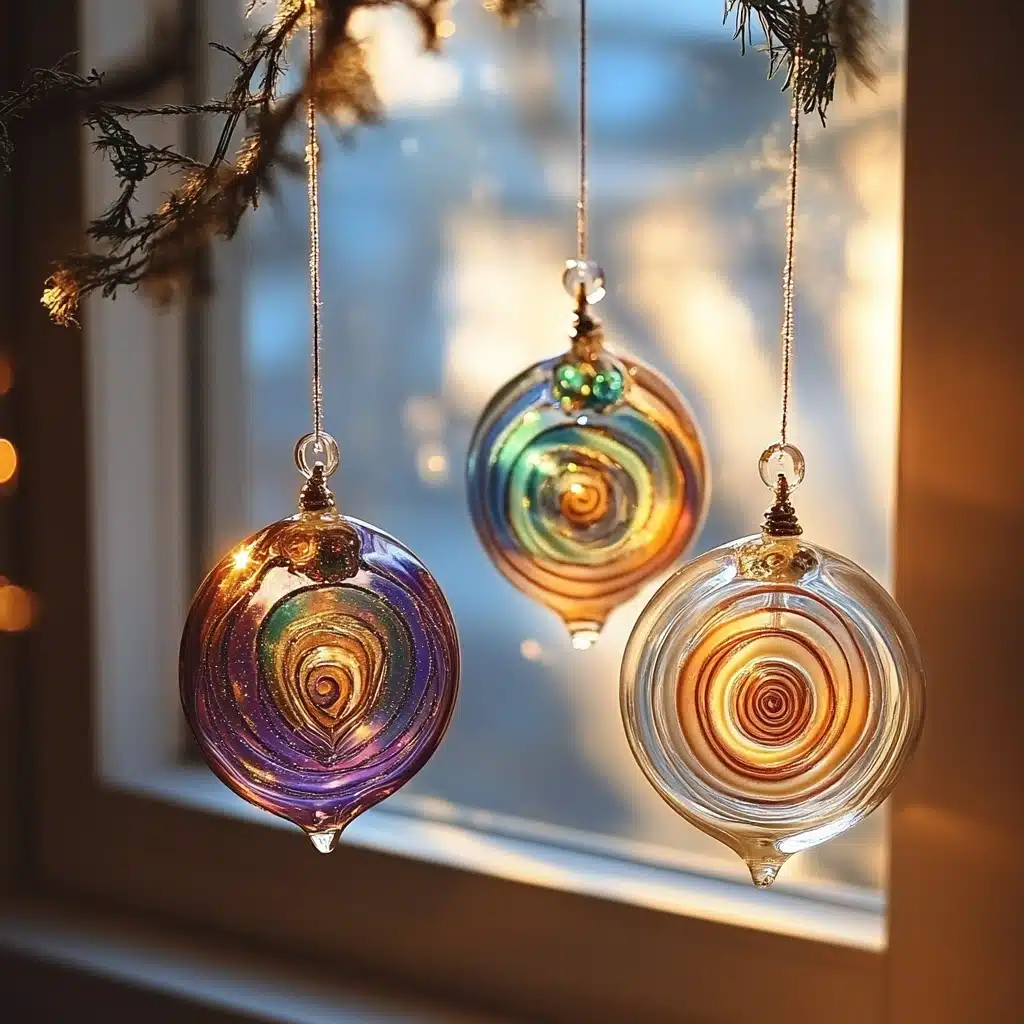
Sunlight danced through our window, casting shimmering rainbows across the floor—our DIY glue suncatcher worked its magic once again. If you’re looking for a simple, colorful, and captivating craft project that adds a burst of light and joy to any room, this is the perfect idea to try. Whether crafting with kids, looking for an easy homemade gift, or just wanting to bring some magic to your space, DIY glue suncatchers are both enchanting and incredibly fun to make.
In this post, you’ll learn everything you need to create these radiant glass-like artworks, from the supplies and step-by-step instructions to pro tips that guarantee beautiful results. Let’s get ready to fill your home with the joy of rainbow light!
Why You’ll Love Making DIY Glue Suncatchers
Creating glue suncatchers is a simple craft that blends creativity, science, and beauty into one magical experience. Unlike traditional stained glass or glass painting, this craft uses everyday materials like school glue and plastic sheets, making it affordable and accessible to all skill levels.
The appeal lies in:
- Colorful, translucent beauty: When hung in a sunny window, the dried glue captures light, throwing vibrant rainbows and patterns that can brighten any space.
- Customizable designs: From simple shapes to intricate patterns outlined with black glue, you control the artistic style.
- Kid-friendly fun: It’s safe, non-toxic, and a wonderful sensory experience for children learning about colors and textures.
- Slow craft satisfaction: Watching the glue dry and transform into a transparent, glossy surface teaches patience and mindfulness.
- Easy to display: Just punch a hole and hang with string, ribbon, or suction cups—no fancy frames needed.
If you want a creative project that sparks joy and offers a hands-on artistic outlet, this glue suncatcher craft is for you!
Ingredients & Supplies
To create your own DIY glue suncatchers, gather the following materials:
- Clear school glue (white glue can work but clear glue yields the best transparent effect)
- Plastic lid or clear plastic sheet (recycle lids from yogurt containers, takeout trays, or use clear acetate sheets)
- Food coloring or liquid watercolors (for vibrant color drops)
- Toothpicks or small brushes (to swirl and blend colors)
- Optional: glue mixed with black acrylic paint (for outlining designs)
- Tape (to secure the plastic to your workspace)
- Scissors and hole punch (to cut and prepare the suncatcher for hanging)
- String, ribbon, or suction cup hooks (for displaying your finished masterpiece)
Necessary Tools
In addition to the supplies, you’ll need a few basic tools:
- Work surface (table or countertop)
- Paper towels or wipes (for quick cleanup)
- Small bowls or containers (to mix glue and colors if desired)
- Patience and creativity!
Ingredient Swaps and Additions
Feel free to customize your suncatcher craft to suit your style or available materials:
- Instead of food coloring, try liquid watercolors or watered-down acrylic paints for more intense hues.
- For a stained-glass effect, mix some black glue outlines using clear glue combined with black acrylic paint or use a black puff paint instead.
- Use glitter glue or add fine glitter to your glue colors for sparkle.
- For larger projects, experiment with thicker plastic sheets or even transparency films used for printers.
- Try adding pressed flowers or small leaves into the glue for a natural look.
- For hanging, instead of string, use colorful ribbons or fishing wire to create floating effects.
Step-by-Step Instructions
Step 1: Prepare Your Workspace
Tape your plastic lid or sheet firmly to a flat surface. This prevents shifting and helps you work with precision.
Step 2: Outline Your Design (Optional)
If you want a stained-glass effect, mix some clear glue with black acrylic paint or use a black glue pen to outline your design on the plastic. Let it dry completely before filling in colors.
Step 3: Add Clear Glue
Fill the spaces inside your outlines (or the entire area if no outline) with clear school glue. Pour gently to avoid bubbles and uneven thickness.
Step 4: Add Color
Drop food coloring or liquid watercolors directly onto the glue. Use toothpicks or small brushes to swirl and blend the colors creatively. This step is where your design comes to life!
Step 5: Drying Time
Let your suncatcher dry completely. This can take 24 to 48 hours depending on thickness and humidity. Make sure it’s fully hardened before peeling off.
Step 6: Peel, Punch, and Hang
Carefully peel your dried suncatcher from the plastic base. Use scissors to trim any rough edges if needed. Punch a hole near the top and thread string, ribbon, or attach a suction cup hook for hanging.

Pro Tips for Success
- Use clear school glue for the best transparency; white glue tends to stay cloudy.
- Work on a level surface to keep glue thickness even.
- Avoid over-layering glue to prevent cracking during drying.
- Allow full drying time; rushing can cause tearing or stickiness.
- Use fine toothpicks for detailed color swirling and blending.
- If you want bold outlines, wait for black glue to dry fully before adding colors inside.
- Store leftover glue and food coloring properly for your next project.
- Keep the finished suncatcher away from direct heat or humidity to prolong its life.
Serving Suggestions (Creative Display Ideas)
- Hang multiple suncatchers at different heights in a sunny window for a colorful curtain effect.
- Use suction cup hooks to stick them on glass doors, shower windows, or mirrors.
- Make seasonal designs and swap them out to match holidays or seasons.
- Create small suncatchers as gifts or ornaments for friends and family.
- Combine suncatchers with other crafts like pressed flowers or paper cutouts for layered art pieces.
Storing and Reheating (Care Tips)
Since glue suncatchers are decorative crafts rather than food recipes, storage involves:
- Keep them flat in a dry, cool place when not hanging to avoid warping.
- Avoid exposure to moisture or extreme heat.
- Handle gently to prevent cracking or breaking.
- Clean gently with a soft, dry cloth if dusty.
There is no reheating needed, but proper care ensures your suncatcher remains a cherished decoration for years.
Nutritional Information
This craft is non-edible, so nutritional information doesn’t apply. Instead, think of the mental nourishment it provides—boosting creativity, patience, and the joy of handmade art.
FAQs
Q1: Can I use white glue instead of clear glue?
White glue works but will dry opaque or cloudy, losing the beautiful transparent effect that makes suncatchers so magical.
Q2: How long does the drying process take?
Drying can take anywhere from 24 to 48 hours depending on glue thickness and room humidity. Patience is key for best results.
Q3: Can I reuse the plastic sheets or lids?
Yes! Just clean and dry them thoroughly before starting your next project.
Q4: Is this craft safe for kids?
Absolutely. Use non-toxic school glue and supervise small children with scissors and small parts.
Q5: How do I fix bubbles or imperfections?
Try to avoid bubbles by pouring glue slowly and working on a flat surface. If bubbles appear, gently pop them with a toothpick before drying.
Conclusion
DIY glue suncatchers are a wonderful, accessible craft that brings light, color, and joy into your home. Whether you’re looking for a simple kids’ project, a creative way to decorate, or a mindful activity to relax, this craft ticks all the boxes. With just a few supplies and some patience, you can create dazzling, translucent art that transforms any space with magical rainbows and sunlight reflections.
So grab your glue and colors, set up your workspace, and start crafting your very own suncatcher masterpiece today. Brighten your home and your mood with this beautiful, handmade light art!
Leave a Reply