


Introduction
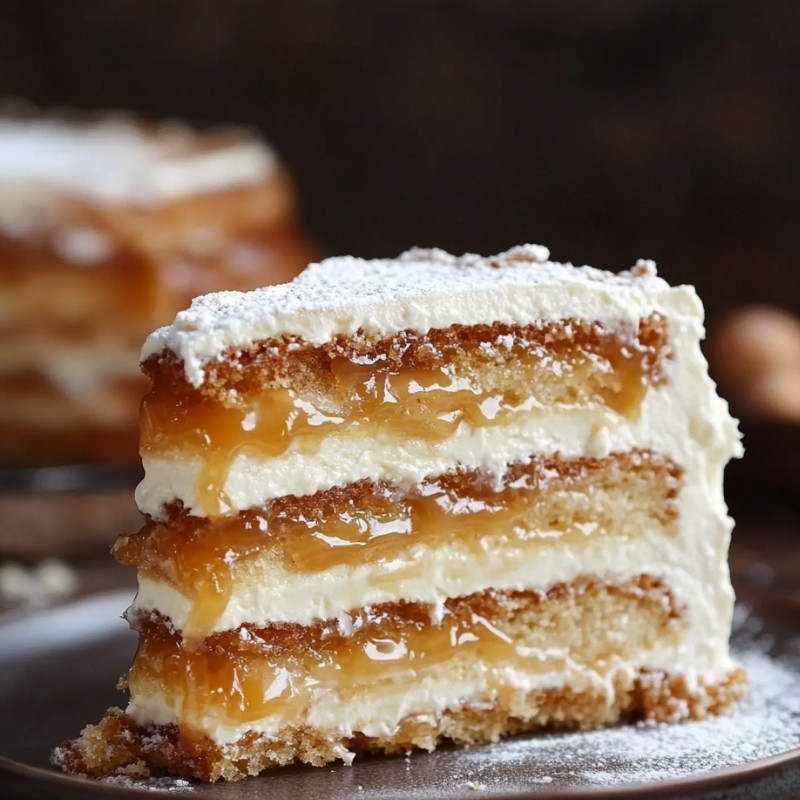
Indulge in the heavenly delight of a salted caramel layer cake, a dessert that beautifully balances sweet and salty flavors with its soft, moist layers and rich caramel frosting. This luscious cake not only pleases the palate but also adds a touch of elegance to any occasion. Whether you’re celebrating a birthday, an anniversary, or simply treating yourself, this cake promises to impress and satisfy every sweet tooth.
Detailed Ingredients with measures
250g all-purpose flour
2 tsp baking powder
1/2 tsp baking soda
1/2 tsp salt
200g granulated sugar
120g unsalted butter, softened
2 large eggs
1 tsp vanilla extract
180ml whole milk
120ml buttermilk
For the Salted Caramel Sauce:
200g granulated sugar
90g unsalted butter, cubed
120ml heavy cream
1/2 tsp sea salt
For the Frosting:
250g unsalted butter, softened
400g powdered sugar
120ml salted caramel sauce
2 tbsp heavy cream
Prep Time
20 minutes
Cook Time, Total Time, Yield
Cook Time: 30 minutes
Total Time: 50 minutes
Yield: 12 servings
This delectable salted caramel layer cake will not only brighten up your dessert table but also create lasting memories with every delicious bite. Enjoy the harmonized flavors and richness that come together beautifully in each layer.
Detailed Directions and Instructions
Step 1: Preheat Oven
Preheat the oven to 175°C (350°F). Prepare two 20cm (8-inch) cake pans by greasing them and lining the bottoms with parchment paper.
Step 2: Prepare Dry Ingredients
In a mixing bowl, whisk together the all-purpose flour, baking powder, baking soda, and salt. Set this mixture aside for later use.
Step 3: Cream Butter and Sugar
In a large mixing bowl, beat the softened unsalted butter and granulated sugar together until the mixture is light and fluffy.
Step 4: Add Eggs and Vanilla
Add the eggs to the butter and sugar mixture one at a time, ensuring each egg is fully incorporated before adding the next. Then, mix in the vanilla extract.
Step 5: Combine Wet and Dry Ingredients
Gradually add the dry ingredient mixture to the wet ingredients, alternating with the whole milk and buttermilk. Start and end with the dry ingredients, mixing until just combined to avoid overmixing.
Step 6: Bake the Cake
Divide the batter evenly between the two prepared cake pans. Bake in the preheated oven for 25-30 minutes, or until a toothpick inserted in the center comes out clean. Allow the cakes to cool completely in the pans.
Step 7: Make the Salted Caramel Sauce
In a saucepan, heat the granulated sugar over medium heat, stirring continuously until it melts and develops an amber color. Add the cubed unsalted butter and stir until well combined. Slowly pour in the heavy cream while stirring continuously, then add the sea salt. Remove from heat and let the caramel sauce cool.
Step 8: Prepare the Frosting
In a mixing bowl, beat the softened unsalted butter until creamy. Gradually add the powdered sugar, mixing until combined. Then, incorporate the salted caramel sauce and heavy cream, blending until smooth and fluffy.
Step 9: Assemble the Cake
Place one cooled cake layer on a serving plate. Spread an even layer of frosting over the top, then drizzle some of the salted caramel sauce on top of the frosting. Carefully place the second cake layer on top. Frost the entire cake with the remaining frosting and drizzle additional caramel sauce on top for decoration.
Step 10: Serve
Slice the cake into servings and enjoy the delightful combination of flavors!
Notes
Note 1: Ingredient Temperature
Ensure that the butter and eggs are at room temperature for better mixing and texture.
Note 2: Cooling Time
Allow the cakes to cool completely in the pans for about 10-15 minutes before transferring them to a wire rack to cool completely.
Note 3: Storage
Store any leftover cake in an airtight container at room temperature for up to 3 days or in the refrigerator for up to a week.
Note 4: Salted Caramel Sauce
The salted caramel sauce can be made in advance and stored in the refrigerator. Reheat gently before using if it becomes too thick.
Note 5: Customization
Feel free to add nuts, chocolate shavings, or other toppings to enhance the flavor and presentation of the cake.
Storage Instructions
To store the Salted Caramel Layer Cake, keep it in an airtight container at room temperature for up to 3 days. If you wish to extend its freshness, refrigerate the cake, where it can last for up to a week. For longer storage, freeze the individual cake layers or slices wrapped tightly in plastic wrap and placed in a freezer-safe container for up to 3 months. Thaw in the refrigerator before serving.
Serving Suggestions
Serve the Salted Caramel Layer Cake as a delightful centerpiece for special occasions such as birthdays, weddings, or festive gatherings. For an enhanced experience, pair it with a scoop of vanilla ice cream or a dollop of whipped cream. Garnish with a sprinkle of sea salt, chocolate shavings, or nuts for added texture and elegance. The cake also pairs beautifully with a cup of coffee or a glass of milk.
Nutritional Information
Each serving (1 slice) of Salted Caramel Layer Cake contains approximately:
– Calories: 400
– Total Fat: 20g
– Saturated Fat: 12g
– Cholesterol: 70mg
– Sodium: 180mg
– Total Carbohydrates: 54g
– Dietary Fiber: 0g
– Sugars: 36g
– Protein: 3g
(Note: Nutritional values may vary based on ingredient brands and specific measurements.)
Ingredient Substitutions
– All-purpose flour: Can be replaced with gluten-free flour blend for a gluten-free option.
– Granulated sugar: Coconut sugar or brown sugar can be used for a different sweetness profile.
– Unsalted butter: Substitute with margarine or coconut oil for a dairy-free option.
– Eggs: Use flax eggs (1 tablespoon ground flaxseed mixed with 3 tablespoons water) for a vegan version.
– Whole milk: Almond milk, oat milk, or any non-dairy milk can be used instead.
– Buttermilk: Substitute with a mixture of milk and vinegar or lemon juice (1 tablespoon vinegar/lemon juice + enough milk to make 120ml).
– Heavy cream: Coconut cream or any non-dairy cream can be used as a lactose-free alternative.
Cook techniques
Mixing Techniques
Ensure that the butter and sugar are beaten together until light and fluffy to incorporate air into the mixture, which results in a light and tender cake texture.
Layering the Cake
When assembling the layers, spread an even layer of frosting on the first cake before drizzling salted caramel. This ensures that the layers adhere well and provide a rich flavor with each bite.
Baking the Cake
Bake the cakes until a toothpick inserted into the center comes out clean. Overbaking can lead to a dry cake, so it’s essential to monitor the time closely.
Making Salted Caramel Sauce
To achieve the perfect caramel sauce, heat the sugar slowly over medium heat and do not stir until it begins to melt. Once melted, swirl the pan gently. This helps avoid graininess and achieves a smooth sauce.
Frosting Consistency
When making the frosting, the butter should be softened but not melted. Gradually add powdered sugar and mix well to achieve a creamy consistency that’s easy to spread.
Serving the Cake
Let the cake cool completely before frosting. This ensures that the frosting doesn’t melt and helps maintain the structure of the layers when slicing.
FAQ
Can I use a different type of flour?
Yes, you can experiment with different flours, such as cake flour, for a lighter texture, or whole wheat flour for a denser cake.
How should I store the cake?
Store the cake in an airtight container at room temperature for a few days, or refrigerate for longer freshness.
Can I make this cake in advance?
Yes, you can bake the cake layers a day in advance and frost them the next day. Store the layers in plastic wrap to keep them moist.
Is there a substitute for buttermilk?
You can substitute buttermilk with a mixture of milk and vinegar or lemon juice. Simply add one tablespoon of vinegar or lemon juice to one cup of milk and let it sit for 5-10 minutes.
What can I use instead of eggs for a vegan version?
You can use flaxseed meal or applesauce as an egg substitute. For one egg, mix one tablespoon of flaxseed meal with three tablespoons of water and let it sit until it thickens. Alternatively, use 1/4 cup of applesauce.
Conclusion
The Delectable Salted Caramel Layer Cake is a delightful dessert that showcases the perfect harmony of sweet and salty flavors. Its moist layers, rich caramel frosting, and decadent salted caramel sauce make it an irresistible treat for any celebration. Whether enjoyed at a birthday party, holiday gathering, or simply as a weekend indulgence, this cake is sure to impress and satisfy any sweet tooth.
Chocolate Hazelnut Layer Cake
Swap the salted caramel for chocolate hazelnut spread between the layers for a rich and nutty flavor. Top with chocolate ganache and crushed hazelnuts for added texture.
Lemon Blueberry Layer Cake
Replace the caramel sauce with fresh lemon curd and layers of blueberry compote. Frost with a light cream cheese frosting for a refreshing twist.
Vanilla Bean Birthday Cake
Stick to classic flavors by using vanilla bean paste in the cake batter and frosting. Top with colorful sprinkles for a festive touch.
Red Velvet Layer Cake with Cream Cheese Frosting
Incorporate the iconic red velvet flavor and pair it with tangy cream cheese frosting. Drizzle with a little salted caramel for an added depth of flavor.
Spiced Apple Layer Cake
Create a warm, cozy dessert by adding spiced apple filling between the layers. Frost with a cinnamon-infused buttercream for a seasonal treat.
Matcha Green Tea Layer Cake
Infuse the cake layers with matcha powder for a unique flavor. Pair with a light mascarpone frosting and top with white chocolate shavings for a beautiful presentation.
Leave a Reply